Do you want to allow your customers to filter products based on specific attributes such as brand and texture? Adding an image attribute filter can provide a more efficient and personalized shopping experience.
With the WP Search Filters widget from The Plus Addons for Elementor, you can easily add an image attribute filter for WooCommerce products.
To check the complete feature overview documentation of The Plus Addons for Elementor WP Search Filters widget, click here.
Requirement – This widget is a part of The Plus Addons for Elementor, make sure its installed & activated to enjoy all its powers.
To do this, make sure you’ve added some products to your WooCommerce store, then you have to create an image attribute and assign them to some products.
Enable WooCommerce Swatches
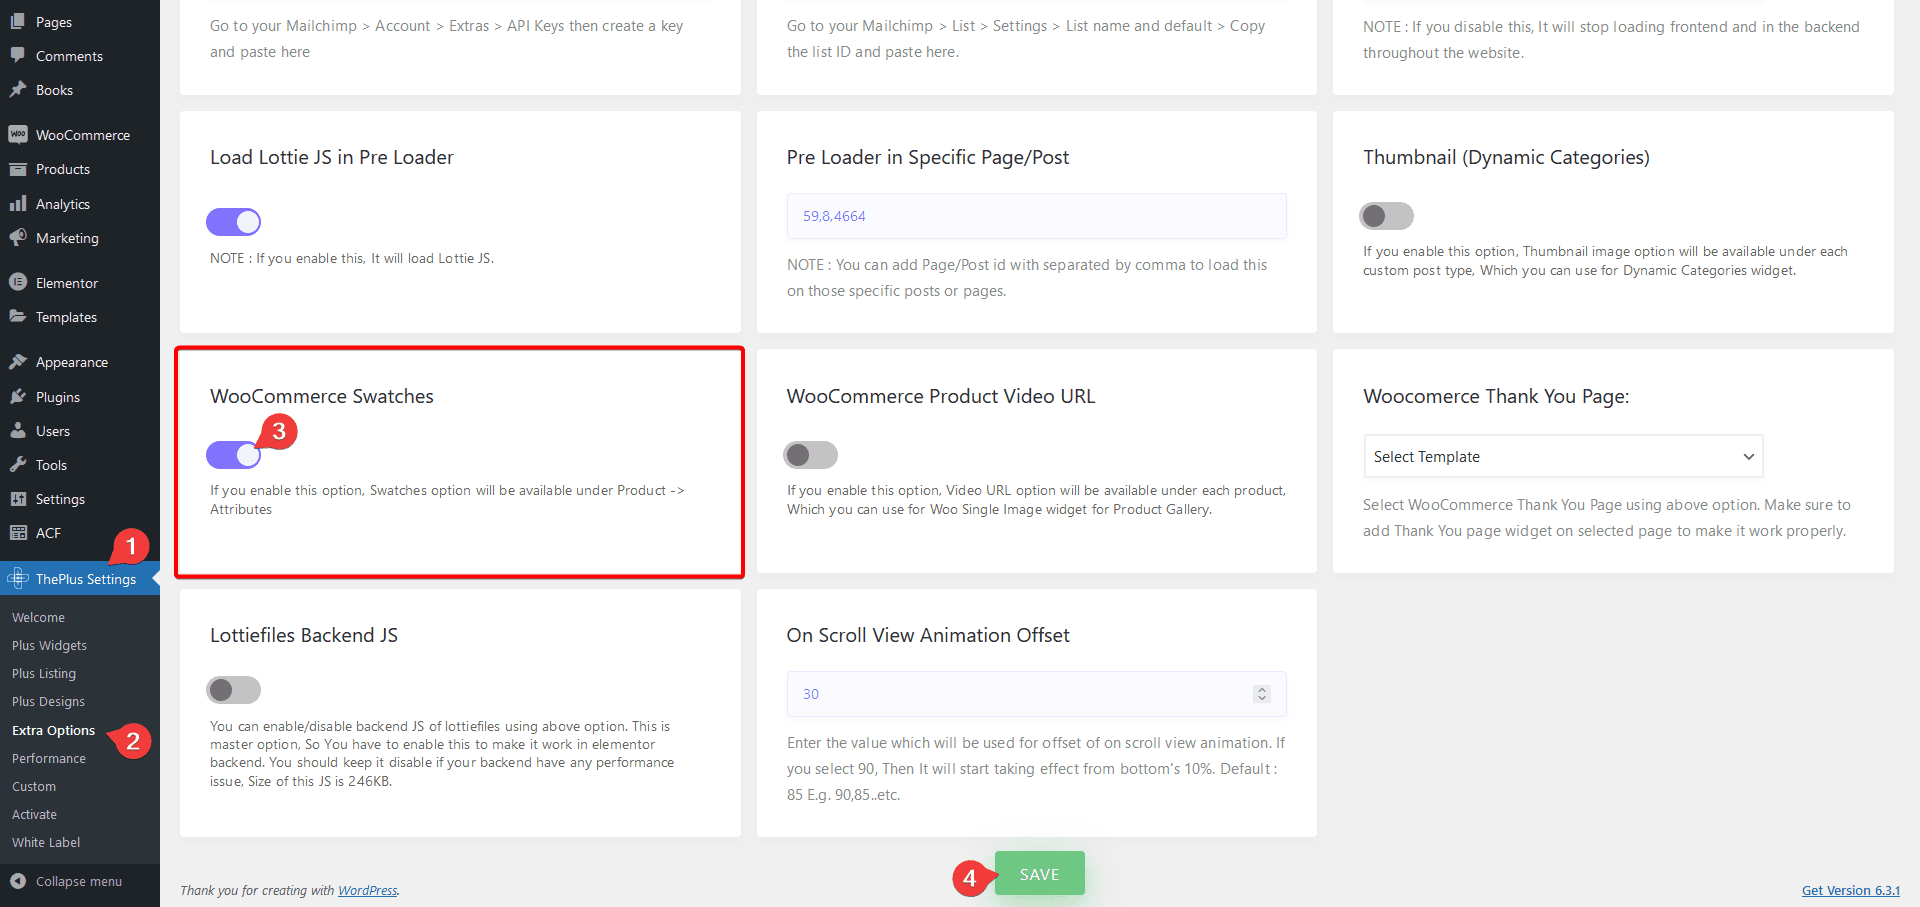
But first, you have to enable The Plus Addons for Elementor swatches option. To do this –
1. From the Dashboard, go to The Plus Settings > Extra Options.
2. Scroll down to the WooCommerce Swatches section and enable it, then click the Save button.
Create an Image Attribute
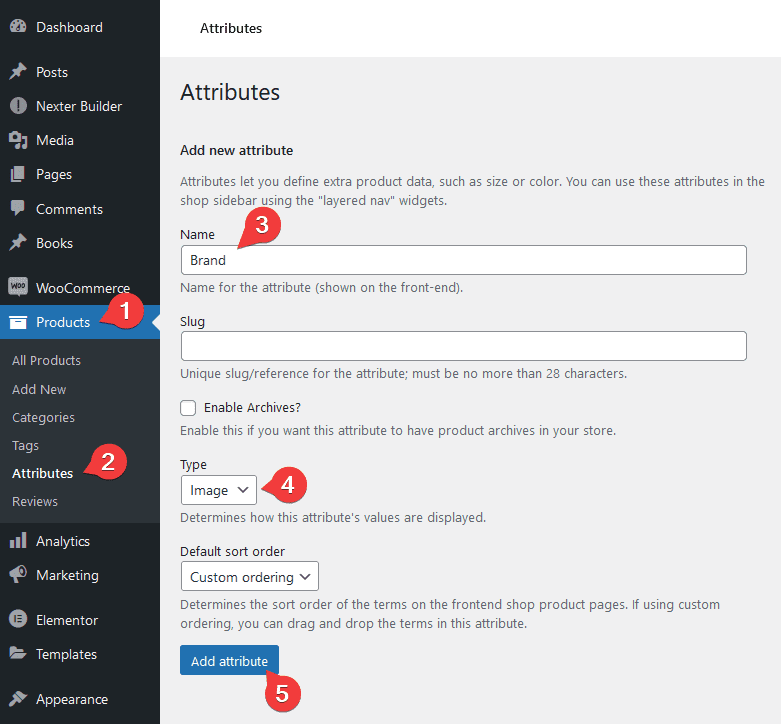
1. To create an image attribute from the Dashboard, go to Products > Attributes.
2. On the next page, add a name in the Name field and select Image from the Type dropdown then click on the Add attribute button.
3. Once the attribute is created, click on the Configure terms link.
4. On the next page, add a name in the Name field and an image in the Image field then click on the Add new Brand button.
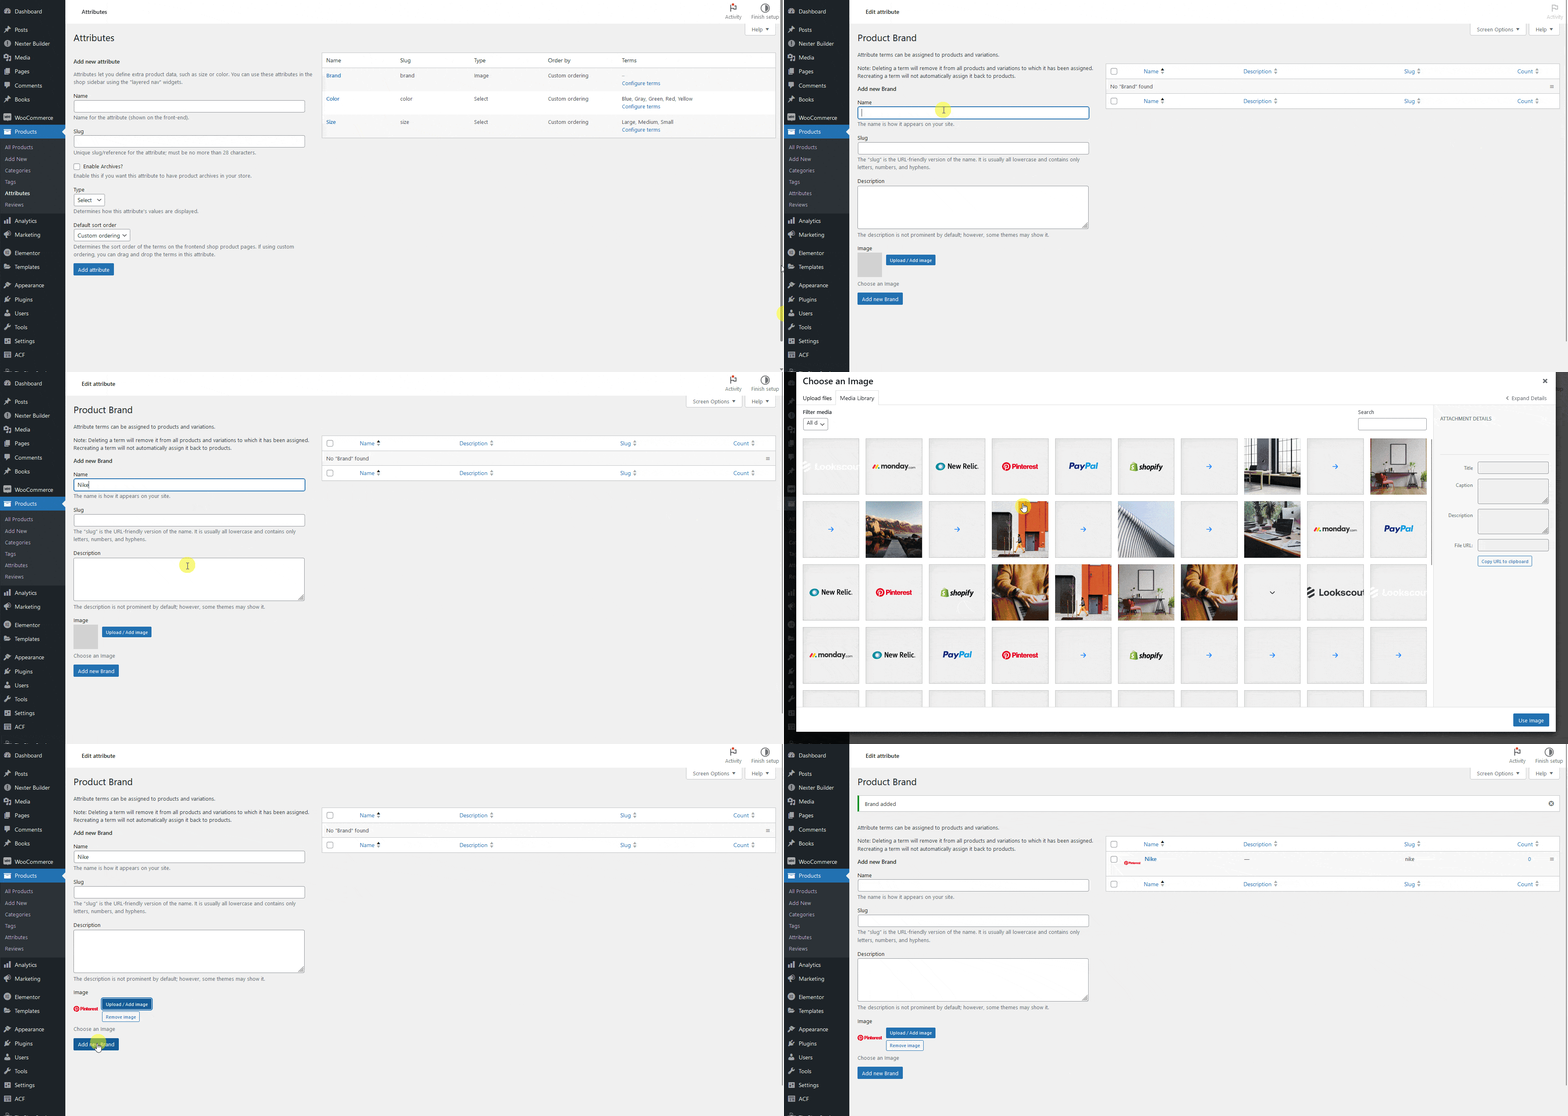
Following this process, you can add multiple items.
Assign Image Attribute
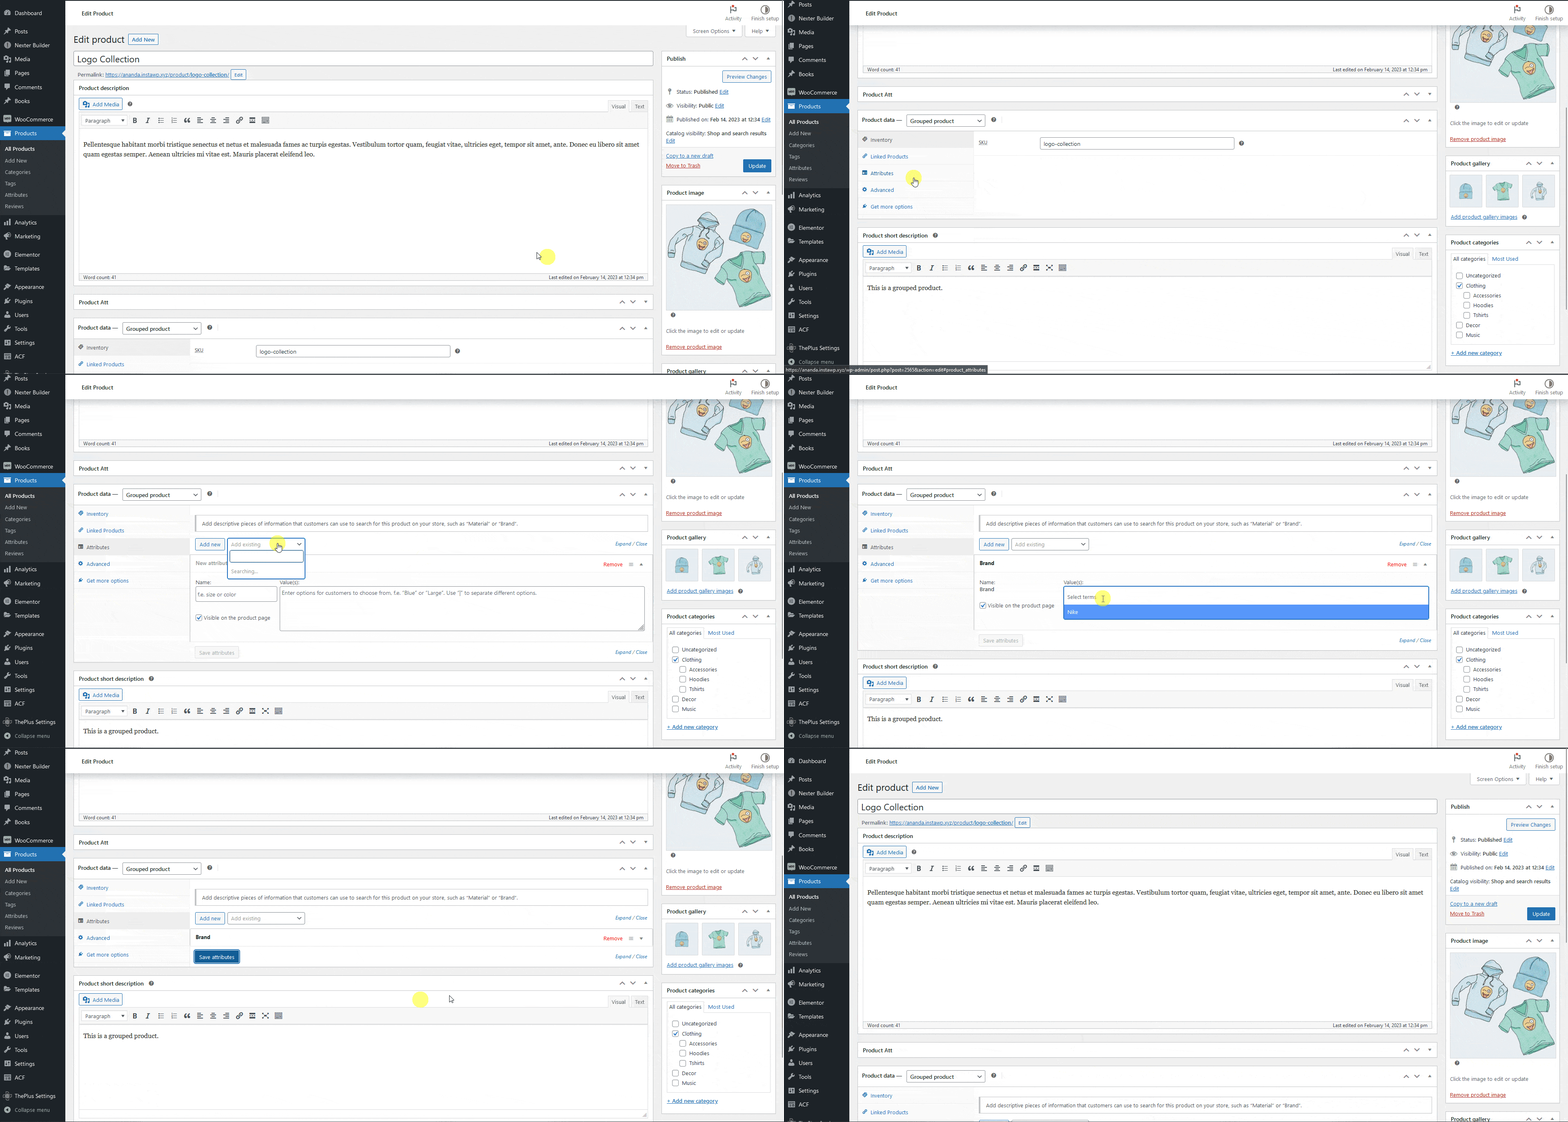
1. Edit a product.
2. Scroll down to the Product Data section and click on Attributes.
3. Click on the dropdown and select your image attribute option.
4. In the Value(s) field add the values, once done click the Save attributes button.
5. Then update the page.
Use the WP Search Filters Widget
You have to use the WP Search Filters widget with the Product Listing widget.
Note: Make sure you’ve enabled both WP Search Filters and Product Listing widgets from The Plus Settings.
Place the widgets in your desired location on the page or template, then follow the steps –
1. In the Product Listing widget, select Search List from the Product Listing Types dropdown.
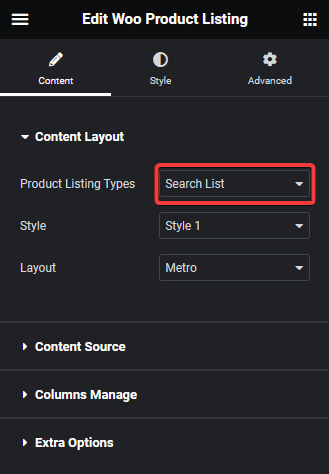
2. Then select the appropriate style and layout.
3. In the WP Search Filters widget, open the Category item under the Filter Area.
4. From the Filter Type dropdown, select Woo Filter.
5. Then select Image from the Select Source dropdown.
6. Select Taxonomy from the Select Type dropdown.
7. After that, select Product Attribute from the Select Taxonomy dropdown.
8. Finally, from the Select Attributes dropdown, select your image attribute.
Note: The list will only show global attributes, not any custom attributes.
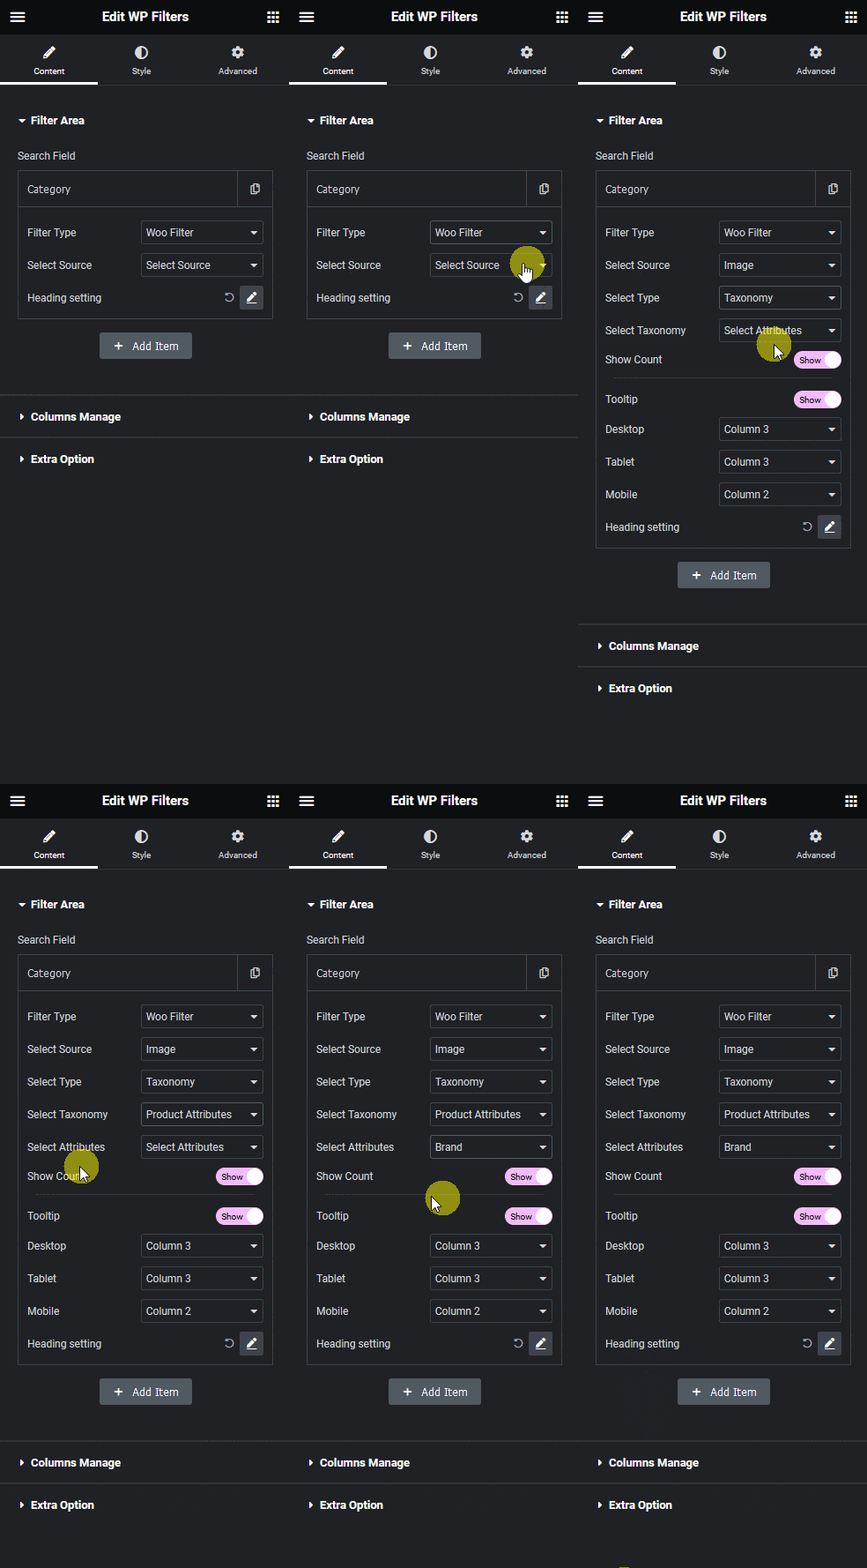
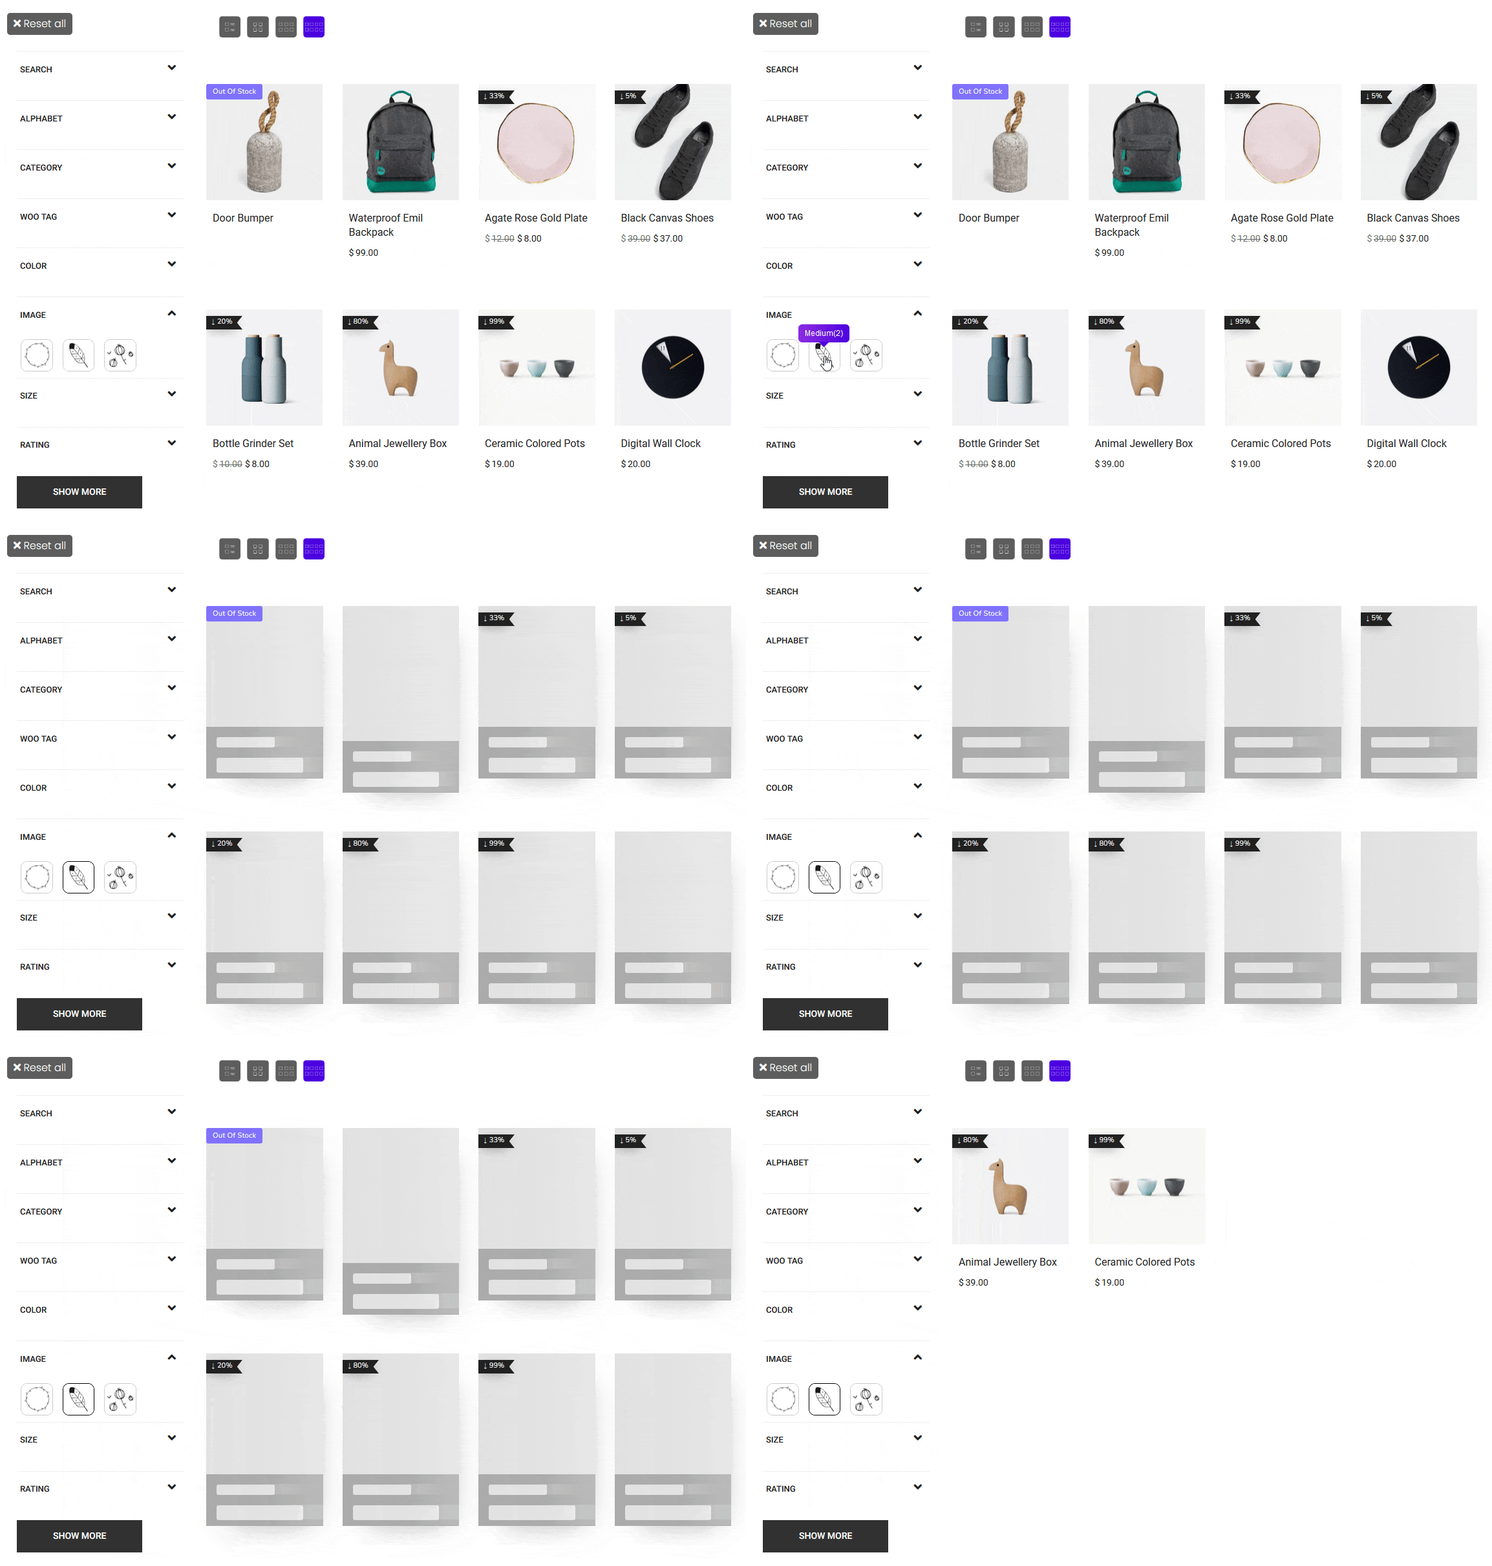
Now you’ll be able to see an image filter that you can use to filter products.
From the Show Count toggle, you can show the product count.
Then, from the Tooltip toggle, you can show a tooltip on hover with the product count.
You can also manage item columns for desktop, tablet and mobile.
Also, read How to Create WooCommerce Product Size Filter in Elementor.


