If you’re looking for the easiest & fastest way to convert your Figma design to a 100% Editable WordPress website, then this blog is for you.
Converting Figma design to WordPress website can be a daunting task, especially for those who are not familiar with the process.
However, with the UiChemy Figma to WordPress Converter Plugin, you can convert your Figma design to WordPress website in a few clicks. It makes the conversion process seamless and hassle-free.
In this article, we will guide you through a step-by-step process with video guide so you can practically implement as well.
Key Takeaways
- UiChemy Figma Plugin allows you to convert your Figma design to WordPress website in just a few minutes.
- Following the step-by-step instructions provided in this article, you can easily convert your Figma design to WordPress website without any coding knowledge.
What is UiChemy Figma Plugin?
The UiChemy Figma Plugin is a powerful tool that enables you to effortlessly convert your Figma designs into WordPress websites with just a few clicks.
This plugin streamlines the website creation process by eliminating the need for manual coding.
Thanks to the UiChemy Figma Plugin, you can now easily export your Figma designs and transform them into fully functional WordPress websites.
How to Convert Figma Design to WordPress? [Step-by-step Guide]
Now that you know what UiChemy is, let’s find out how it works through easy steps.
Step 1 – Install UiChemy Figma Extension on Your Figma App
- To begin, navigate to Resources > Plugins within Figma and search for “UiChemy“. Then, click on “Run” to initiate the installation process.
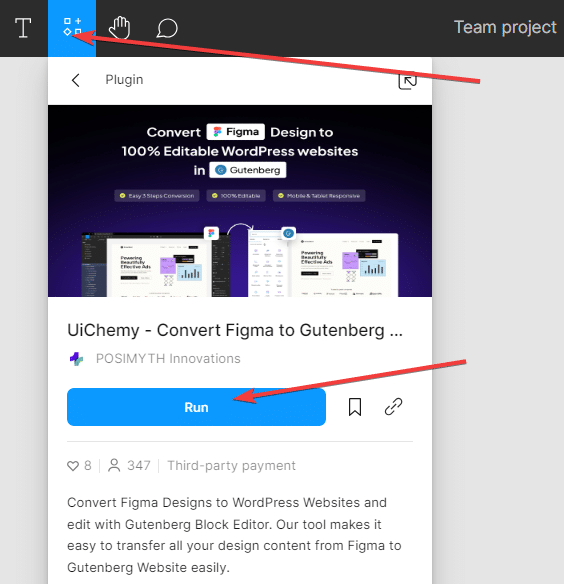
- Once the plugin is installed, the UiChemy interface will automatically open, allowing you to proceed with the conversion process.
Step 2 – Get UiChemy Key & Hit Activate
Next, you’ll need to enter your UiChemy license key.
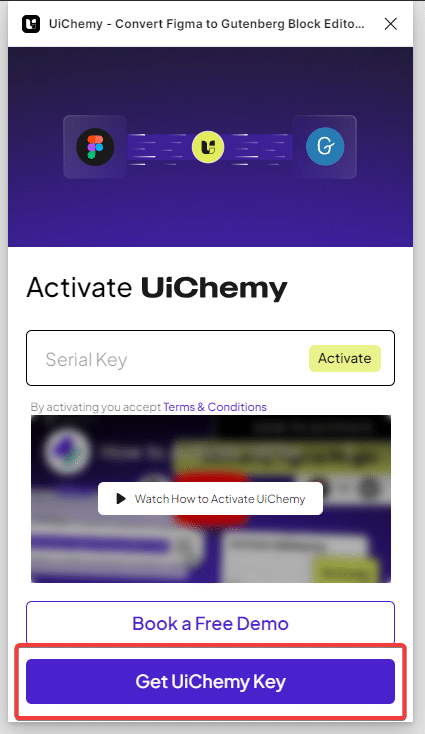
- To obtain a license key, simply click on the “Get UiChemy Key” button or head over to the pricing page directly (make sure to select the Gutenberg page builder option).
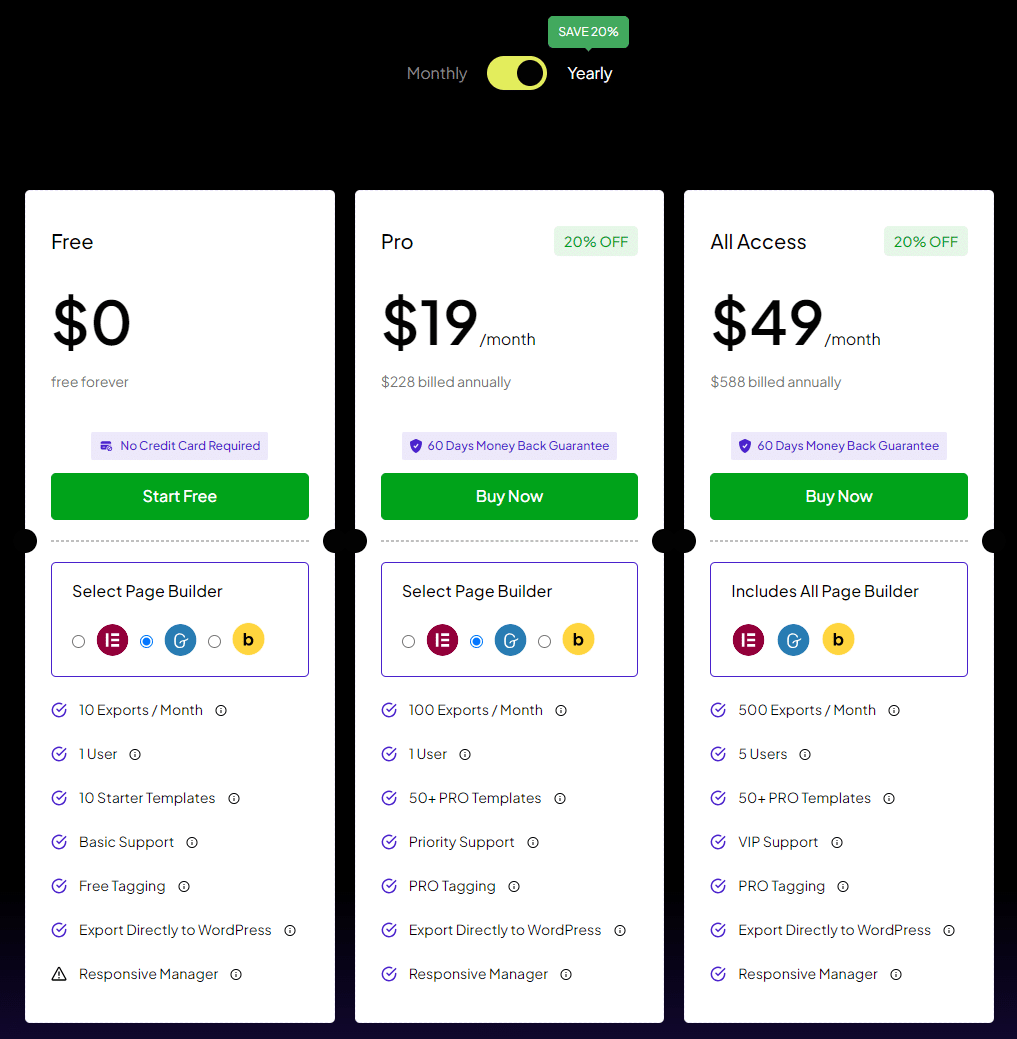
- Upon clicking the button, you will be redirected to the UiChemy pricing page. Here, select the desired plan as per your needs (the free plan allows 10 exports while the Pro plan allows 100 exports monthly). And if you want support for all page builders including Elementor, Gutenberg, and Bricks builder then you can opt for the All Access plan which allows 500 exports per month.
- After creating your account, you can locate your license key on the purchase confirmation page. Alternatively, it can also be found within the Dashboard of your POSIMYTH Store account. For a step-by-step guide on this process, check out this document.
- Once you have obtained the license key, return to the Figma dashboard and navigate to the UiChemy interface. Paste your license key into the designated “Serial Key” field, and then click on the “Activate” button to successfully activate your account.
You can also watch the full activation process in this video
Step 3 – Optimize Design Sections with UiChemy Design Optimizer
Optimizing your design for the best conversion is crucial. With UiChemy, we have 4 tabs and 15+ steps designed to help you optimize your Figma files for easy conversion.
These tabs ensure that your designs maintain their integrity and efficiency throughout the process, making it easier to achieve professional and polished results.
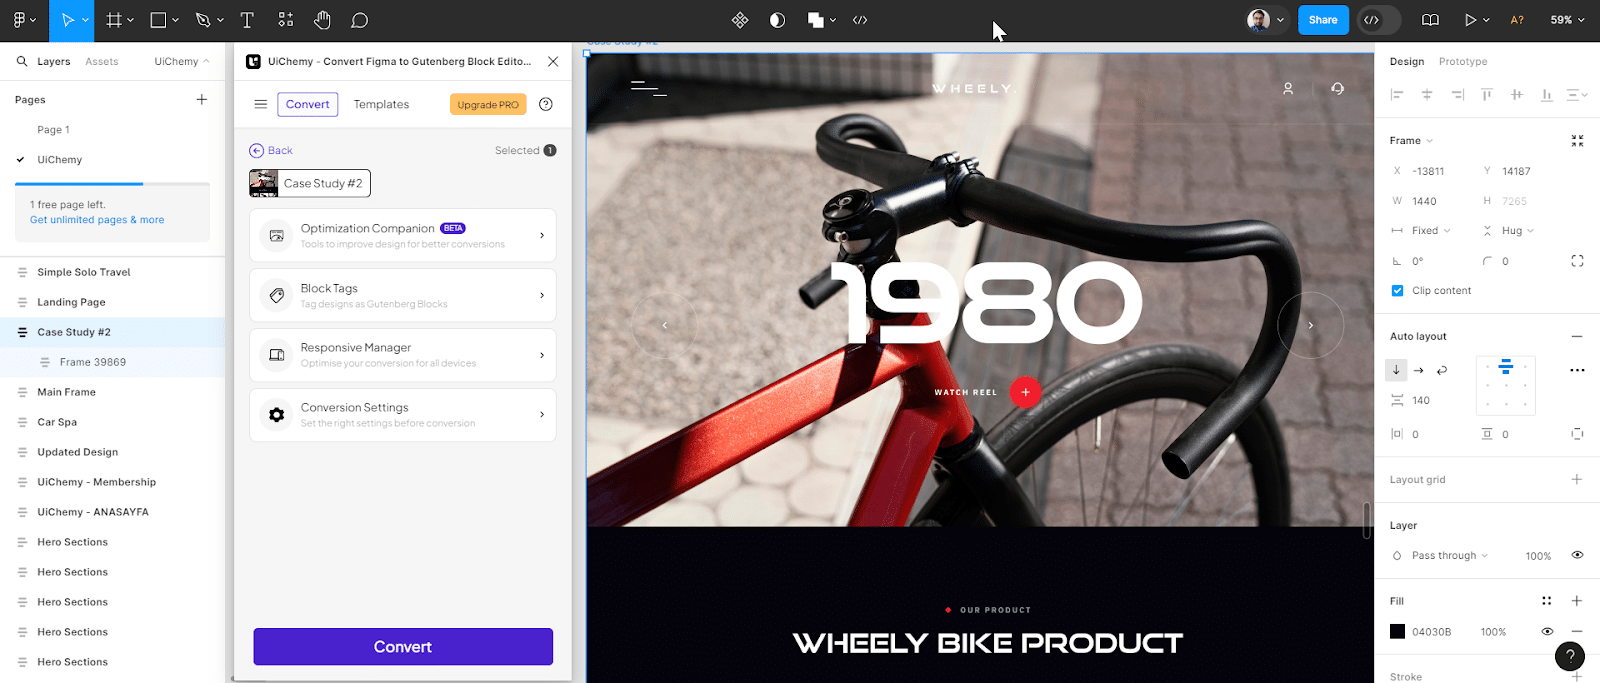
It’s divided into four key tabs: Media Optimization, Frame Optimization Phase, Text Optimization, and Main Frame Optimization.
Each tab addresses specific areas of your design, making it easier to identify and resolve issues.
- Media Optimization:
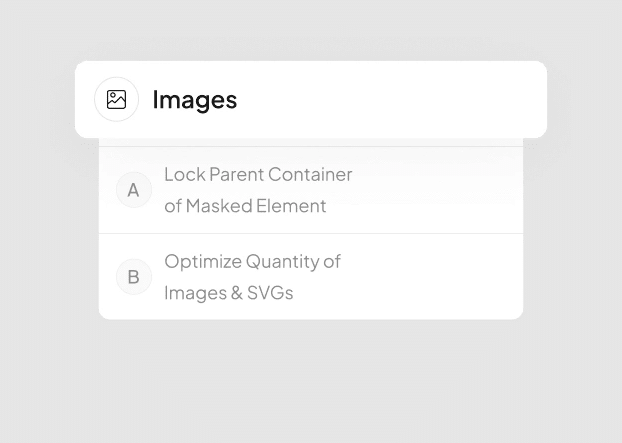
In this tab, you will find issues related to media elements such as images and SVGs.
The options here help optimize these elements to ensure they load efficiently and maintain high quality.
Key features include Lock Multi Layer Media, Lock Parent Container of Masked Element, and Optimize Quantity of Images & SVGs with Image Heatmap.
- Frame Optimization Phase:
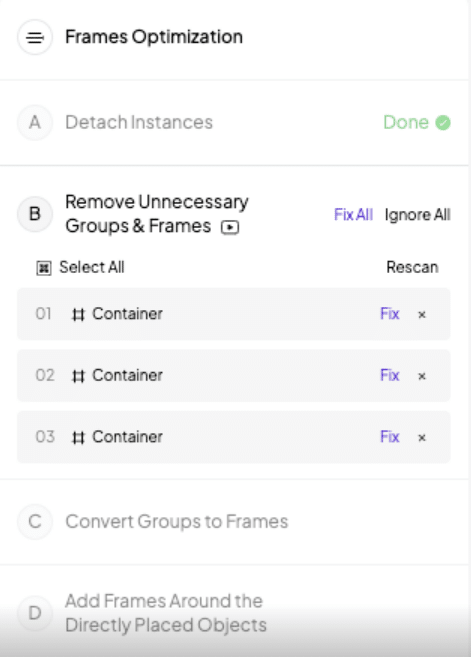
This tab focuses on frames within your design. It identifies issues and provides options to optimize frames, ensuring they are properly structured and aligned for the best conversion results.
Key features include Convert Groups to Frames, Manage Auto Layout in Frames, Detach Instances, Remove Unnecessary Groups & Frames, and more than 8 additional options.
- Text Optimization:
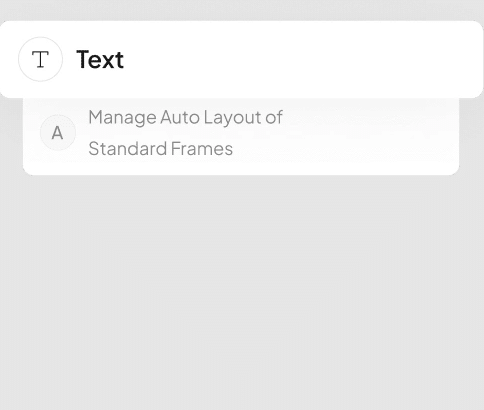
Here, you will find issues related to text elements in your design. The options in this tab help optimize text for clarity, consistency, and responsiveness.
Key features include Split Multi-Colored Text, with more tools and features coming soon.
- Mainframe Optimization:
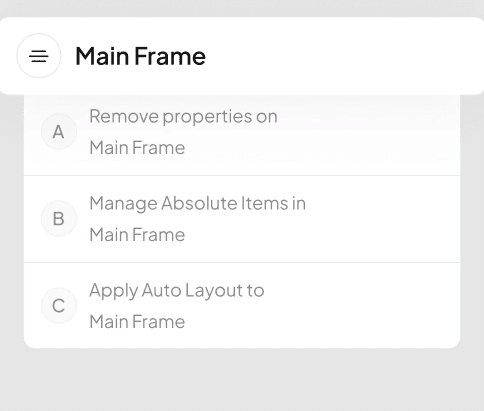
This tab addresses issues related to the main frame of your design. It offers options to optimize the main frame, ensuring it supports a clean and functional layout.
Key features include Remove Properties on Main Frame, Manage Absolute Items in Main Frame, Apply Auto Layout to Main Frame, and other options to enhance mainframe optimization.
You may need to adjust the elements and text, and everything will be auto-adjusted based on the width of your website. The rest of the content is easily manageable, with everything configured for responsive settings.
By utilizing the Optimization and its four tabs, you can easily optimize and convert your Figma designs, ensuring a smooth and efficient conversion process with UiChemy.
To help you with this, we have created step-by-step tutorials for each of these four tabs. You can watch these detailed guide tutorials to optimize your Figma file designs neatly and effectively.
Check out our detailed explanation and read this guide on Optimization Companion to learn more about it.
Step 4 – Export Design from Figma to WordPress Website
Once your Figma design is optimized, it’s time to convert it into an editable WordPress page.
There are two methods to convert Figma to WordPress:
- Live Import Method (Using UiChemy WordPress plugin)
- JSON Download Method
Let’s understand both these methods in detail –
Method 1: Live Import Method (Using UiChemy WordPress plugin) – Recommended
- First, you need to install the UiChemy WordPress Plugin on your WordPress website.
- Once done, come back to your Figma app and select the top-level frame of your desired layout for export within Figma. Alternatively, you can utilize the arrow icon within the UiChemy window, which will automatically select the top-level frame. It is crucial to ensure that the top-level frame is selected, as failure to do so will result in the export option remaining inactive.
- Following the frame selection, choose between the “Optimize & Convert” or “Express Convert” option. Subsequently, click on the corresponding “Optimize & Convert” or “Express Convert” button based on your selection.
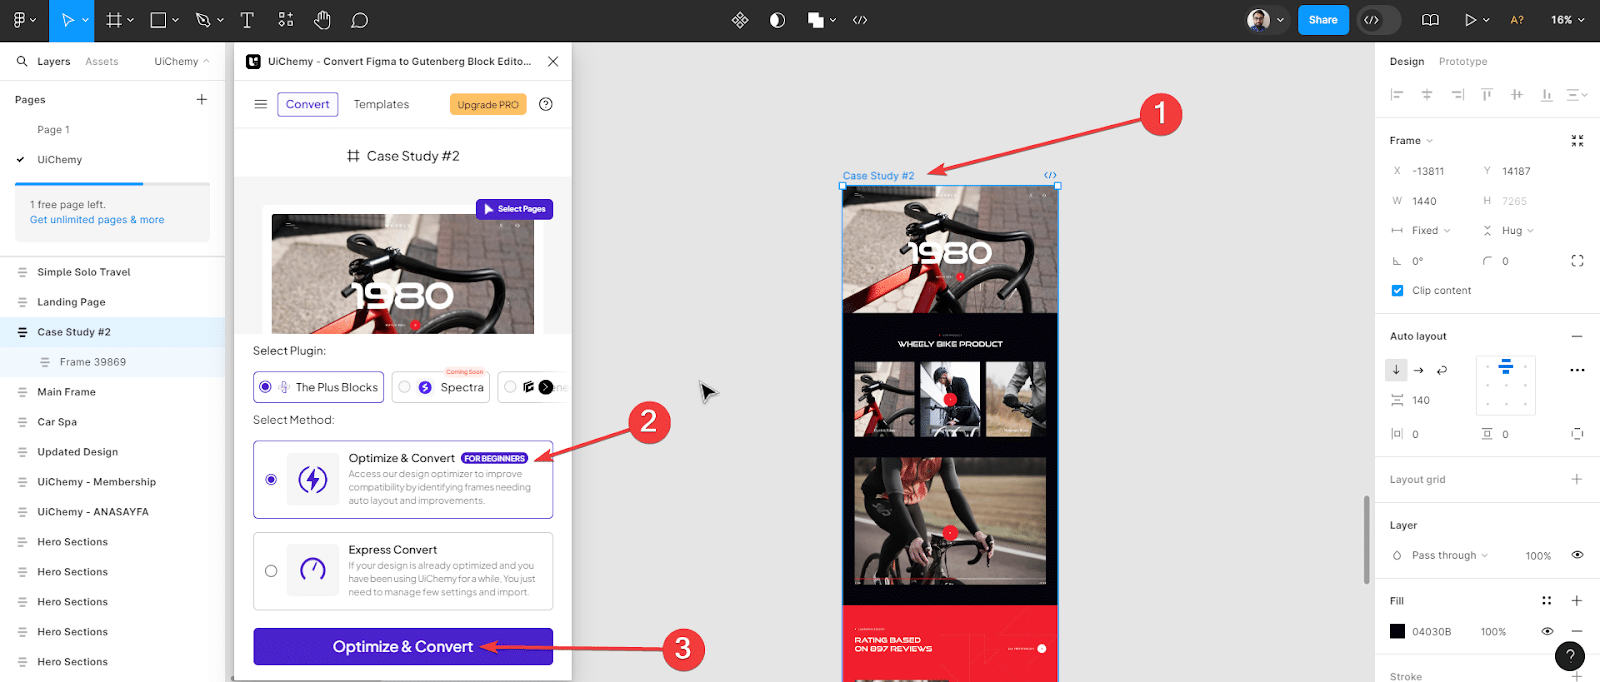
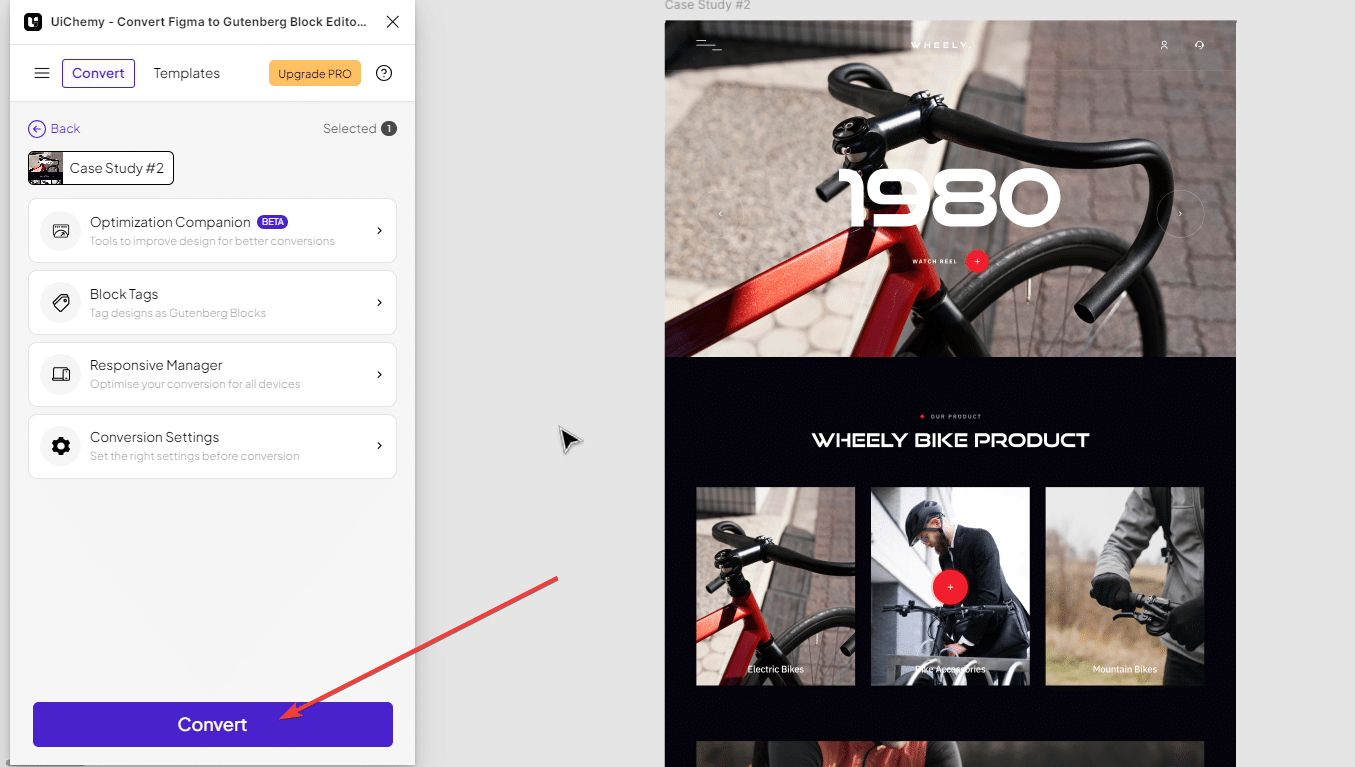
- Finally, proceed by clicking on the “Convert” button on the subsequent screen to initiate the conversion process.
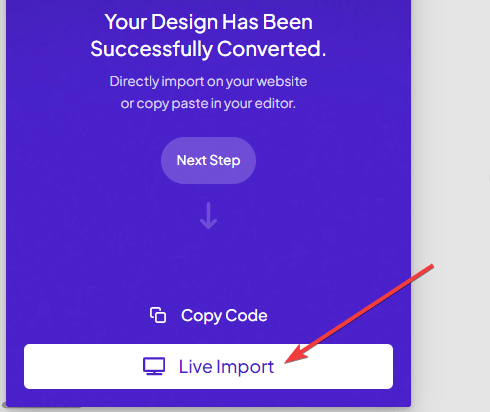
- Upon reaching the next screen, you will encounter two distinct buttons: Copy Code (which we will cover in the next section) and Live Import. Click on Live Import.
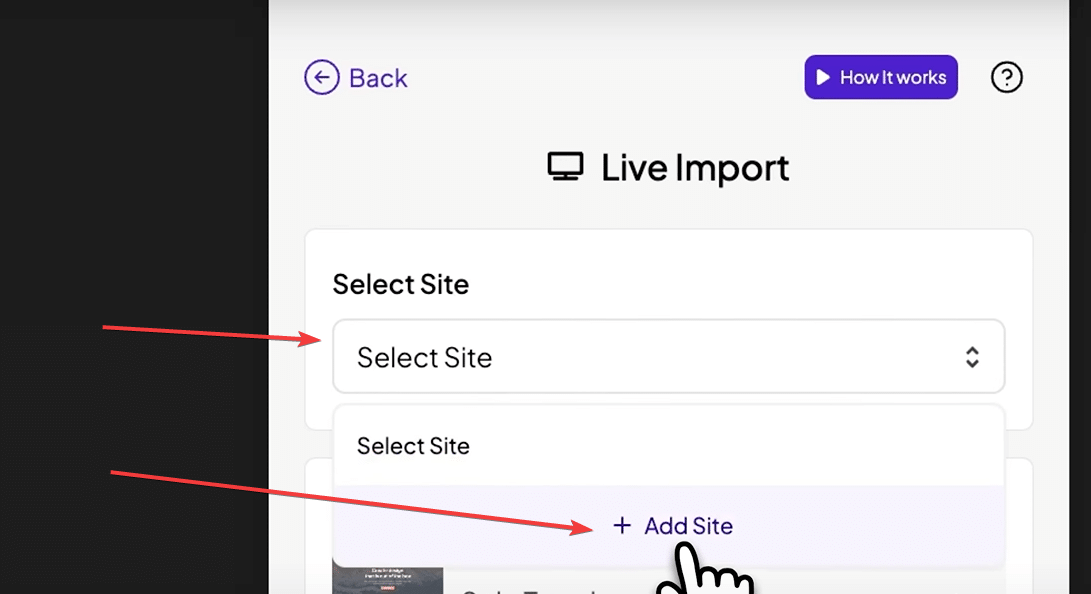
- Next, in the “Select Site” dropdown, click on the “+ Add Site” button to proceed.
7. A Live Import popup will appear. Here, you are required to input the Site URL and Security Token. You can find these two in your UiChemy WordPress plugin settings.
8. After entering the URL and Token, proceed by clicking on the “Connect” button. Upon successful input, a confirmation message will be displayed, indicating a successful connection. In the event of any discrepancies, an error message will be prompted.
9. Following the successful connection, you will notice that your website URL is automatically selected within the “Select Site” dropdown.
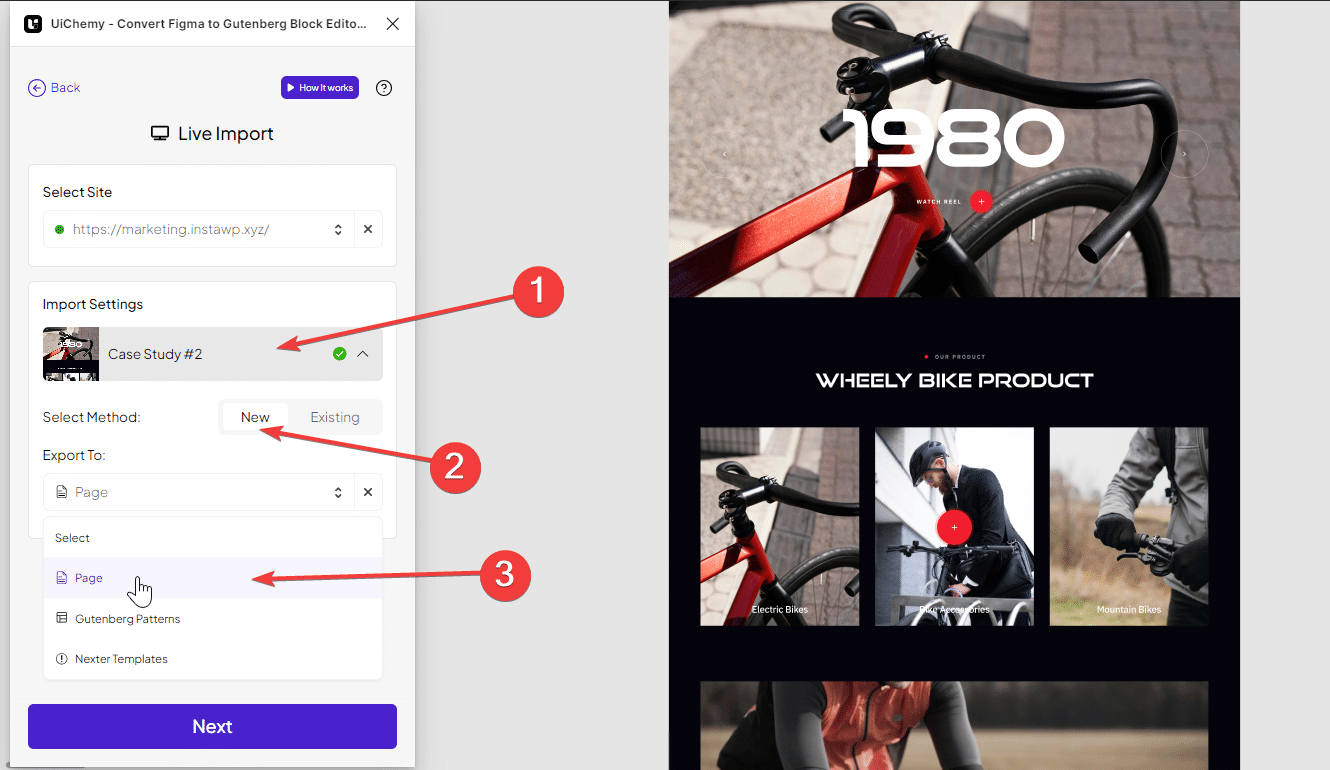
10. Once the dot next to the website URL turns green, click on the dropdown located under the “Import Settings.”
11. Subsequently, select “New” from the “Select Method” section. Alternatively, you also have the option to update an existing template or page.
12. Following the previous steps, proceed by selecting the desired template type from the “Export To” dropdown. You have the option to import as a Page, Gutenberg Patterns, or Nexter Template. We will choose “Page” for this demonstration.
13. Once you have selected the template type, click on the “Next” button to continue the import process.
- On the next screen, you can choose to import individual layouts or import all layouts at once by clicking the “Import All” button.
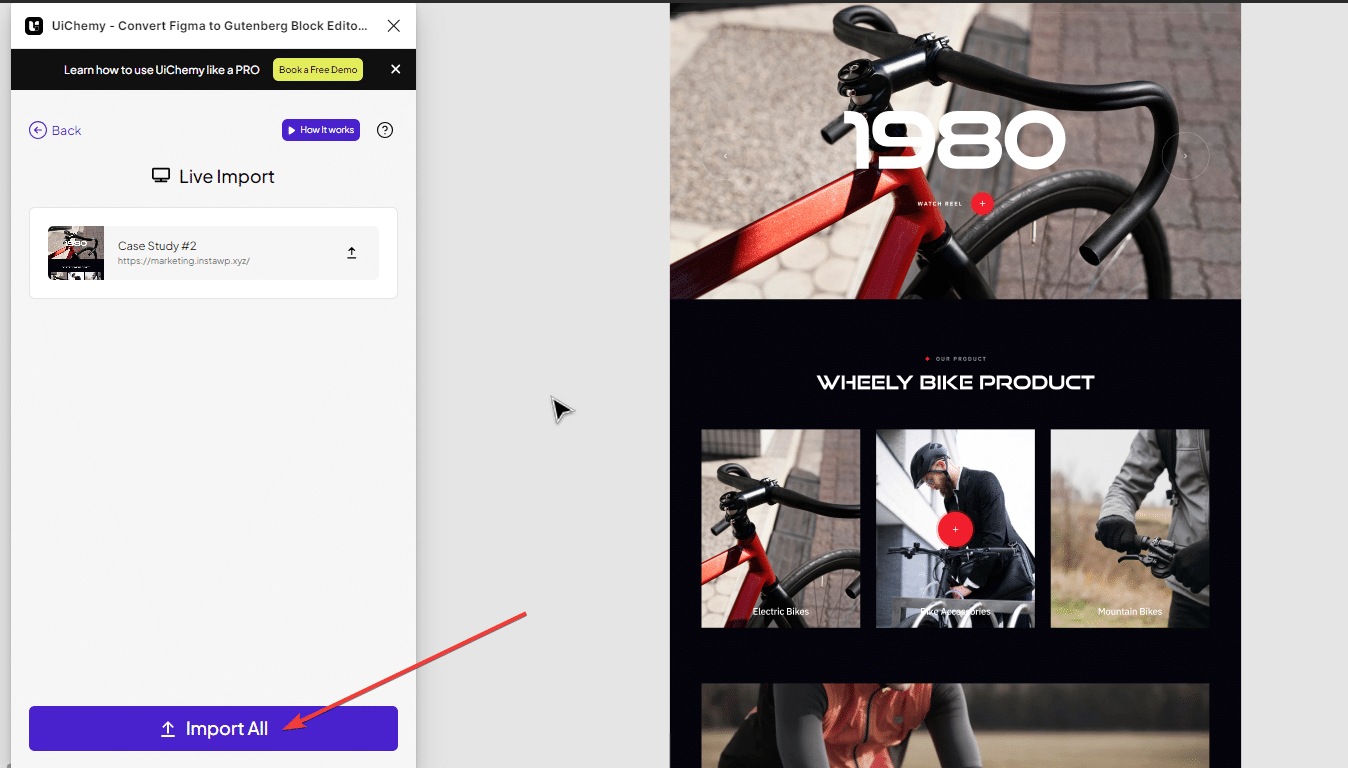
- That’s it! You successfully converted your Figma design to an editable WordPress page. You open the page by clicking the “Open” button.
Benefits of using the Live Import method for converting Figma to WordPress –
- Effortless Conversion Integration: Link your WordPress site directly to the Figma UiChemy plugin using the URL and Security Token, enabling smooth conversion without the need for manual intervention.
- Multi-Site Versatility: Enjoy the option to add multiple sites, allowing you to import designs to various sites according to your future needs.
- Varied Export Formats: Export your designs directly as a Page, Gutenberg Pattern, or Nexter Template.
- Incorporate Design into Existing Content: Use the Add-on feature to seamlessly integrate the exported design into the bottom section of an existing page, minimizing the manual effort required to add elements individually.
- Simplified Bulk Exporting: Enhance efficiency by applying the same settings across all pages during bulk exporting with just one click, removing the necessity to set identical configurations for each page manually.
Method 2: Copy Code
While the Live Import method is more efficient. There’s another method to convert Figma to WordPress where you’ll have to copy a code from Figma manually and paste it to your WordPress page.
Note: For this method to work, make sure you’ve installed and activated the Nexter Blocks plugin on your WordPress website.
Here’s how:
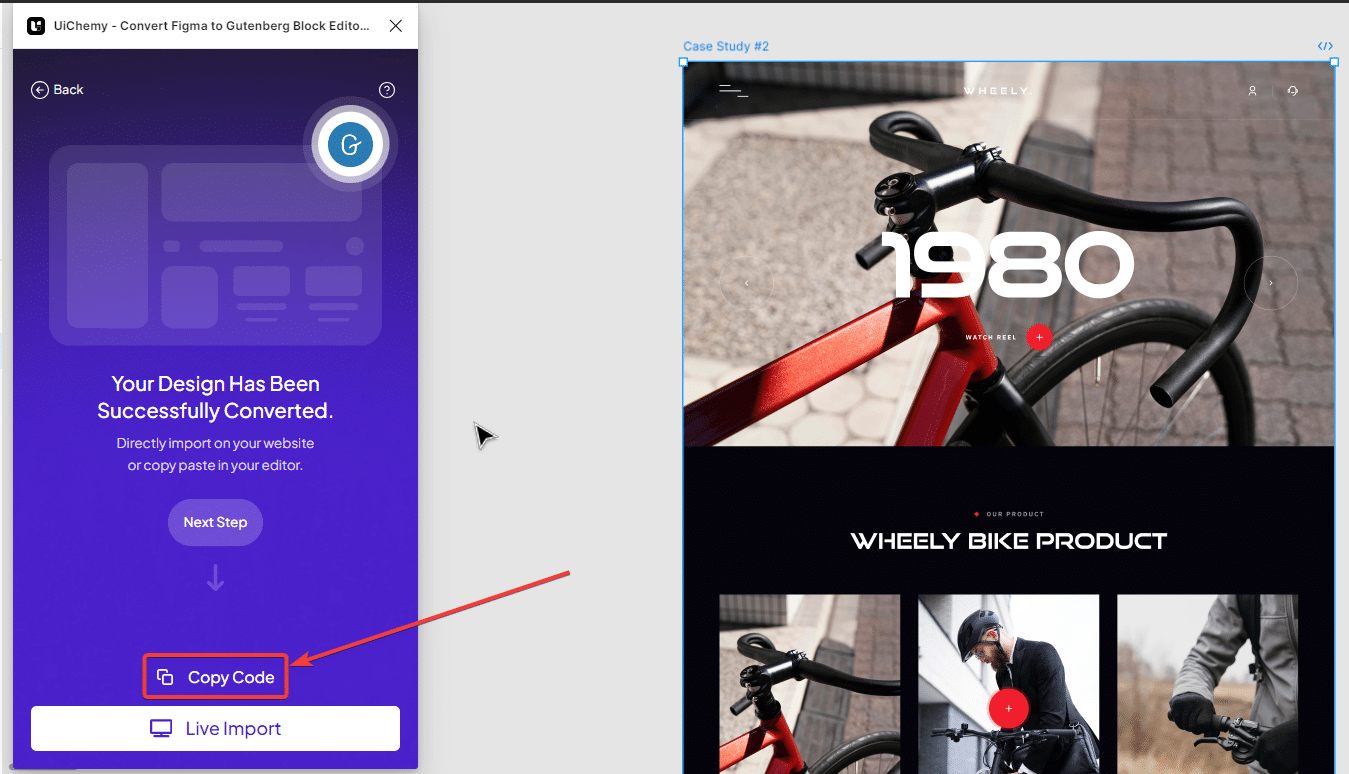
- Assuming that you have optimized your Figma design, now it’s time to use the Copy Code method, click on Copy Code in the UiChemy window.
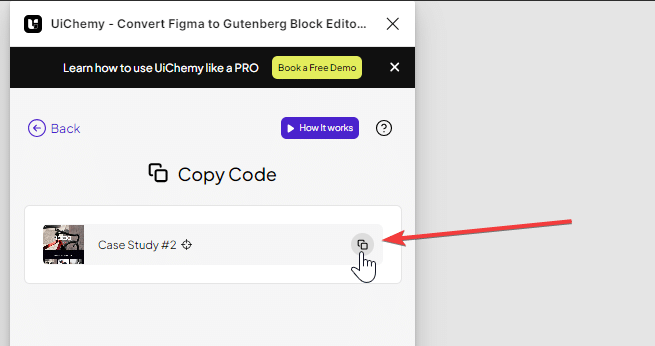
- On the next screen, click on the copy icon beside the page.
- Next, go to your WordPress dashboard and add a new page.
- Click on the Plus Paste button (purple color) at the top.
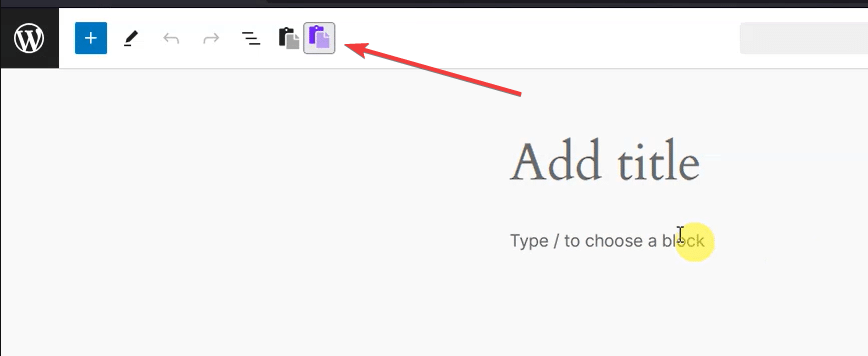
- Now a popup will open, press Ctrl+V and the template will be imported on your page.
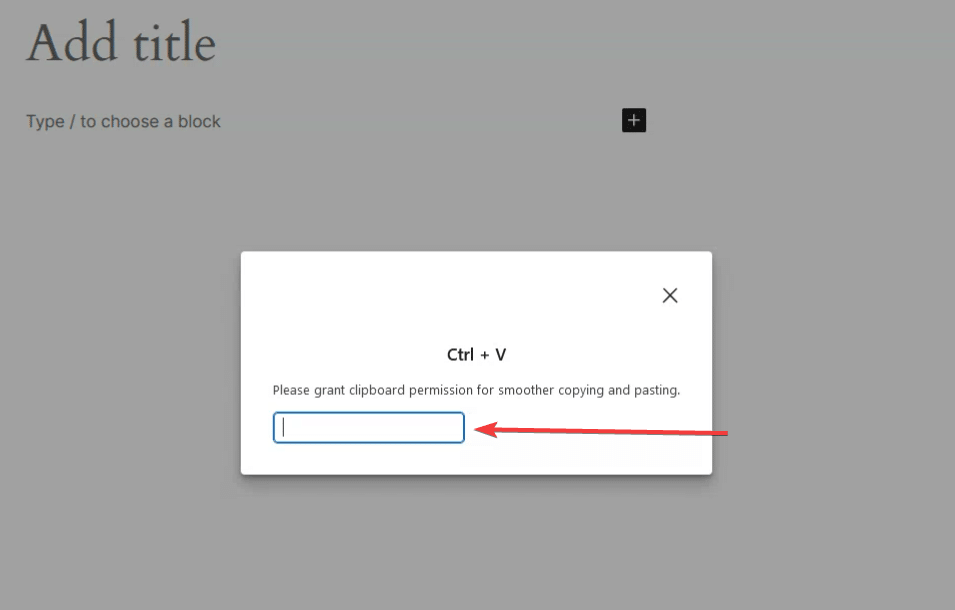
- That’s it! You successfully converted your Figma design to an editable WordPress page through the Copy Code method.
Step 5 – Edit Further in Gutenberg Editor
Now that you have successfully imported your Figma design into WordPress, you can start editing and customizing your website further.
Gutenberg provides a user-friendly and intuitive editor that allows you to make changes to your website with ease.
Once you export, everything is editable in the Gutenberg page builder. You can easily change the text, buttons, and other elements. The tagging method allows you to tag buttons and other options. If you have added images to the file, they will be exported seamlessly, improving your performance. You can also choose to export images as single files if needed.
You might need to manage some text according to your preference. After adjusting the elements and text, everything will be auto-adjusted based on the width of your website. The rest of the content is easily manageable, with everything configured for responsive settings.
For example, if you go to the style settings and click on typography, then switch to tablet view, you will see that everything is exported and managed for responsive devices. If you want to customize further, you can adjust the width and other settings. You can adjust the padding and other elements as needed.
To start editing your website, simply click on the section or element that you want to modify. You can then use the various editing tools and options available in Gutenberg to make the necessary changes.
Once you are satisfied with your changes, you can preview your website to see how it looks on different devices, such as desktops, tablets, and mobile phones. You can also make further adjustments as needed.
Finally, when you are ready to publish your website, simply click on the “Publish” button in Gutenberg. Your website will then be live and accessible to your audience.
Suggested Read: If you’re an Elementor user, here’s a detailed guide on how to convert Figma to Elementor for FREE.

Do you Manage WordPress Websites? Download Our FREE E-Book of 20+ Checklist for WordPress Site Maintenance.
- SAVE MAXIMUM THIS BLACK FRIDAY
Don’t Miss the Mega WordPress
Black Friday Select Deals of 2024.
Wrapping Up
Converting your Figma design to a WordPress website has never been this easy, thanks to UiChemy Figma Plugin.
With just a few steps, you can have a fully functional website up and running. This plugin offers a seamless and efficient way to convert your designs to WordPress, saving you time and effort.
UiChemy Figma Plugin is a valuable tool for designers and developers who want to streamline their workflow and create high-quality websites.
With its simple and efficient conversion process, you can focus on what you do best – designing and developing great websites.
Further Read: There are two popular Figma to WordPress Convertors out there. Here’s a detailed comparison of Fignel vs UiChemy to help you make an informed decision.
