Are you looking to create a custom WooCommerce product skin in Elementor? Creating a custom product item layout can help you stand out from the rest.
With the Product Listing widget from The Plus Addons for Elementor, you can easily design a custom skin for your WooCommerce product in Elementor.
To check the complete feature overview documentation of The Plus Addons for Elementor Product Listing widget, click here.
Requirement – This widget is a part of The Plus Addons for Elementor, make sure its installed & activated to enjoy all its powers.
Here we’ll use the Woo Product Images, Woo Single Basic and Woo Single Pricing widgets from The Plus Addons for Elementor to create the product loop. So make sure these widgets are activated.
You can also create a custom product loop with custom fields.
To do this, make sure you’ve added some products to your WooCommerce store, then follow the steps –
First, you have to create a custom product template using Elementor. For instance, we will be creating this custom product layout design.

Create a Custom Product Template for WooCommerce
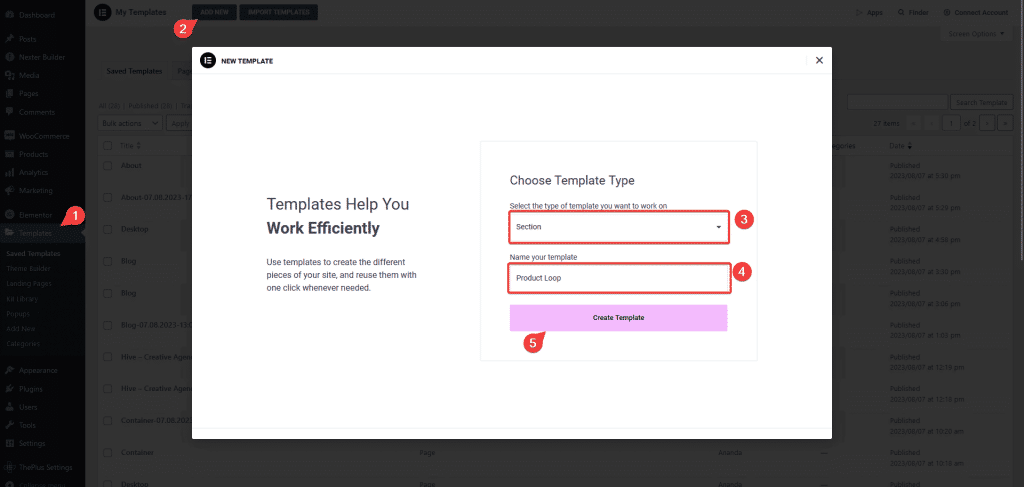
1. To do this from the Dashboard, go to Templates and click on Add New, then select Section as the template type, give a name to the template then click on Create Template button.
2. We’ll add a two column container, with a background color and border.
3. As per the design we have the product image on the left. For that in the left column, we’ll add the Woo Product Images widget.
4. Then select Single Image from the Layout dropdown.
5. After selecting the appropriate image size, enable the Link toggle, to link the product image to the product details page.
6. As per the layout we have the product title and description in the right column. For this, we’ll add the Woo Single Basic widget in the right column.
7. From the Woo Single Basic repeater section we’ll remove all the default items except the title and short_descripton.
Note: By opening individual items you can easily change the element type. You can also click on the + Add Item button to add more elements.
Style it further as per your requirements.
8. Then we need to add the product price and add to cart button in the right column. For this, we’ll add the Woo Single Pricing widget in the right column.
9. From the Woo Single Pricing repeater section we’ll remove all the default items except the price and add_to_cart.
Note: By opening individual items you can easily change the element type. You can also click on the + Add Item button to add more elements.
Style it further as per your requirements.
10. Once done, publish the template.
Use the Template With Product Listing Widget
Once you have created your custom product layout, use it with the Product Listing widget.
1. Add the Product Listing widget on a page or template, and select the appropriate listing type.
2. Then select Custom Skin from the Style dropdown.
3. Now, you have to select your template from the Select a template dropdown.
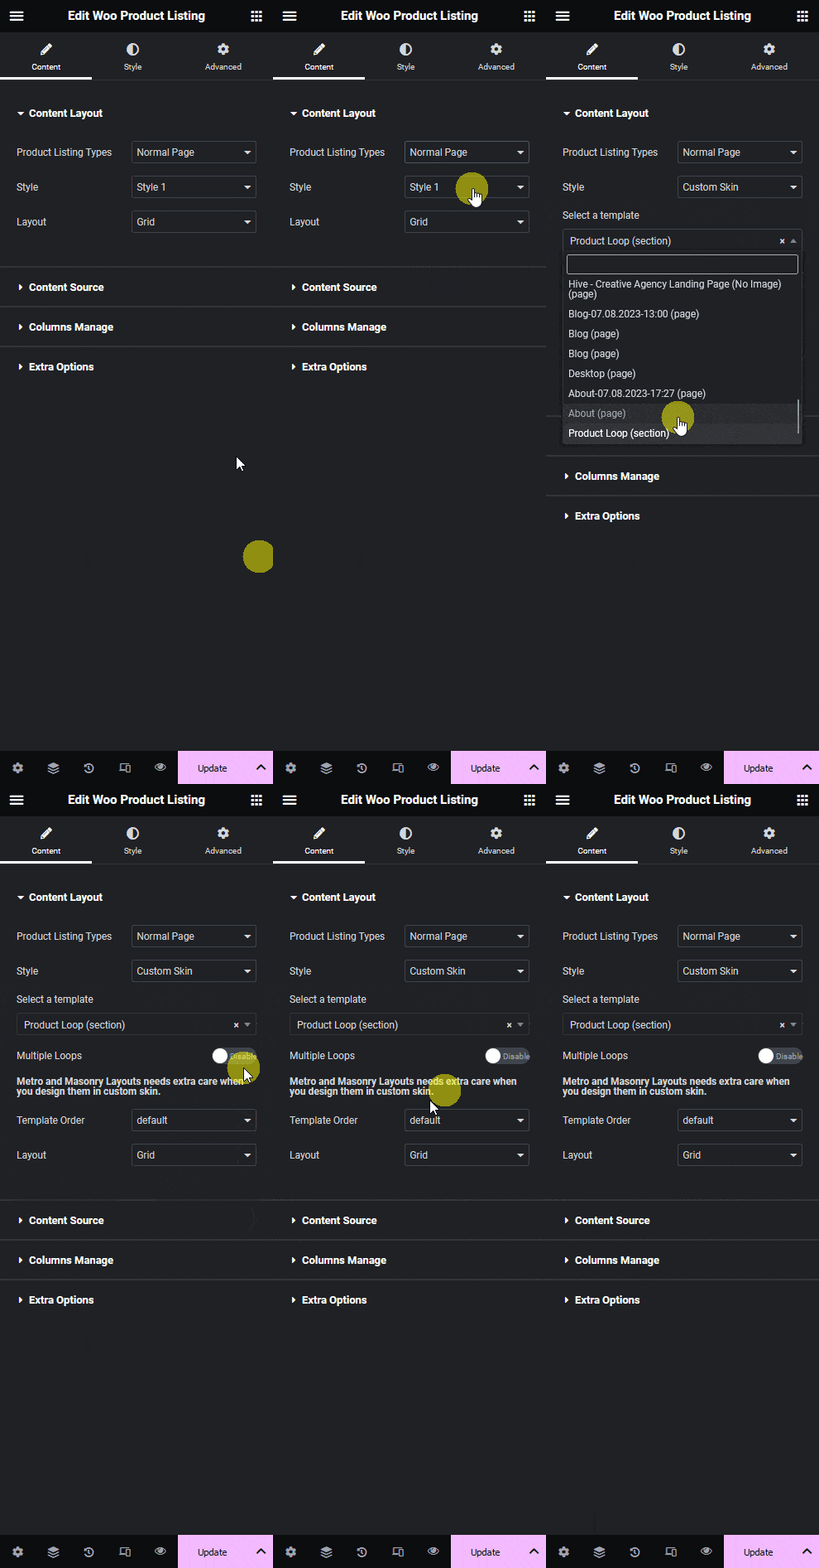
You can turn on the Multiple Loops toggle to use multiple layout designs together for your listing. You can use up to 5 templates together.
Note: In order to use Multiple Loops, you have to create separate custom templates for each loop template.
If you are using multiple loops, you can arrange the templates in reverse or random order from the Template Order dropdown.
4. Then, you have to select the appropriate layout type from the Layout dropdown.
Note: For using Masonry and Metro layout, you have to design your templates accordingly.
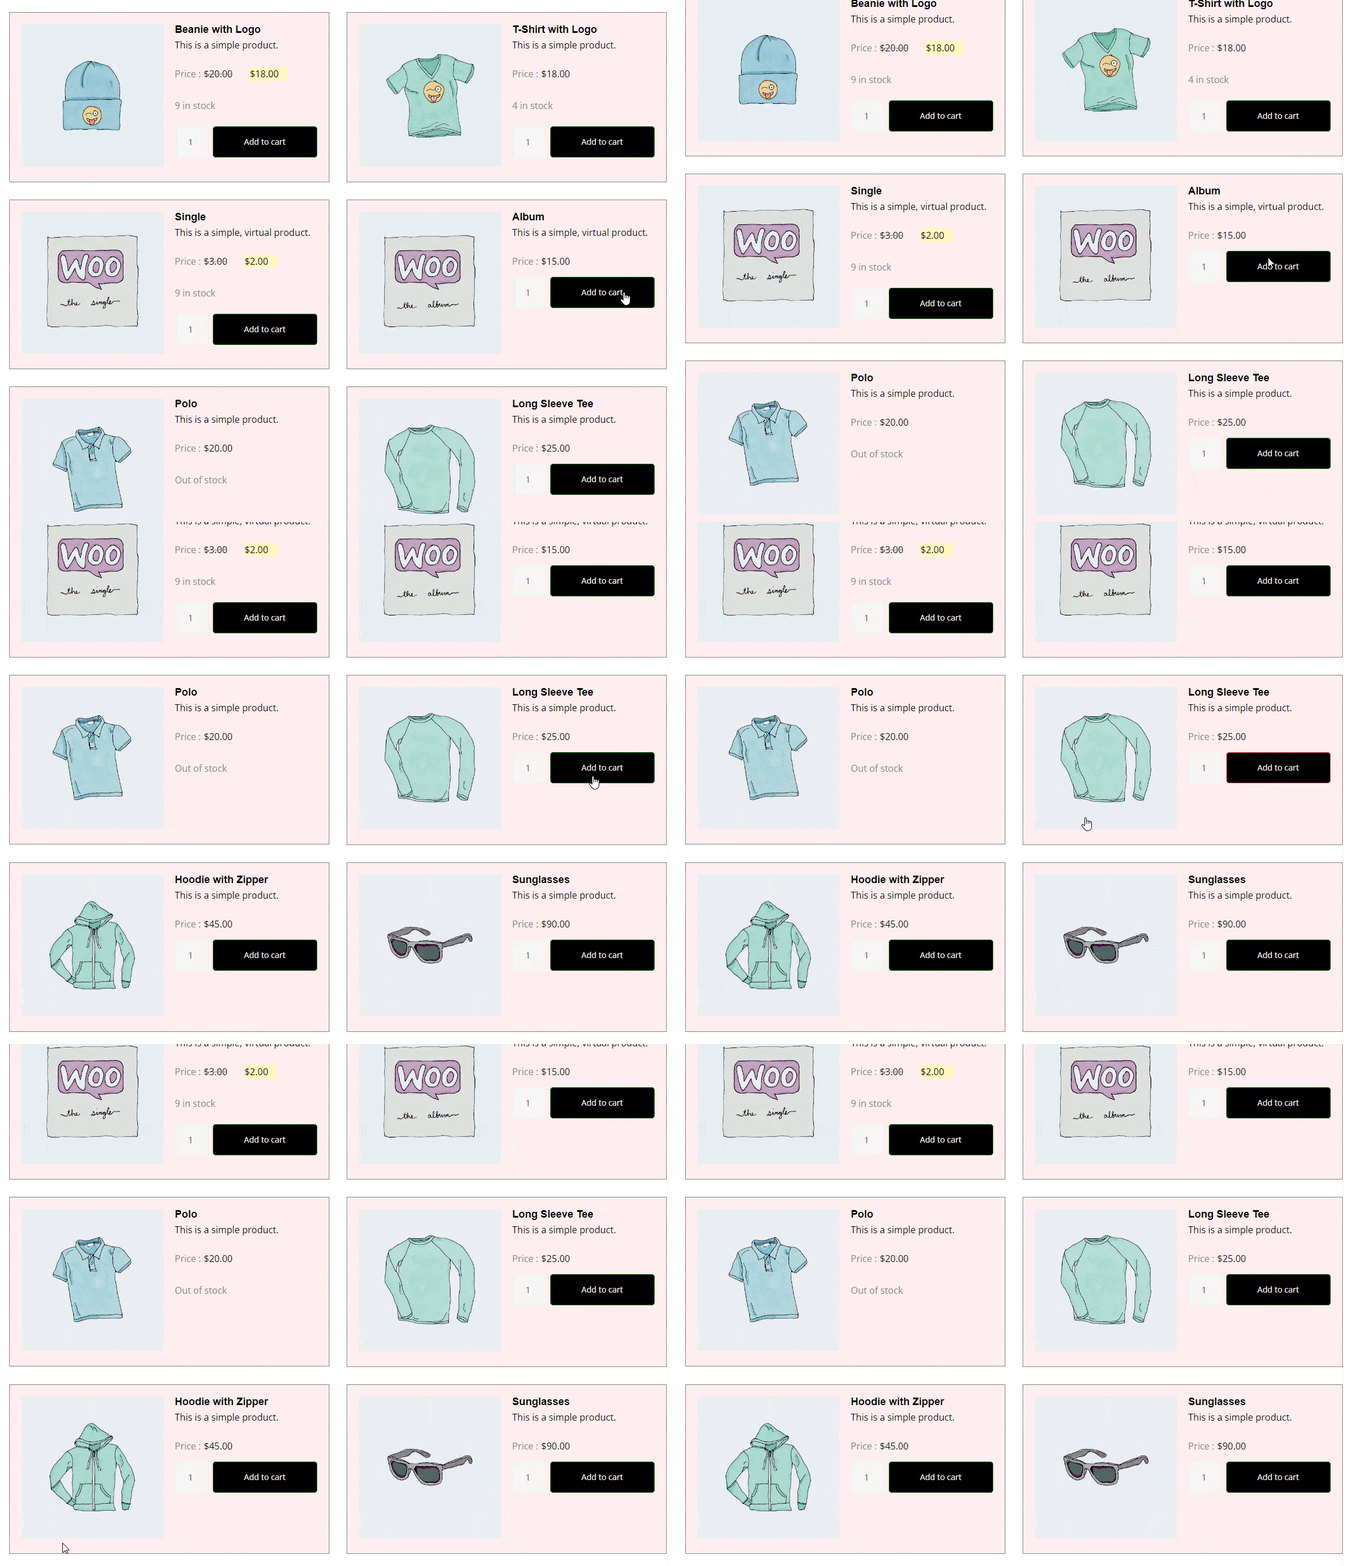
Now your products will show in your custom layout.
You can also create a single product page using these widgets.

