Did you encounter a fatal error on your WordPress site? Here’s your ultimate guide for fixing all kinds of WordPress fatal errors.
A fatal or critical error in WordPress occurs when your site fails to perform specific actions or execute a part of code. The error may result from plugin incompatibilities, insufficient server resources, or corrupt files.
A WordPress fatal error can disrupt your website’s functionality. It often takes a site offline and displays a message to visitors that might say, “There has been a critical error on your website.”
Such interruptions affect the user experience and can damage your site’s reputation. Therefore, you must know how to resolve them.
Join us as we walk you through this guide on how to remove fatal errors in WordPress.
What is a WordPress Fatal Error?
WordPress fatal errors occur when the website’s PHP code encounters an issue it cannot recover from, causing the entire PHP script to terminate unexpectedly.
These errors halt the website’s execution and disrupt its normal functioning. The site may even become inaccessible for both admins and end users.
There are various kinds of fatal errors that occur due to specific reasons, including issues with the PHP version, incompatibility with themes and plugins, corrupt WordPress core files, etc.
Some WordPress fatal errors carry an error code/message that you can use to identify their cause.
However, there are also instances where there may not be an error message on the screen, making troubleshooting difficult.
Is your WordPress website down? Here are 8 things you must check to fix your website.
Most Common WordPress Errors
Here are some frequently occurring WordPress errors you must know about:
- Internal Server Error: The error suggests that the server cannot fulfill the request, often caused by plugin or theme functions and corrupt browser cache.
- Error Establishing a Database Connection: This critical error indicates that WordPress cannot connect to the database. The issue may arise due to incorrect credentials, a corrupted database, or server issues.
- White Screen of Death (WSOD): This isa plain white screen with no error message, often caused by PHP or database errors.
- Memory Exhausted Error: This error often occurs when a plugin or a script exceeds the default allocated memory limit.
- 403 Forbidden Error: This issue arises when the server refuses to fulfill the request because it perceives that the user does not have permission to access the specified URL.
- 404 Not Found: This error appears when visitors try to access a web page on your site that doesn’t exist. It usually occurs due to broken links or deleted pages.
- Image Uploading Error: You may encounter this error while uploading an image via the media library.
How to Fix WordPress Fatal Error [Working Methods]
Here are nine ways you can fix WordPress fatal errors:
- Increase your PHP memory limit
- Remove and Re-Add Core WordPress Files
- Increase the Max Upload File Size
- Use A Default Theme
- Deactivate All Plugins
- Clear Your Site Cache
- Check for Malware
- Reach Out to Hosting Provider Support
- Check Your Error Logs
Now let’s see each way in depth.
1. Increase your PHP Memory Limit
If you’re seeing an error message on WordPress like “Fatal error: Allowed memory size of xxx bytes exhausted,” it points towards a lack of sufficient memory.
You can easily work past this issue by simply increasing the memory limit.
Here’s how to do it:
Step 1. Login to your hosting provider’s control panel or an FTP client.
Step 2. Access the wp-config.php file located in your site’s root directory. Right-click on the file and select the Edit option.
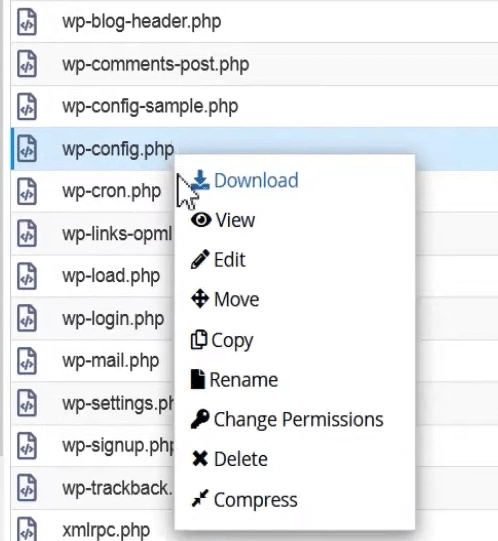
Step 3. In the wp-config.php file, look for the following line: define(‘WP_MEMORY_LIMIT’, ‘256M’);

Step 4. Increase the memory from 256M to 512M or 1024M.
Recommended Read: How to Find Root Directory of WordPress Website
2. Remove and Re-Add Core WordPress Files
If a fatal error occurs due to a corrupted, modified, or deleted WordPress core file, you’ll need to delete your current WordPress installation and reinstall a new one.
Just follow these steps:
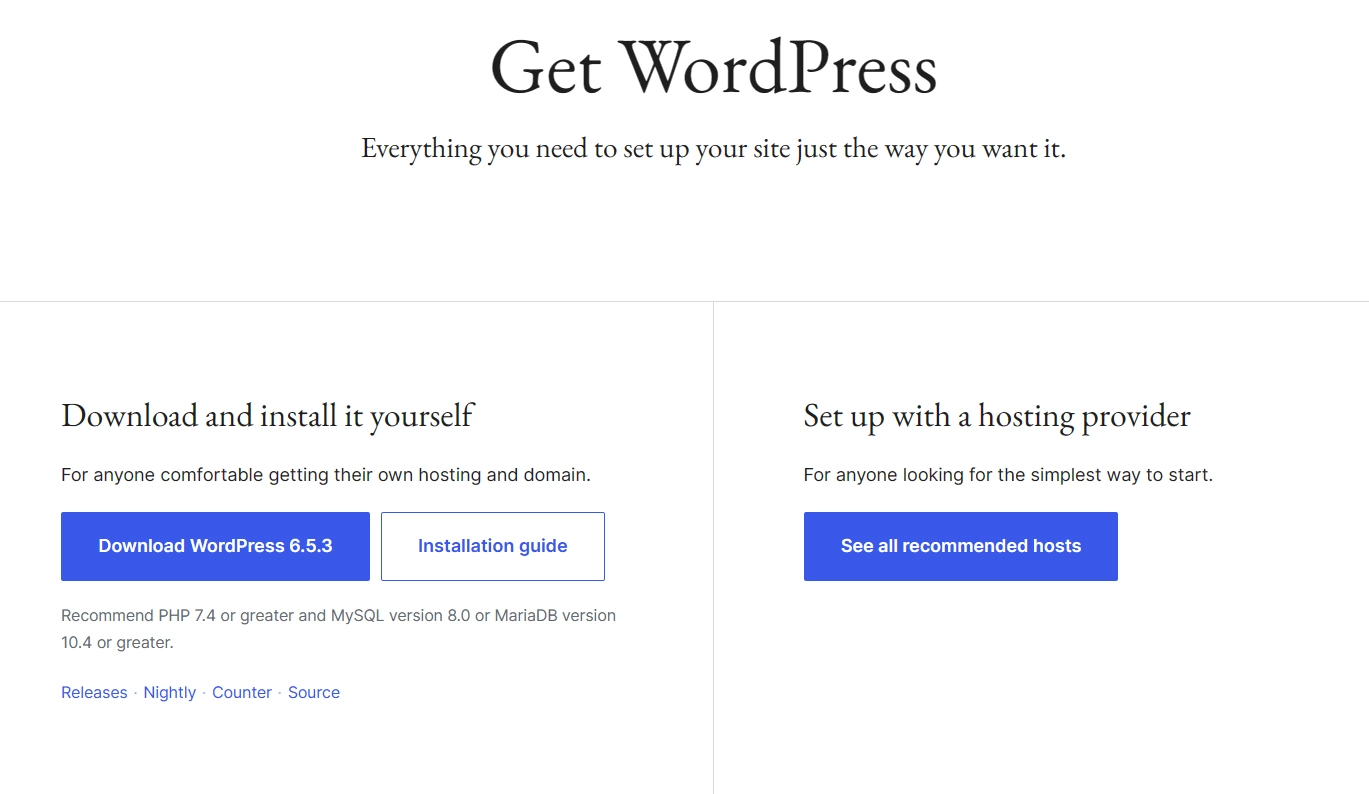
Step 1. Download the latest WordPress zip file from WordPress.org.
Step 2. Login to your hosting provider’s control panel or use an FTP client to access the root directory.
Step 3. Delete all the files in your site’s root directory except the wp-config file. You can also skip deleting the wp-content folder to retain custom content, themes, and plugins.
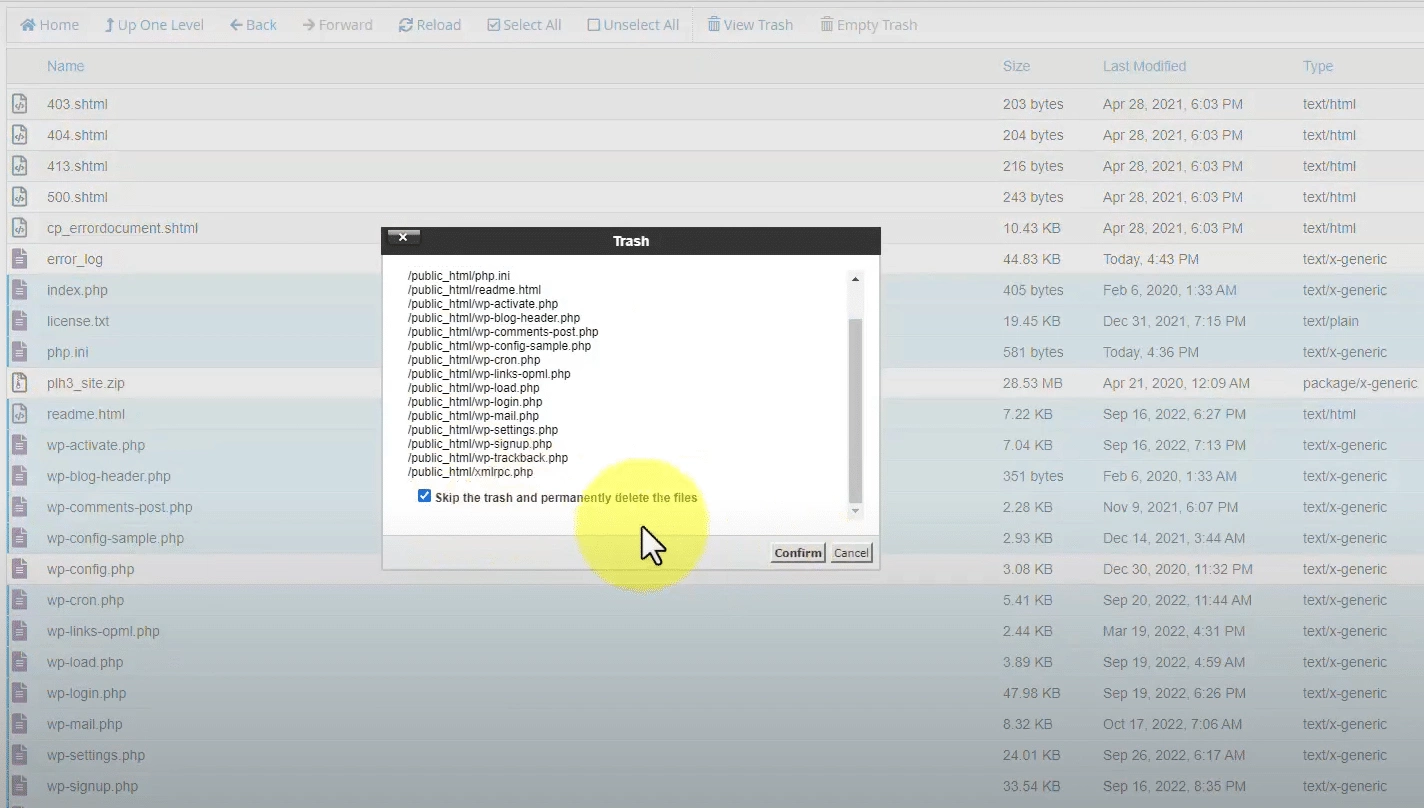
Step 4. Finally, upload the downloaded WordPress files to your server.

That’s it. You have a brand-new WordPress installation, which should work without any errors.
Alternatively, if you maintain regular site backups, you can also try restoring one of the backup files to see if it resolves the error.
3. Increase the Max Upload File Size
When uploading a large file to your site, you may see the error that says, “exceeds the maximum upload size for this site.”
This error generally occurs because hosting providers usually limit the size of files you can upload to WordPress.
By default, the limit is often in the 4 MB to 128 MB range.
Fortunately, you can easily increase this limit from your hosting control panel, as shown below:
Step 1. In the hosting control panel, navigate to PHP Options.
Step 2. Then, open the Options section.
Step 3. Scroll down and look for upload_max_file settings.
Step 4. Select a new limit from the dropdown menu next to the upload_max_file option based on your needs.
This should solve any issues you face when uploading large files to your website.
4. Use A Default Theme
Custom themes are among the biggest causes of fatal errors in WordPress.
If you witness such errors after installing or updating a theme, try switching to a default theme to see if the error disappears.
Default themes are designed by the WordPress team. They have cleaner code, integrate well with websites, and are less likely to carry bugs compared to a third-party theme.
Therefore, switching to the default theme should do the trick if errors occur due to your existing theme.
Here’s how to do it:
Step 1. From the WordPress dashboard, navigate to Appearance > Theme.
Step 2. Next, select any of the following default themes – Twenty Twenty-Two, Twenty Twenty-Three, or Twenty Twenty-Four.
Step 3. Click Activate to apply the selected default theme to your website.
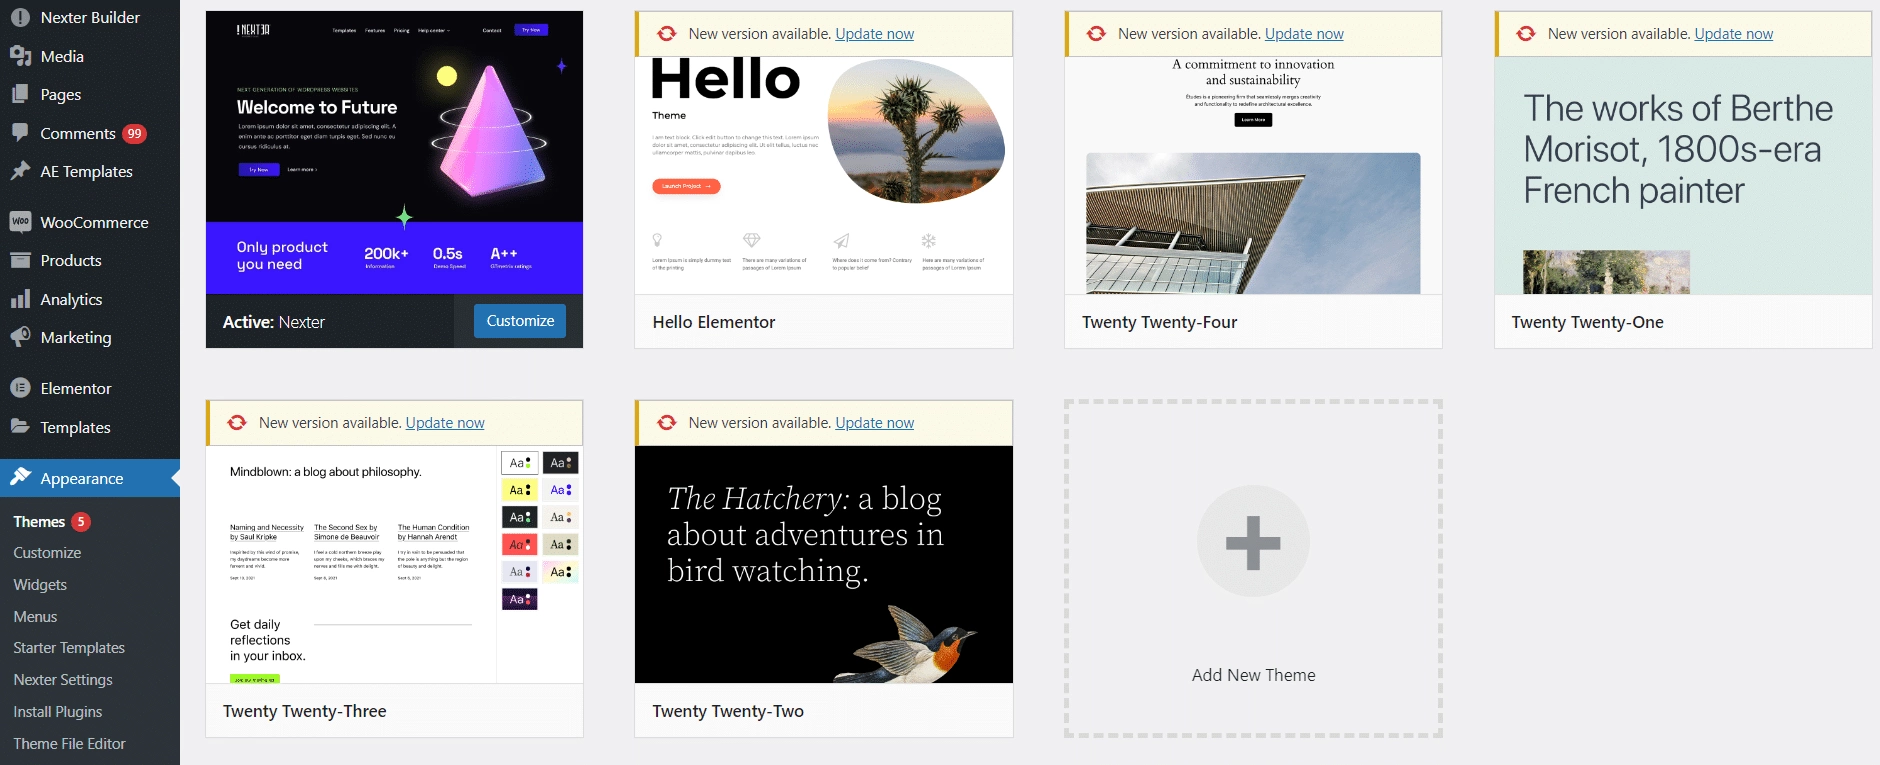
There may be instances where an error may prevent you from accessing your WordPress admin dashboard.
In that case, you won’t be able to use the abovementioned method. But you can still switch to the default theme using an FTP client or the hosting provider’s control panel.
Step 1. Access the wp-content folder.
Step 2. Look for the theme folder and rename it. This will prevent WordPress from accessing the custom theme and force it to switch to the default one.
Step 3. Once renamed, log in to the WordPress admin panel to see if the error persists.
5. Deactivate All Plugins
Similar to themes, plugins also frequently cause fatal WordPress errors.
These critical errors often occur due to bugs or PHP version mismatches between the plugin and your WordPress installation.
One of the most effective ways to solve such errors is to deactivate all the plugins and see if it removes the error. Then, you reactivate these plugins one by one to see which exact plugin causes the issues.
Here’s how:
Step 1. Navigate to the Plugins > Installed Plugins section of the WordPress backend.
Step 2. Tick the checkbox at the top of the plugin list to select all plugins at once.
Step 3. Click the Bulk Action button to open a dropdown menu. Select the Deactivate option from the list.
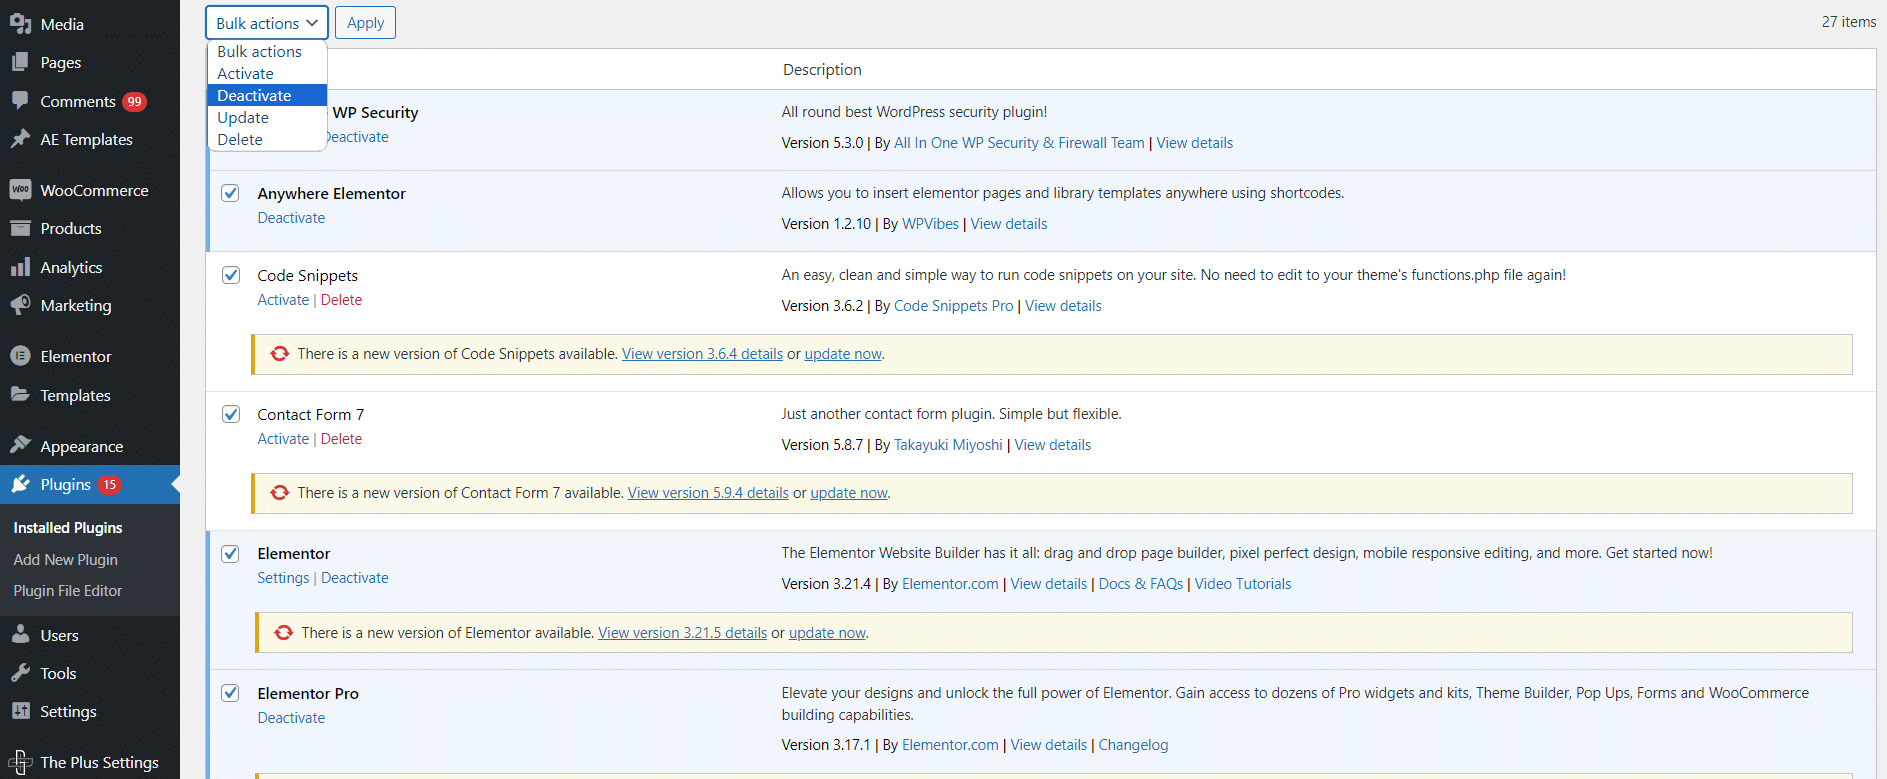
If you can’t access the WordPress admin panel, you can deactivate your plugins by deleting the plugins folder from the server.
Use an FTP client or your hosting provider’s control panel to access your server files. Navigate to public_html > wp-content > plugins.
Rename the plugins, and they’ll be deactivated.
6. Clear Your Site Cache
Like cache on your web browser, cached site data stored on your server can become outdated and bloated.
It slows down the website’s load time and prevents the latest changes from appearing on your live site.
Therefore, clearing the cache ensures that all updates are visible and functioning as expected.
Follow these steps to clear your site cache:
Step 1. Access your site’s root directory from your hosting control panel.
Step 2. Locate the folder named cache.
Step 3. Look for wp-content/cache and wp-content/advanced-cache.php files and delete them.
Step 4. Now, clear your web browser’s cache so you can see the latest version of your site. Then, reload the site and see if the error still persists.
Just like fixing fatal errors, you can also fix a slow WP admin dashboard. Check out 13+ ways to fix slow WordPress admin dashboard.
7. Check for Malware
WordPress is a widely used CRM, therefore it is also a frequent target of cyberattacks. So, the chances are a critical error screen may appear on your site because malware has infected it.
To check whether your site was attacked by malware, you’ll need to install a security plugin. You can try plugins like All-in-One WP Security, Wordfence, Sucuri, etc.
Most WordPress security plugins offer one-click malware scans, and you can even schedule scanning at regular intervals.
If they find malware, you’ll be notified so you can take appropriate action to remove it from your website.
Suggested Read: How to Remove Malware From WordPress Site [Guide]
8. Reach Out to Hosting Provider Support
If none of the solutions from this guide fix fatal errors on your WordPress installation, you may need professional assistance.
The best route is to contact your hosting provider’s support team directly. Explain the issue, and the team will help you solve it and identify its cause.
9. Check Your Error Logs
If you aren’t a complete beginner, you can try one more method to fix WordPress fatal errors by yourself before reaching out to any support team.
Try to review the error logs of your site stored on the server.
Error logs contain all the necessary details about various errors encountered on your website, including the exact time and date, error message, file and line number where the error occurred, etc.
These details can be valuable in diagnosing errors that aren’t immediately apparent.
Again, to access these logs, you’ll need to use FTP or the hosting control panel. WordPress writes errors to a debug.log file located in the wp-content directory of your WordPress installation.
Note: By default, WordPress doesn’t log errors. To save error logs, you must activate logs by modifying the wp-config.php.
Wrapping Up
Don’t let the term fatal error scare you. These errors are quite rare in WordPress, and even if you encounter them on your site, you can resolve them within minutes.
Upon discovering a critical error, review the error logs on your server, and depending on the error’s nature, use any of the tips mentioned in this post.
If you use Elementor to design your web pages, you must check out The Plus Addons for Elementor. This addon comes with more than 120 Elementor widgets and 1000+ readymade templates, empowering you to create unique designs.
Do you think WordPress is losing its charm? Find out whether you should use WordPress lately.
