Do you want to create a multi step checkout for your WooCommerce store in Elementor? Breaking the traditional single-page checkout into smaller, more manageable steps can make the process easier and improve the checkout experience for customers.
With the Woo Multi Step widget from The Plus Addons for Elementor you can easily create a WooCommerce multi step checkout in Elementor.
To check the complete feature overview documentation of The Plus Addons for Elementor Woo Builder, click here.
Required Setup
- Elementor FREE Plugin installed & activated.
- You need to have The Plus Addons for Elementor plugin installed and activated.
- This is a premium widget, and you need the PRO version of The Plus Addons for Elementor.
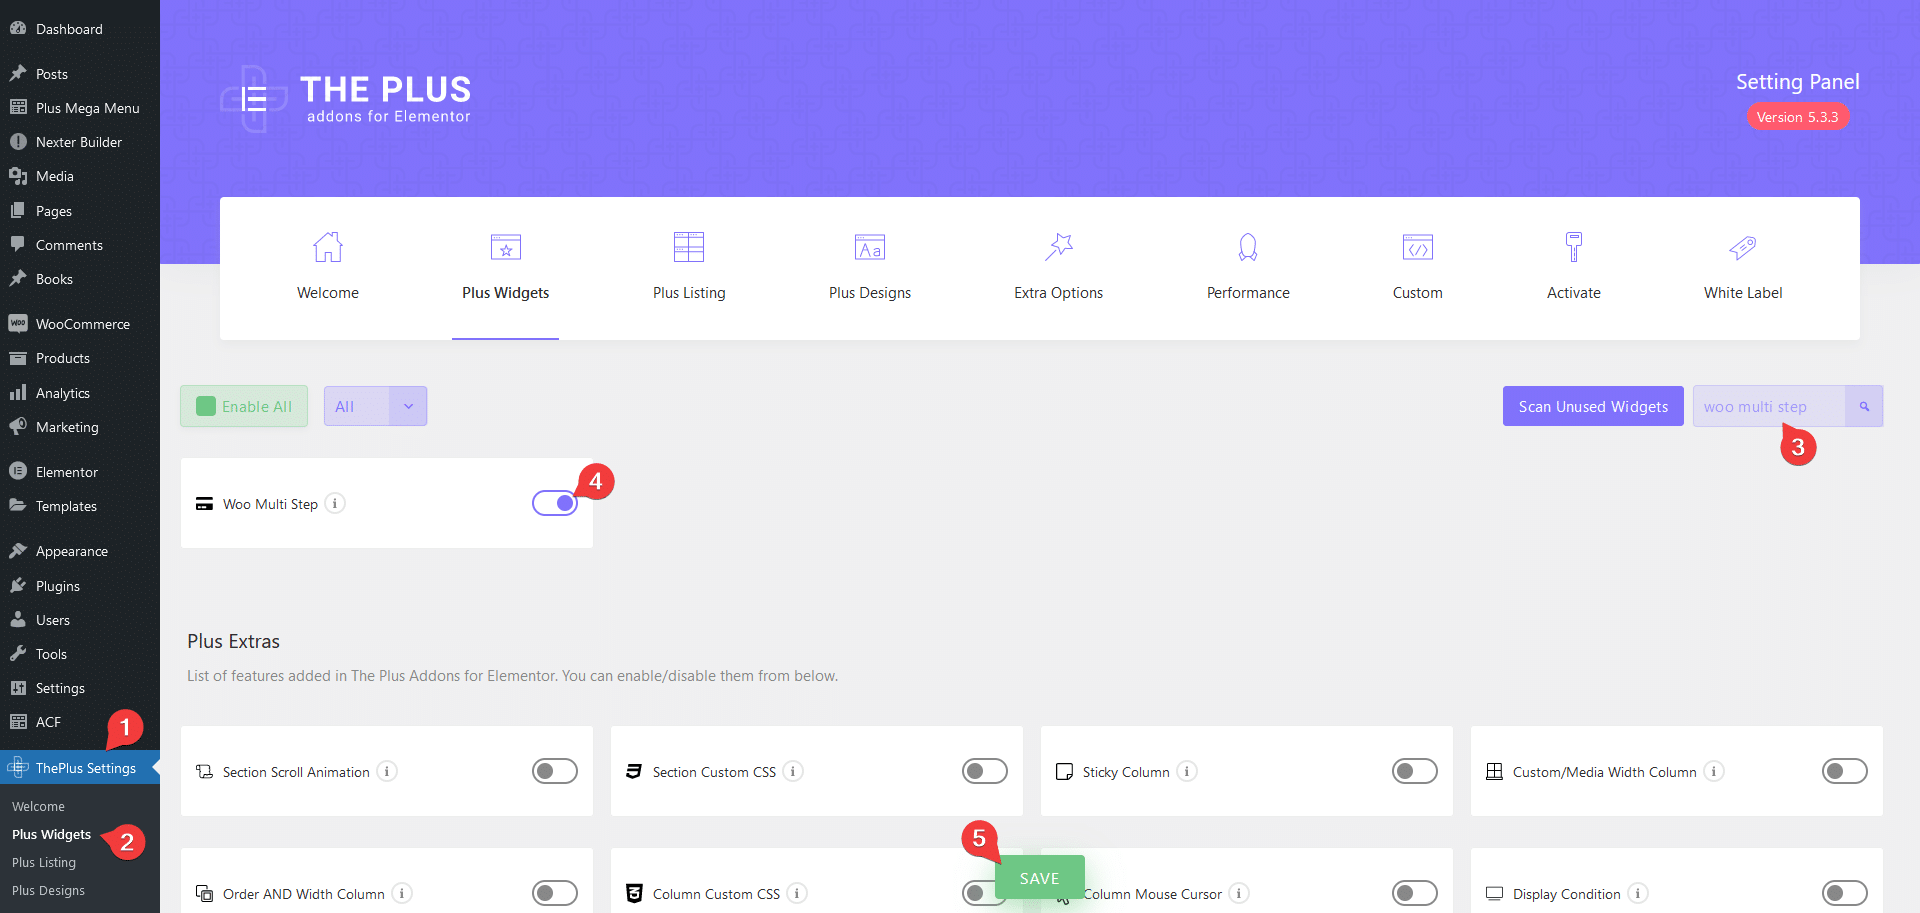
- Make sure the Woo Multi Step widget is activated, to verify this visit Plus Settings → and Search for Woo Multi Step and activate.
How to Activate the Woo Multi Step Widget?
Go to
- The Plus Settings → Plus widgets
- Search the widget name and turn on the toggle then click Save.
Add Woo Multi Step
To create a multi step checkout page, open the checkout page with Elementor and add the Woo Multi Step widget.
Note: Make sure all the default WooCommerce pages are created.
Content
From the Style dropdown, under the Layout tab, you can select from multiple predefined styles.
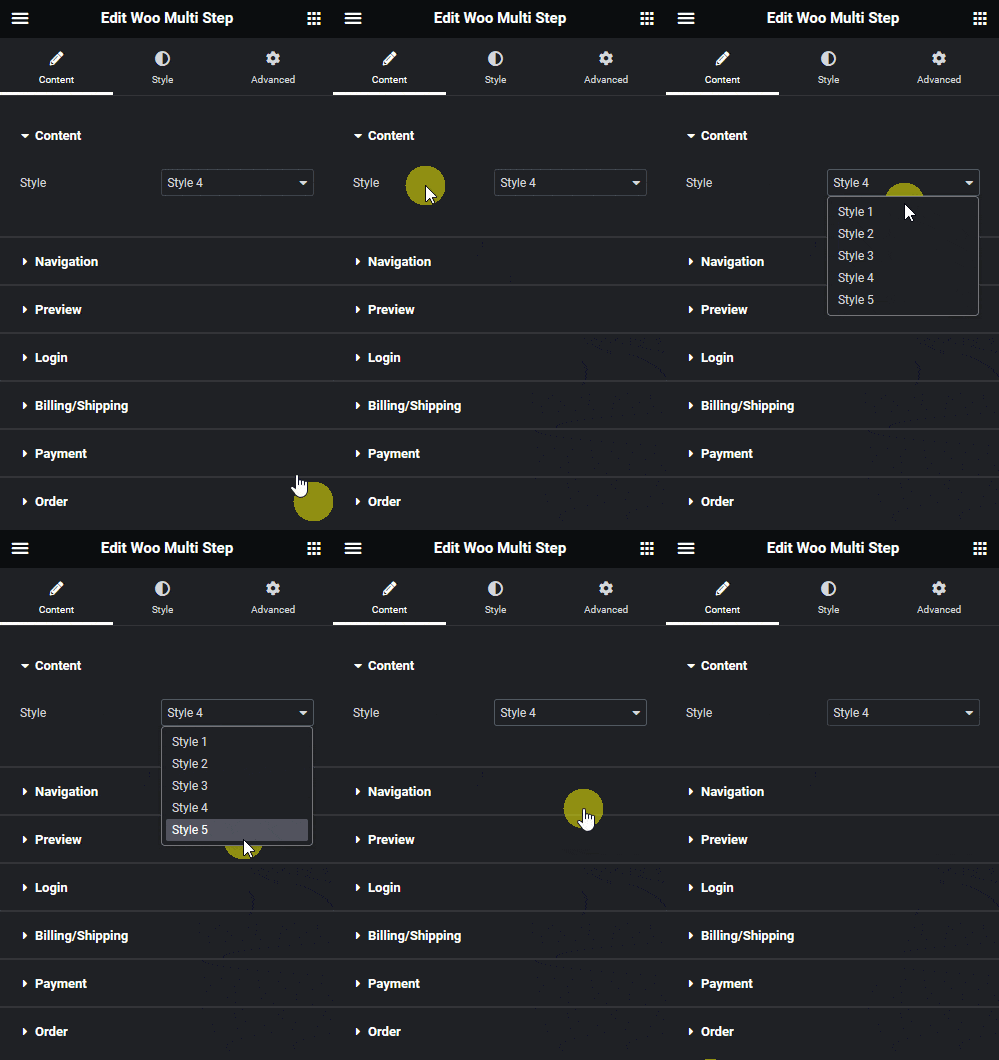
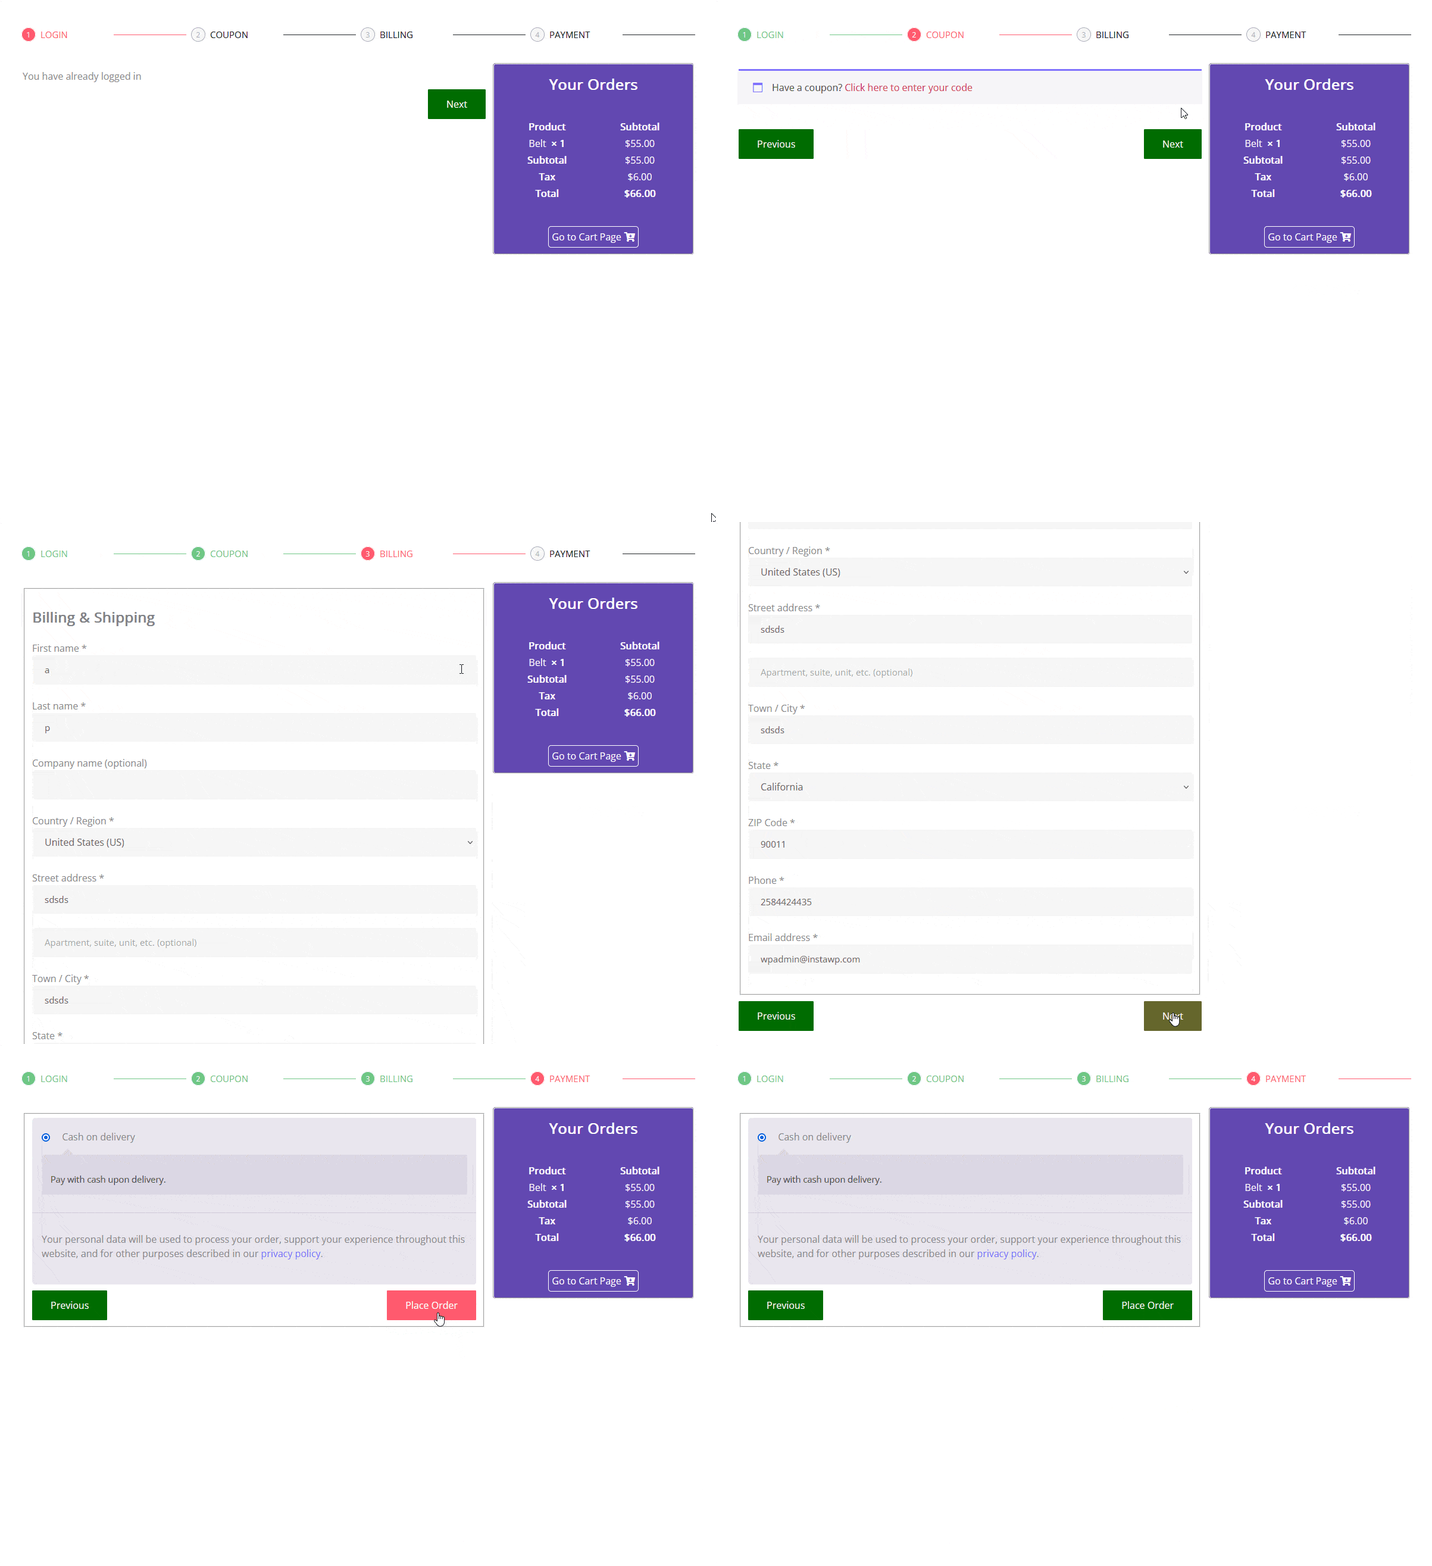
Now you’ll see a checkout with four steps Login, Coupon, Billing and Payment.
Navigation
From the Login Tab toggle, you can add or remove the login step. When enabled you can change the login step label from the Login field and from the Logged In field, you can manage the login message.
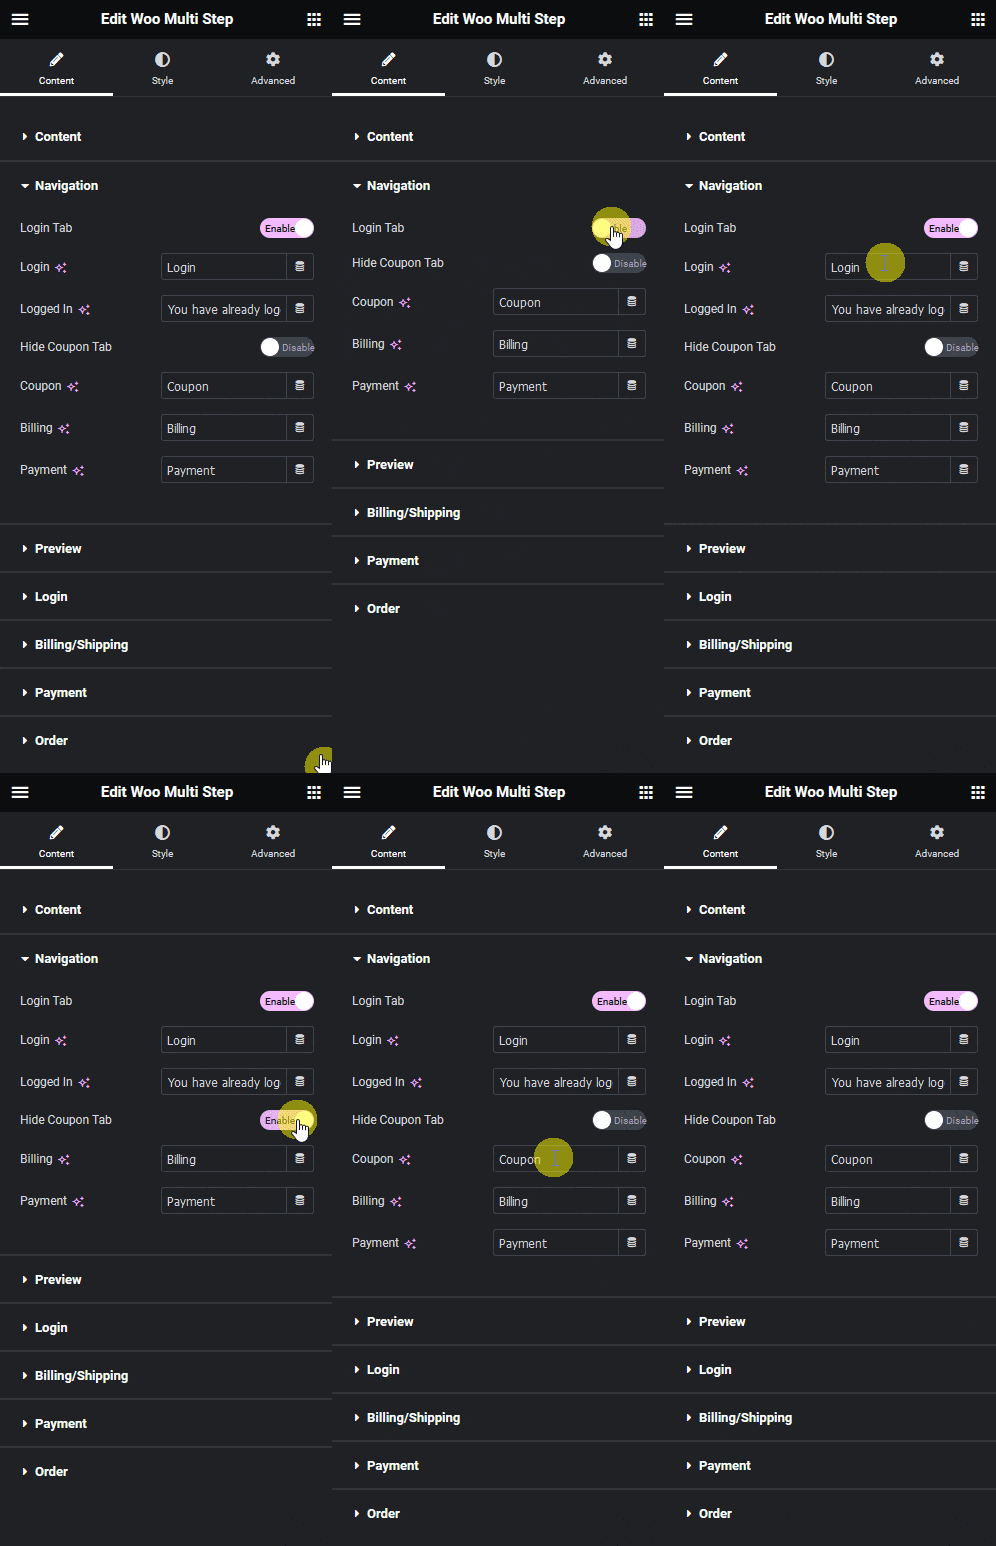
By enabling the Hide Coupon Tab toggle, you can remove the coupon step. When disabled you can edit the coupon step label from the Coupon field.
Then from the Billing field, you can edit the billing step label.
Similarly, you can edit the payment step label from the Payment field.
Preview
From the Preview dropdown, you can select and preview a step on the editor. This will help you to style individual steps.
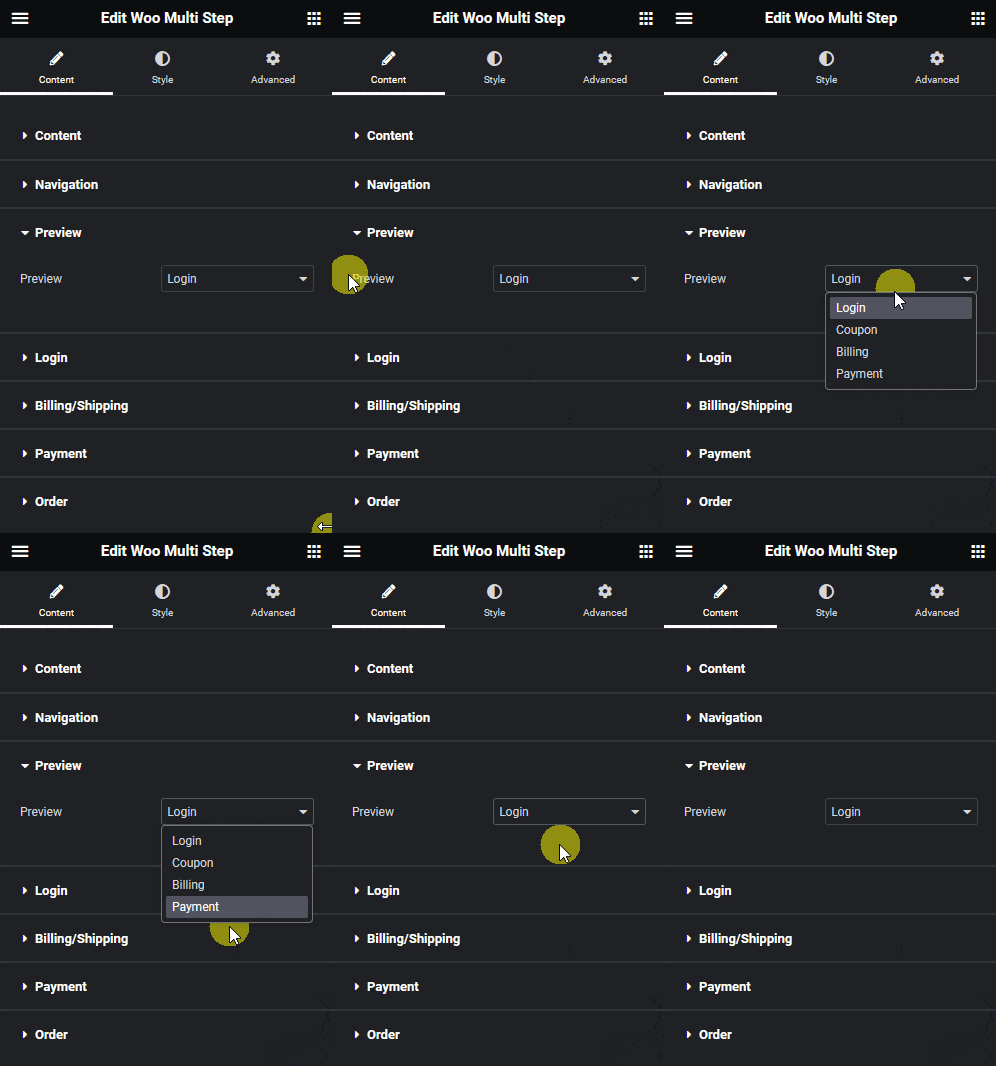
Login
You’ll see this tab if you’ve enabled the Login Tab toggle from the Navigation tab.
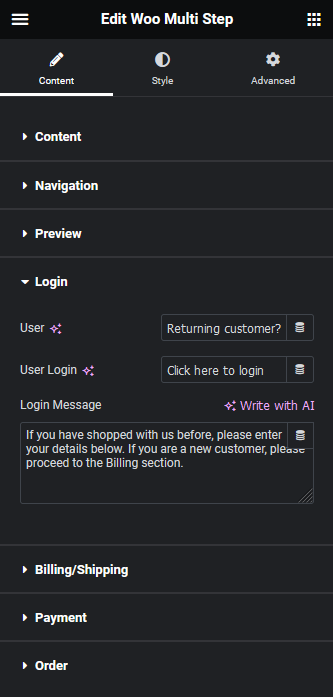
From the User field, you can edit the text for the logged out users.
Then from the User Login field, you can edit the link text, showing above the login form.
You can edit the message for logged out users from the Login Message field.
Billing/Shipping
From the Error Postfix field, you can edit the required field error message of the billing and shipping form.
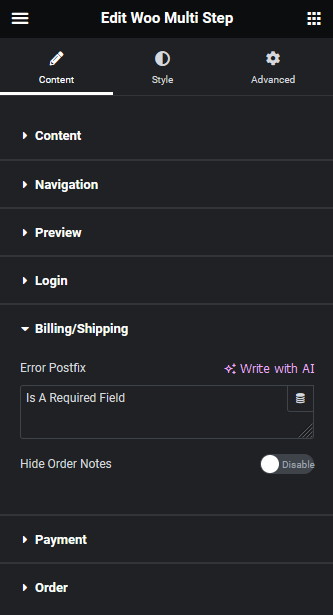
Then by enabling the Hide Order Notes toggle, you can hide the Order notes field from the form.
Payment
From the Place Order field, you can edit the place order button text on the payment step.
Order
From the Your Order field, edit the order summary section title.
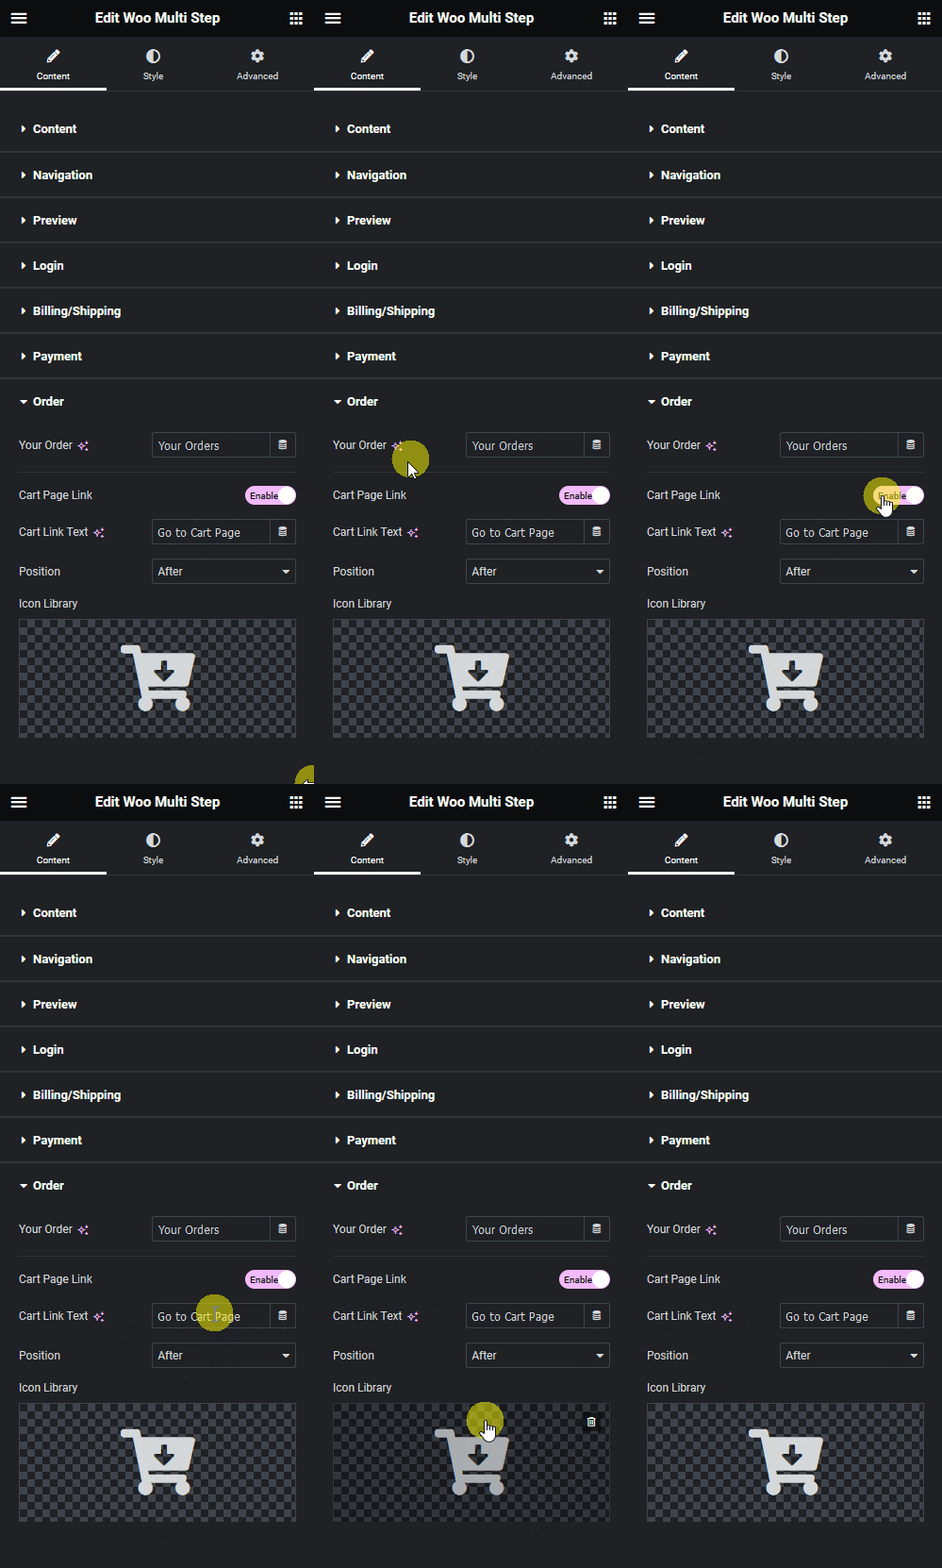
Then by enabling the Cart Page Link toggle, you can add a button for the cart page in the order summary section.
When enabled you can edit the button text from the Cart Link Text field.
You can add an icon to the button from the Icon Library section and manage its position from the Position dropdown.
From the Style tab, you can customize the page further.
Now, you’ll see a beautiful multi step checkout with buttons for easy navigation.
Read Further: How to Create a WooCommerce Order Tracking Page in Elementor?

