Are you looking for an Elementor form builder plugin to add contact forms to your site? Or do you have a business that needs more complex forms to generate leads and register users?
Your search for the best WordPress forms plugin ends here.
Having even a simple contact form on your website can improve your site’s user experience. It gives a professional outlook and lets users send inquiries and feedback directly to you.
With the best form plugin for Elementor, you can use forms to build email lists, register new users, and take bookings for your products and services.
You can also customize the look of these online forms. WordPress forms plugins will let you stylize your forms to match your brand’s visual identity.
But the WordPress repository is filled with form builders, so which one should you choose?
To help you pick the best form builder for WordPress, we have put together a list of the top 5 Elementor form builder plugins. This blog will give you a complete breakdown of the features and pricing of these plugins.
We will also help you stylize these forms in Elementor using widgets instead of shortcodes.
So, let’s get started!
What is an Elementor Form Builder Plugin?
Elementor is a great page builder with a comprehensive list of features and widgets you can add to your website. But it lacks complex widgets such as a form. That is where the Elementor form builder plugin comes in.
An Elementor form plugin for WordPress lets you add form widgets to your website. You can also customize looks by tweaking fonts, colors, and design.
You can also pick from different types of forms, including feedback forms, booking forms, user registration forms, donation forms, and more.
Here is a sample WordPress form styled using The Plus Addons for Elementor’s Contact Form 7 Style widget without any code

Best Elementor Form Builder Plugins
Now, let us have a look at the top 5 Elementor form builders for WordPress:
| Sr. No. | Form Builder | Price |
|---|---|---|
| 1 | Gravity Forms | $59 |
| 2 | Everest Forms | Free + $69 |
| 3 | Contact Form 7 | Free |
| 4 | Ninja Forms | Free + $99 |
| 5 | WP Forms | Free + $99 |
This comparison list is not legally binding. If you find any discrepancy, please feel free to notify us.
1. Gravity Forms

The first WordPress form plugin you should check out is Gravity Forms. It is a premium plugin that has been quite popular among WordPress users ever since its launch in 2009.
This WordPress Form provides 30+ form fields with field validation settings. Also, you can add file uploading fields in your form so that your user can send files directly to your server.
The Gravity Forms plugin will let you create simple forms as well as complex multi-page forms. But being a paid product, it is a more suitable option only if you have a website that needs plenty of advanced form options.
Forms you create using the Gravity Forms plugin will be responsive and decent-looking. In addition, your forms can have custom field types based on the input you want from the visitors. And you receive notifications every time a user inputs details in your forms.
Key Features of Gravity Forms
Here are some essential features available in Gravity Forms plugin:
- Drag-and-Drop Form Editor: Gravity Forms comes with a visual drag-and-drop interface. So, it is easier to pick a design, select components, and edit your form in WordPress without coding.
- Multi-Column Layouts: You can add multiple columns to a form. These columns house fields for your form, and you can even tweak the width of columns.
- Conditional Logic: Depending on visitors’ input, you can show/hide fields, sections, and pages. As a result, you can tailor forms to each individual’s responses.
- Digital Signatures: Your user can sign forms electronically by using touchscreen devices.
- Spam Filters: You can add Google ReCAPTCHA to prevent spam form submissions.
Are you tired of spam on your forms? Then, check out our guide on permanently stopping Elementor contact form spam.
How to Style Gravity Forms in Elementor?
To style Gravity Forms, you’ll need extensions for Elementor Form, you can follow these simple steps:
- Ensure that the Gravity Forms plugin is installed and activated on your WordPress website.
- Create a new form and select entries and settings.
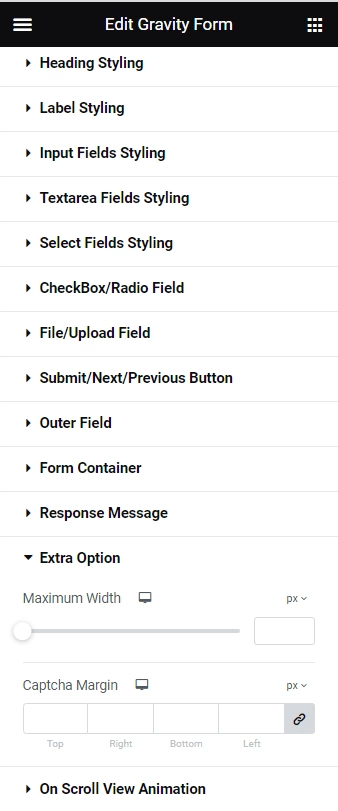
- Install the Gravity Form styler widget from The Plus Addons for Elementor. This widget enables you to customize every part of the form, including the field and form button, to match your brand’s style.
- Once you have installed the widget, you can start styling your form by clicking on the Style tab in Elementor’s visual editor. You will see several sub-tabs that allow you to style different aspects of your form without having to write any code.
- To style the input fields of your Gravity Form, go to the Style tab and select Input Fields Styling. Similarly, you can style the Text area of Gravity Forms in Elementor by following similar steps.
- Finally, ensure that you maintain the form style by setting a style for the input fields and text area.
Here’s a video of styling Gravity Form
Pricing of Gravity Forms
The Basic license is the most affordable option, starting at $59, and provides support for a single website. The Pro license, which costs $159, supports up to three websites and includes additional features such as priority support and access to more add-ons.
For users who need to manage multiple websites or require more advanced features, the Elite license is the best option. At $259, it provides unlimited site support and access to all of Gravity Forms’ features and add-ons, as well as priority support.
Pricing of Gravity Forms Elementor Styler
The Gravity Form Styler widget from The Plus Addons for Elementor is included in the free plan, which means that users can access this feature without having to pay anything.
2. Everest Forms

If you want an easy-to-use form plugin for your WordPress site, Everest Forms should be on your wish list. It is a powerful form builder that provides prebuilt and customizable form templates to quickly add a form to your website.
If you want to create forms from scratch, Everest Forms also provides a built-in drag-and-drop editor that you can use to create custom forms. Besides, the interface of the plugin’s back end is quite user-friendly. You can access all plugin options from the WP dashboard itself.
Leverage the power of AI with its AI contact form by which you can integrate interactive chatbots, generate AI-based email notifications, and many more. Not only that you can also collect the geolocation data of your user who submitted the forms.
Everest Forms also has tons of customization options to tweak the appearance of a form. And if you want more features, upgrade to the pro version of the Everest Forms plugin or install extra add-ons.
Key Features of Everest Forms
Below are the key features of the Everest Forms plugin:
- Premade Templates: Everest Forms offers a wide range of prebuilt forms tailored to perform different tasks. You get readymade forms for quote requests, job applications, surveys, registrations, and more.
- Unlimited Form Fields: With Everest Forms, you can create unlimited forms with unlimited fields. You can add items from general, advanced, payment, and survey field categories.
- Form Delivery: The plugin lists entries from a form submission in an entries dashboard instead of using email delivery.
- Form Customization Options: Everest Forms’ built-in designer allows you to modify your forms’ visual outlook. Without coding, you can tweak font style, color, background, spacing, etc.
- Advanced Functionalities: Everest Forms allows you to convert form submissions into PDF files automatically. Besides, the plugin also supports automatic email notifications.
How to Style Everest Forms in Elementor?
To style Everest Forms in Elementor, you can follow these simple steps:
- Make sure that the Everest Forms plugin is installed and activated on your WordPress website.
- Create a new form and configure the entries and settings.
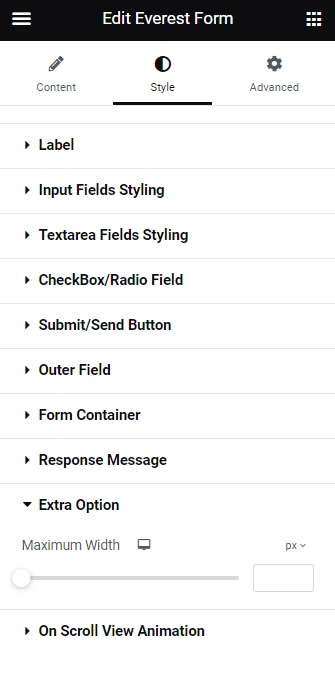
- Add the Everest Form styler widget from The Plus Addons for Elementor. This widget allows you to personalize all aspects of your form, including the fields and form button, to match your brand’s appearance.
- Once the widget is installed, you can begin customizing your form by selecting the Style tab in Elementor’s visual editor. You will find various sub-tabs that enable you to customize different parts of your form without needing to code.
- To customize the input fields of your Everest Form, go to the Style tab and choose Input Fields Styling. Similarly, you can style the Text area of Everest Forms in Elementor by following analogous steps.
- Lastly, ensure that you maintain your form’s style by applying a consistent style to the input fields and text area.
Here’s a video of styling Everest Form
Pricing of Everest Forms
Everest Forms’ free version is available to download on the WordPress directory. The premium version with advanced features starts from $69/year.
Pricing of Everest Forms Elementor Styler
Users can access the Everest Form Styler widget from The Plus Addons for Elementor for free, as it is included in the free plan. This means that they can use this feature without incurring any costs.
3. Contact Form 7
Third on our list is Contact Form 7, a free form builder for WordPress. As the name suggests, it is one of the best contact form plugins for Elementor tailored for creating simple forms.
With this free WordPress form builder plugin, you can add all the essential elements like text fields, checkboxes, and dropdown menus to your forms. Besides, you can integrate the plugin with spam protection tools for free, making it the best form plugin for WordPress Elementor.
If you are a beginner with no expertise in HTML, it is important to note that this free-form plugin for Elementor does not come with a drag-and-drop builder. But you can use extensions such as The Plus Addons for Elementor to add a visual form builder to create forms using the Contact Form 7 with ease.
Key Features of Contact Form 7
Here are some features you get with Contact Form 7:
- Basic Contact Forms: The plugin is perfect for creating basic form types. You can also add text boxes, checkboxes, radio buttons, menus, etc., to these forms.
- Spam Protection: To prevent spam form entries, you can integrate Google ReCAPTCHA with Contact Form 7.
- Unlimited Forms: The plugin allows you to create unlimited forms in WordPress.
- Free Addons: Even though the plugin is very basic, you can add more options using addons. There is an expansive list of community-created add-ons as well you can access for free.
How to Style Contact Form 7 in Elementor?
To style Contact Form 7 in Elementor, you can follow these simple steps:
- Verify that the Contact Form 7 plugin is installed and activated on your WordPress website.
- Build a new form and configure the entries and settings.
- Add the Contact Form 7 styler widget from The Plus Addons for Elementor. This widget allows you to personalize all parts of the form, including the field and form button, to match your brand’s appearance.
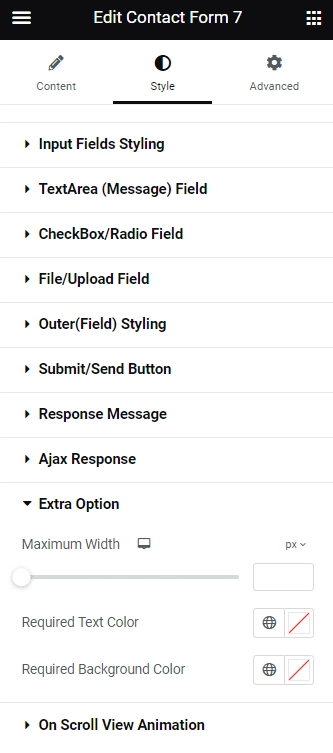
- Once the widget is installed, you can begin customizing your form by clicking on the Style tab in Elementor’s visual editor. You will find various sub-tabs that enable you to customize different parts of your form without needing to write any code.
- To customize the input fields of your Contact Form 7, go to the Style tab and select Input Fields Styling. Similarly, you can style the Text area of Contact Form 7 in Elementor by following analogous steps.
- Lastly, make sure to maintain your form’s style by applying a consistent style to the input fields and text area.
Here’s a video of styling Contact Form 7
Pricing of Contact Form 7
You can download Contact Form 7 for free from the WordPress repository.
Pricing of Contact Form 7 Elementor Styler
The Contact Form 7 Styler widget from The Plus Addons for Elementor is included in the free plan, which means that users can access this feature without having to pay anything.
Check out our blog to Explore the top 5 WordPress theme builders that will help you create responsive websites with ease
4. Ninja Forms

Coming in at the fourth spot is a freemium WordPress forms plugin named Ninja Forms. You do not need to be a code ninja to work with this plugin because you get a beginner-friendly UI, pre-built form templates, and a drag-and-drop builder.
You can create visually appealing and fully functioning forms using the free version of Ninja Forms alone. But you can upgrade to the premium version to enjoy integrations with CRM software and email marketing tools.
You can also accept payments using Paypal and credit card directly from your forms.
Key Features of Ninja Forms
See the list of Ninja Forms plugin’s features below:
- Pre-built Templates: You can use pre-built templates to create fully functional forms in minutes. You can pick from different types of forms like registration forms, payment forms, email subscription forms, etc.
- Drag-and-Drop Builder: With this best form plugin for Elementor, you get extensive customization options that you can add to your forms with ease using the plugin’s built-in drag-and-drop builder.
- Ajax Submissions: The plugin supports Ajax form submissions, i.e., data entered by users is sent to the back end, eliminating the need to reload the webpage.
- Premium Extensions: Upgrading to the premium version of this plugin will give you access to advanced features, third-party plugins, and extensions.
How to Style Ninja Forms in Elementor?
To style Ninja Forms in Elementor, you can follow these simple steps:
- Make sure that the Ninja Forms plugin is installed and activated on your WordPress website.
- Create a new form and configure the entries and settings.
- Add the Ninja Forms styler widget from The Plus Addons for Elementor. This widget allows you to personalize all parts of the form, including the field and form button, to match your brand’s appearance.
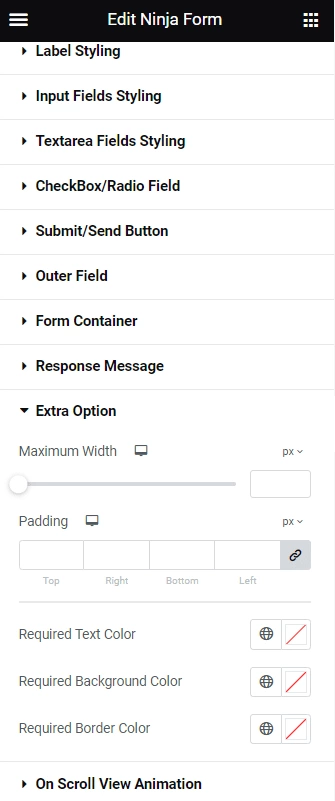
- Once the widget is installed, you can begin customizing your form by clicking on the Style tab in Elementor’s visual editor. You will find various sub-tabs that enable you to customize different parts of your form without needing to write any code.
- To customize the input fields of your Ninja Forms, go to the Style tab and select Input Fields Styling. Similarly, you can style the Text area of Ninja Forms in Elementor by following analogous steps.
- Finally, make sure to maintain your form’s style by applying a consistent style to the input fields and text area.
Here’s a video of styling Ninja Form
Pricing of Ninja Forms
Ninja Forms core plugin is listed on the WordPress repository and available to download for free. The premium plans start from $99/year.
Pricing of Ninja Forms Elementor Styler
The Ninja Form Styler widget from The Plus Addons for Elementor is included in the free plan, which means that users can access this feature without having to pay anything.
5. WP Forms

Taking the last spot in our list of the best form builders for Elementor is WP Forms. This Elementor free form plugin is easy to use and offers a decent mix of features and customizations, even in the base plugin, WP Forms Lite.
This Elementor form provides 1800+ pre-build templates so that you don’t have to design forms from scratch. If you have a membership site and you want to keep the form for the members-only then you can do it easily by using its form locker addon also you can make your forms password-protected.
This is the best drag-and-drop form builder for Elementor. You can also integrate email automation and CRM tools with this plugin. Besides, you can enable file uploads and integrate payment gateways into your forms.
Lastly, you will able to connect your forms AcitveCampaign addon by which you can collect form data and automate email marketing campaigns.
Key Features of WP Forms
Here are some key features of the WP Forms plugin for WordPress:
- Conditional Logic: You can toggle fields, sections, and pages based on user inputs using conditional logic.
- Unlimited Forms: The form builder lets you create unlimited forms in WordPress. Also, there is no limit on the number of responses you can collect.
- Spam Prevention: WP Forms supports ReCAPTCHA, which you can use to prevent spam submissions.
- Instant Notifications: You receive email notifications for every interaction and form abandonment.
How to Style WP Forms in Elementor?
To style WP Forms in Elementor, you can follow these simple steps:
- Verify that the WP Forms plugin is installed and activated on your WordPress website.
- Build a new form and configure the entries and settings.
- Add the WP Forms styler widget from The Plus Addons for Elementor. This widget allows you to personalize all parts of the form, including the field and form button, to match your brand’s appearance.
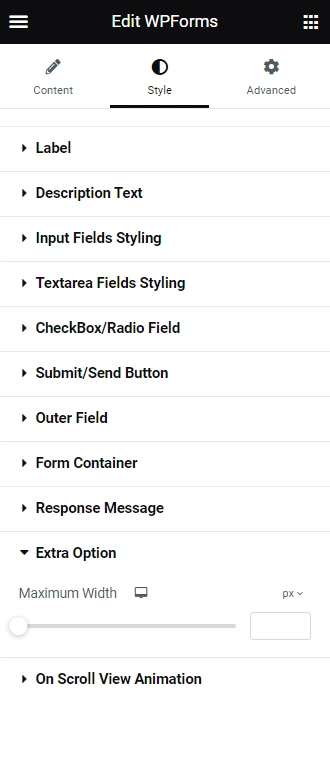
- Once the widget is installed, you can begin customizing your form by clicking on the Style tab in Elementor’s visual editor. You will find various sub-tabs that enable you to customize different parts of your form without needing to write any code.
- To customize the input fields of your WP Forms, go to the Style tab and select Input Fields Styling. Similarly, you can style the Text area of WP Forms in Elementor by following analogous steps.
- Finally, ensure that you maintain the form style by setting a consistent style for the input fields and text area.
Here’s a video of styling WP Form
Pricing of WP Forms
WP Forms Lite is free to download. It also has premium plans starting from $99/year.
Pricing of WP Forms Elementor Styler
Users can access the WP Forms Styler widget from The Plus Addons for Elementor for free, as it is included in the free plan. This means that they can use this feature without incurring any costs.
Suggested Reading: Looking for Best Elementor Addons in 2025? (With Comparison Table)
Which Elementor Form Builder Plugin Should You Use?
That was our list of best Elementor form builder plugins. So, which one should you pick? The absolute best WordPress form builder will vary from person to person as everyone has different requirements. So, consider your needs and wants to choose the best form plugin for WordPress Elementor.
For instance, do you want to create simple contact forms or add complex functions like payment gateway or file upload? Are you comfortable working with shortcodes, or do you prefer a drag-and-drop form builder Elementor? Or do you want to create forms from scratch or use prebuilt widgets to create forms on the go?
Considering these questions will help you pick the right form builder plugin for your WordPress website. And once you have chosen a plugin, you will need an Elementor form addon to stylize your forms. Check out POSIMYTH Innovations’ The Plus Addons for Elementor, the one addon for all your form builder plugins.
The Plus Addons for Elementor gives you access to over 120+ widgets, including widgets for all popular form builder plugins. For just $39/year, you also get 100+ Elementor templates, regular updates, and support. Besides, you can use drag-and-drop tools to assemble forms, edit their look and feel, and add advanced features without hassle.
FAQs on Best Elementor Form Builder Plugins
Are there any free Elementor form builder plugins available?
How to add form in WordPress using Elementor?
1. Install and activate a form builder plugin compatible with Elementor (e.g., “Ninja Forms,” “WPForms”).
2. Create a new page or edit an existing one with Elementor.
3. Drag and drop the “Form” widget onto your desired section.
4. Configure the form settings and fields using the form builder’s interface.
5. Save your changes and publish the page to display the form.
What features should I look for in an Elementor form builder plugin?
Can I customize the styling of my forms using Elementor form builder plugins?
However, if you are not a fan of coding, you can try an easier styling method by downloading The Plus Addons for Elementor. It comes with widgets for all popular form plugins. Once The Plus Addons is active, you can use drag-and-drop tools to create and edit forms.
