Are you new to the world of WordPress? Here’s your guide on how to create Elementor header and footer.
The header and footer are mainstays in 9 out of 10 websites on the Internet. We are so accustomed to these elements that a website lacking them often seems incomplete.
These two components are not only essential from the design’s perspective but also enable useful functionalities on the site, be it navigation, brand promotion, or call-to-actions.
On WordPress, there are many ways to create headers and footers. You can simply use prebuilt templates or get hands-on with PHP and CSS editing.
For those who want to build custom designs without using code, Elementor header & footer builder is the way to go.
So, join us as we walk you through the steps to create custom headers & footers in Elementor.
What is Elementor Header?
A header is the topmost part of a webpage. Since it is the first component visitors notice, designers use it to grab their attention.
They use it to house elements like the brand logo, navigation menu, search bar, cart, login button, etc. The header generally remains consistent across pages, but you can always create unique designs for each page on your site.
To help you create headers, Elementor provides a header builder. It lets you create Elementor header templates either using prebuilt layouts or you can start anew and use various header widgets to make unique designs.
What is Elementor Footer?
A footer appears at the bottom of a site. Like the header, it also remains uniform across the entire site.
It features elements like links to a copyright notice, privacy policy, and terms of use. You can also display contact details, a map, a registration form, etc.
It is an effective method to keep visitors engaged after they reach the end of a webpage.
Elementor also has a dedicated footer builder to help you create unique Elementor footer templates.
There are plenty of prebuilt footer designs you can use, or you can build your custom designs using widgets like The Plus Addons for Elementor.
What Will You Need to Create Elementor Header & Footer?
Before we can create headers and footers in Elementor, we need to assemble a set of essential WordPress website design tools.
We’ll need:
1. Install Elementor
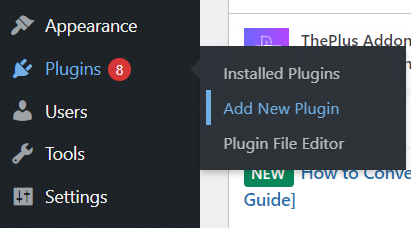
First and foremost, we need the Elementor page builder. For that, head over to the WordPress side menu and select Plugins > Add New Plugin.
Then, search for Elementor, Install the plugin, and Activate it.
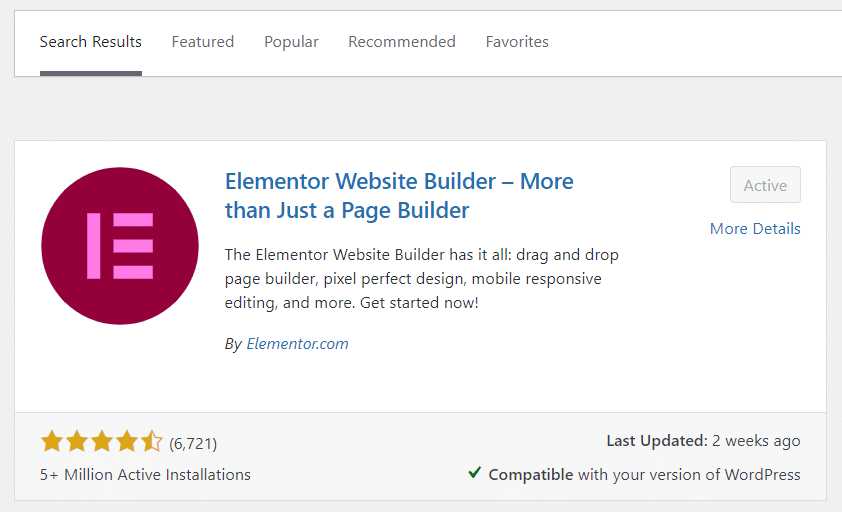
This is the base version of the Elementor page builder, which comes with limited widgets and functionalities. To use the Elementor header & footer builder, we’ll need the premium version.
The Elementor Pro page builder also includes extra widgets for UI elements, WooCommerce, pages, single posts, and more.
To install Elementor Pro on your WordPress setup, refer to the guide on Elementor’s website: Install & activate Elementor Pro.
2. Install Nexter
While Elementor theme builder lets you design various sections of a site, it has very limited options when it comes to customizations and functionalities.
To make up for that, we’ll need a WordPress theme that also comes with a theme builder.
For this guide, we’ll go with the amazing Nexter theme by POSIMYTH Innovations. Nexter is a blank canvas theme, i.e., you can use it to design every part of your site from the ground up, which also includes Elementor header & footer builder.
The best part is that the theme works with Elementor. It also supports widgets and templates so that you can design sites without coding expertise.
To install Nexter, select Appearance > Themes from the WordPress menu and click Add New Theme.
Search for Nexter, install the theme, and activate it.
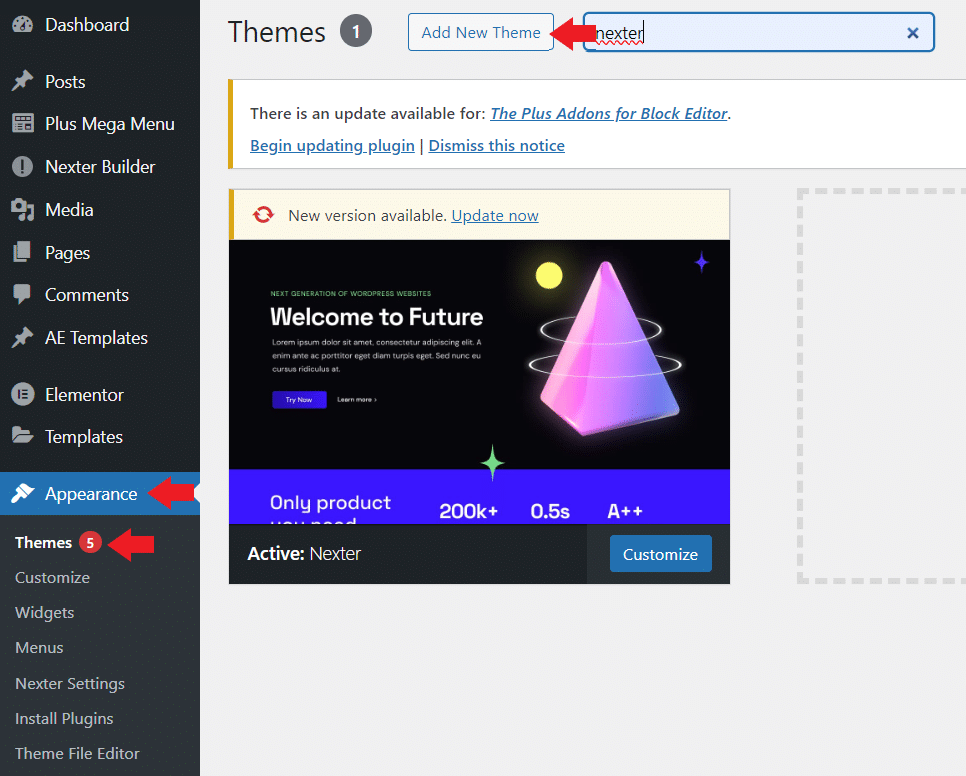
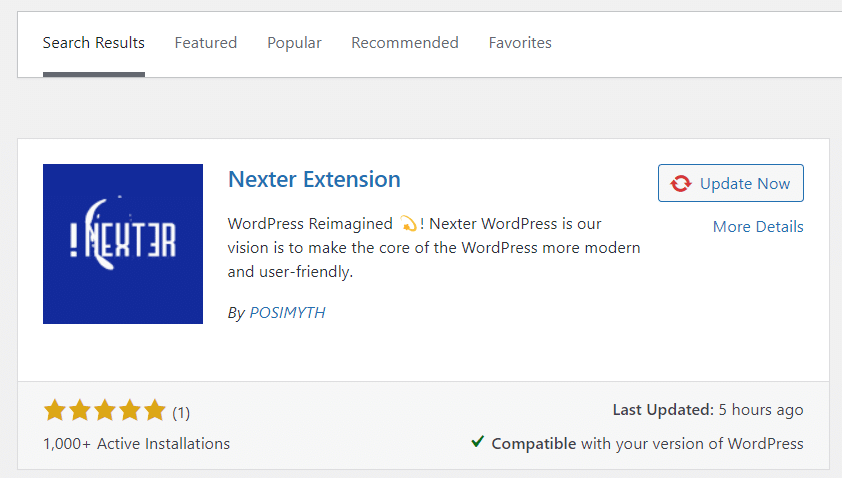
Once you activate the Nexter theme, you’ll need to download the Nexter Extension.
The Nexter Extension comes with tons of features and performance enhancements for the theme.
Head over to the Plugins section, click Add New, search for the extension, and install it.
3. Install The Plus Addons for Elementor
The last thing we’ll need is an addon to get advanced widgets we can use with our custom templates.
We’ll use The Plus Addons for Elementor, another great offering by POSIMYTH Innovations. The addon comes with 120+ widgets and extensions we can use to create unique designs.
You can download The Plus Addons for Elementor from the WordPress Plugins section for free.
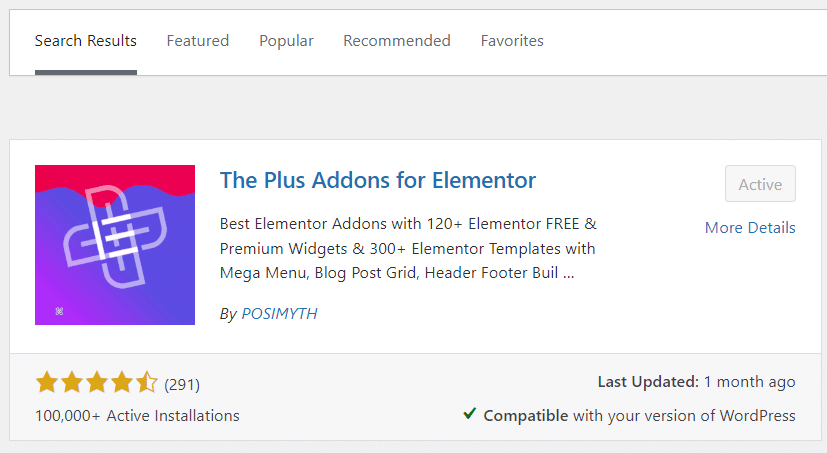
However, we must upgrade to The Plus Addons for Elementor Pro to use its advanced header and footer widgets.
So, follow the simple steps from our guide on how to install & activate The Plus Addons for Elementor PRO.
How to Create Elementor Header (or Elementor Footer) with Nexter & The Plus Addons
With all the necessary plugins installed, we can now begin the design process.
Let’s start by creating an Elementor header template.
Step 1. Create a New Header Template
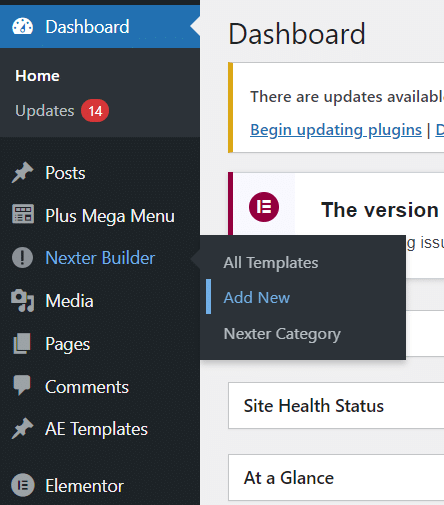
First of all, we need to create a new header template using Nexter theme builder. So, look for the Nexter builder option in the WordPress menu and select Add New.
This will open the Nexter theme builder which has a similar UI to that of the default WordPress editor.
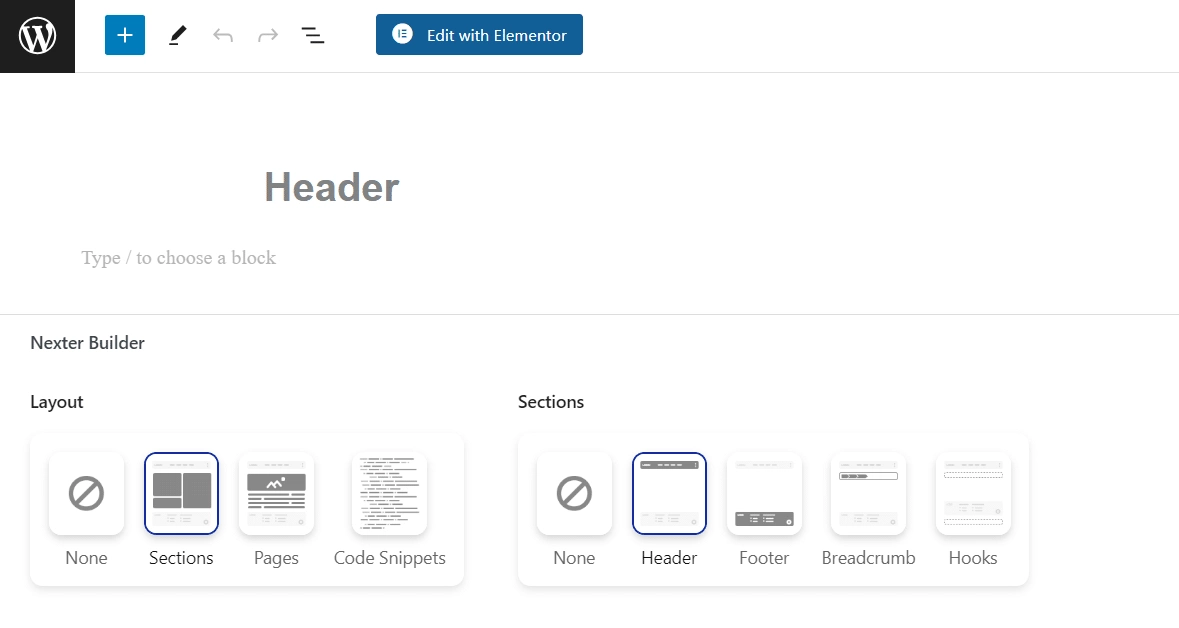
Type the name of your template where it says Enter Title (we entered “Header” here).
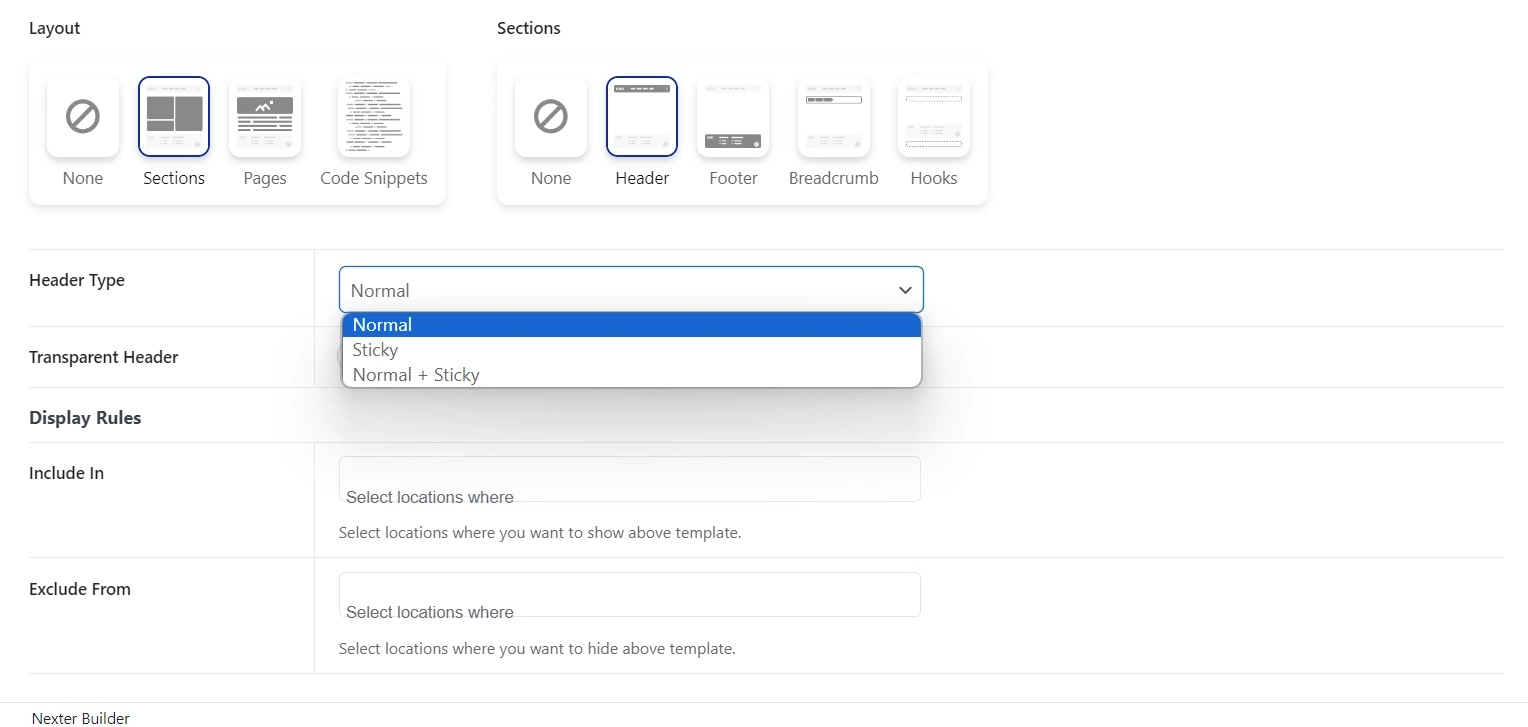
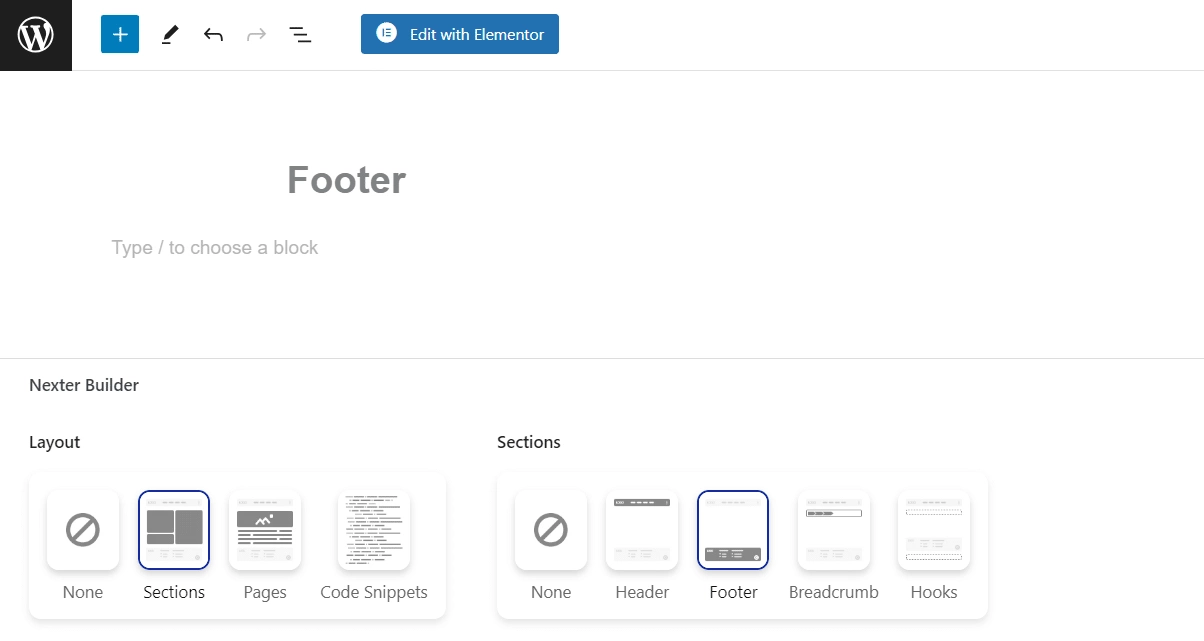
Scroll down, select the Sections option under the Layout column, and then select the Header option under the Sections column.
We can also set our template to be a regular header that scrolls with the page or make it sticky to always remain visible.
Similarly, you can select specific pages where you want (Include In) or don’t want (Exclude From) this header to appear.
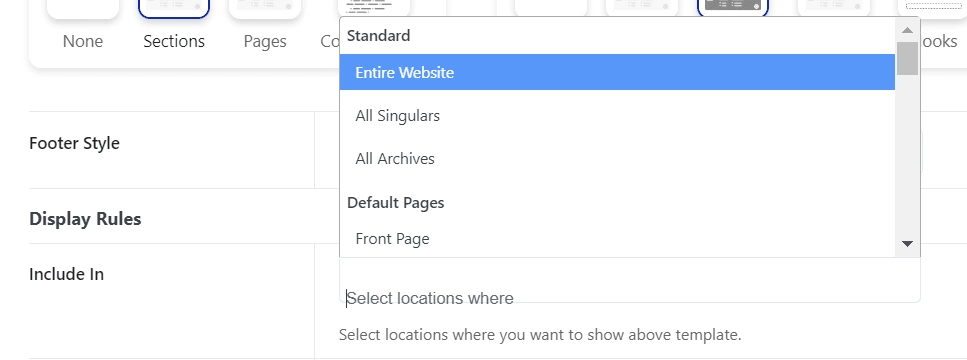
To set this header as the default header for your site, select the option Entire Website in Display Rules > Include In section.
Once you’re ready, click the Publish button that appears at the top-right corner of the screen.
Step 2. Add Widgets to Header in Elementor Page Builder
Our next step is to assemble content within our header.
Thanks to seamless integration between Nexter and Elementor, we can customize our header template using Elementor’s drag-and-drop interface.
Simply click the Edit with Elementor button at the top to get started.

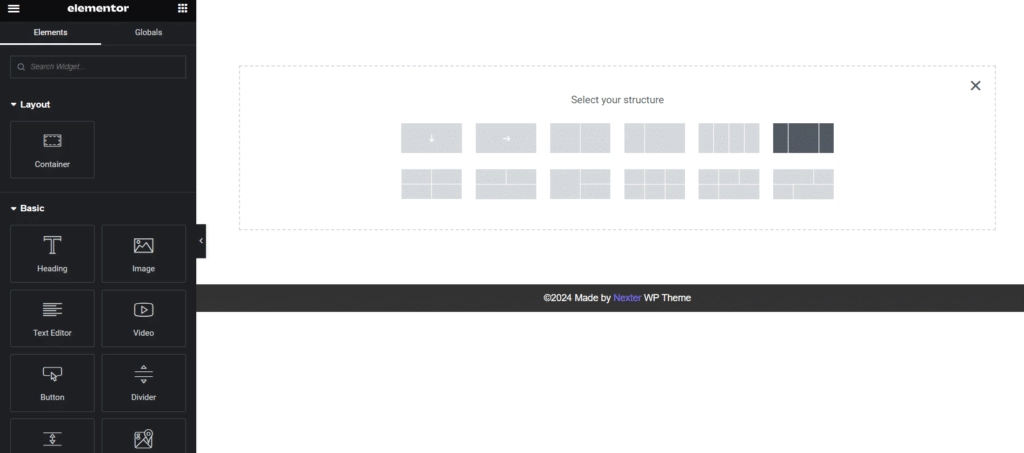
In the Elementor builder, click the plus (+) icon and select a desired structure for your header.
We are going with a three-column layout as we want one column each for the brand column, nav menu, and CTA buttons.
We’ll use specialized header widgets provided by The Plus Addons for Elementor for our template.
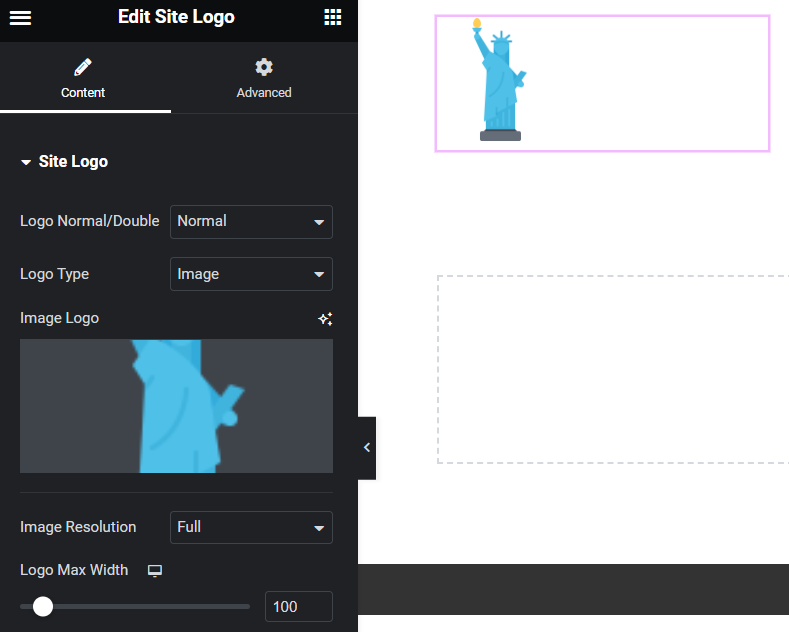
From the widget panel on the left corner, drag and drop the Site Logo widget, and select the image or icon you want to use as the logo.
In the right column, add the Button widget, name it Login, and link it to your site’s registration page.
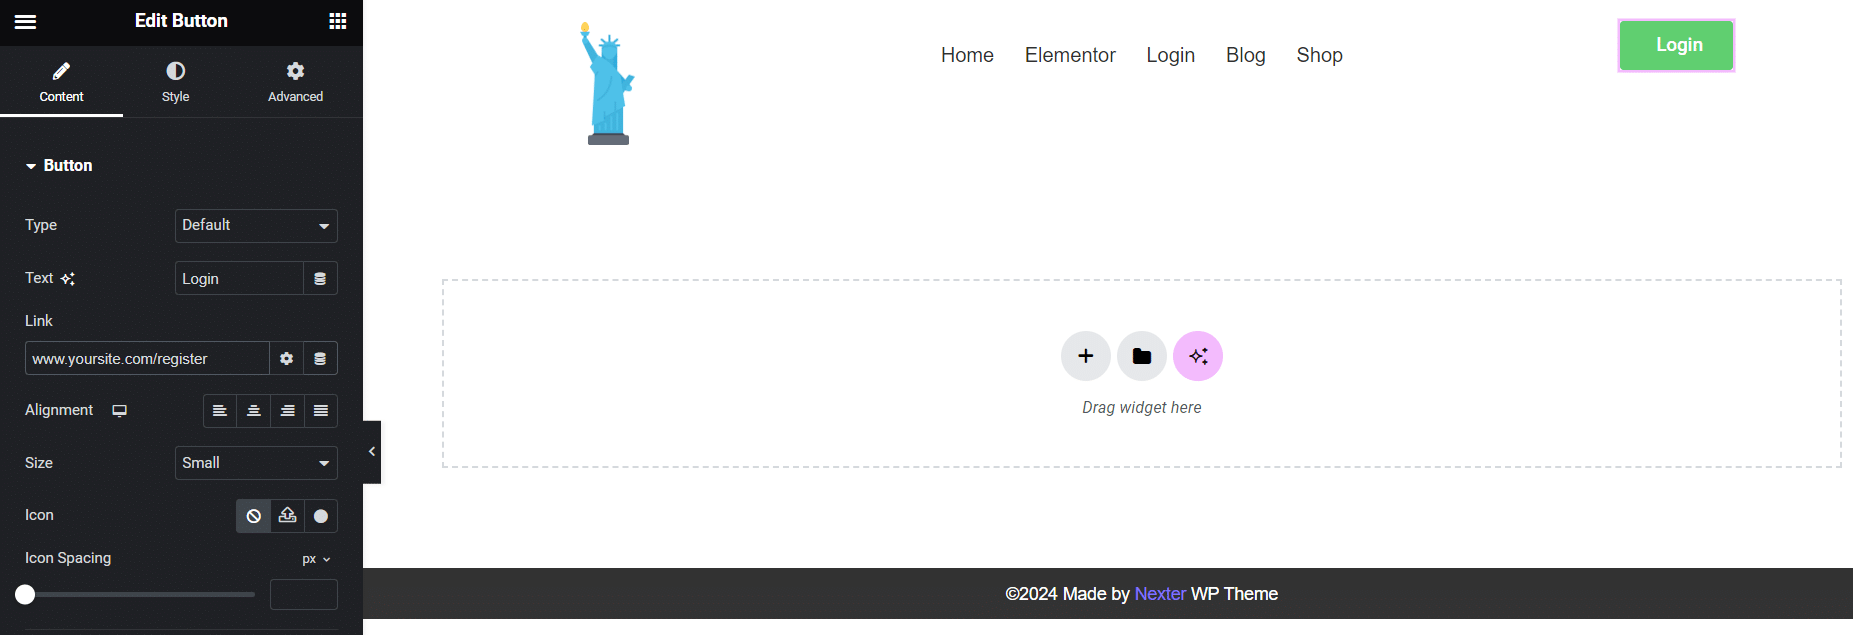
Similarly, add the Navigation Menu widget in the center column. Under the Content tab, select your site’s existing menu.
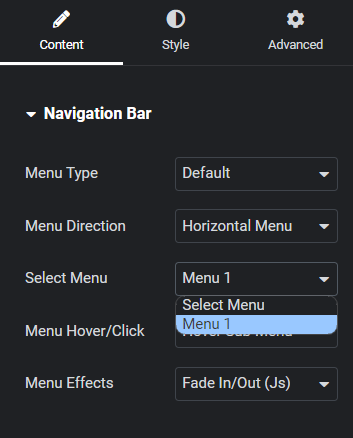
Don’t have a navigation menu on your site yet? Check out our guide on how to create a mega menu for a WordPress site using Elementor.
Step 3. Customize Header Design
After you have added content to your header, it’s time to customize its look and feel.
To stylize your header, simply select the parent container and switch to the Style tab in the Elementor side menu.
There, you can tweak customization options like background color, border, shape divider, etc.
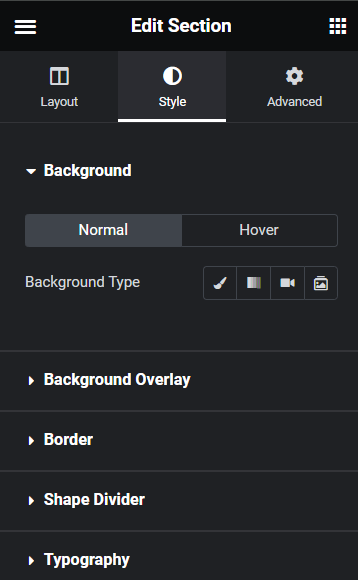
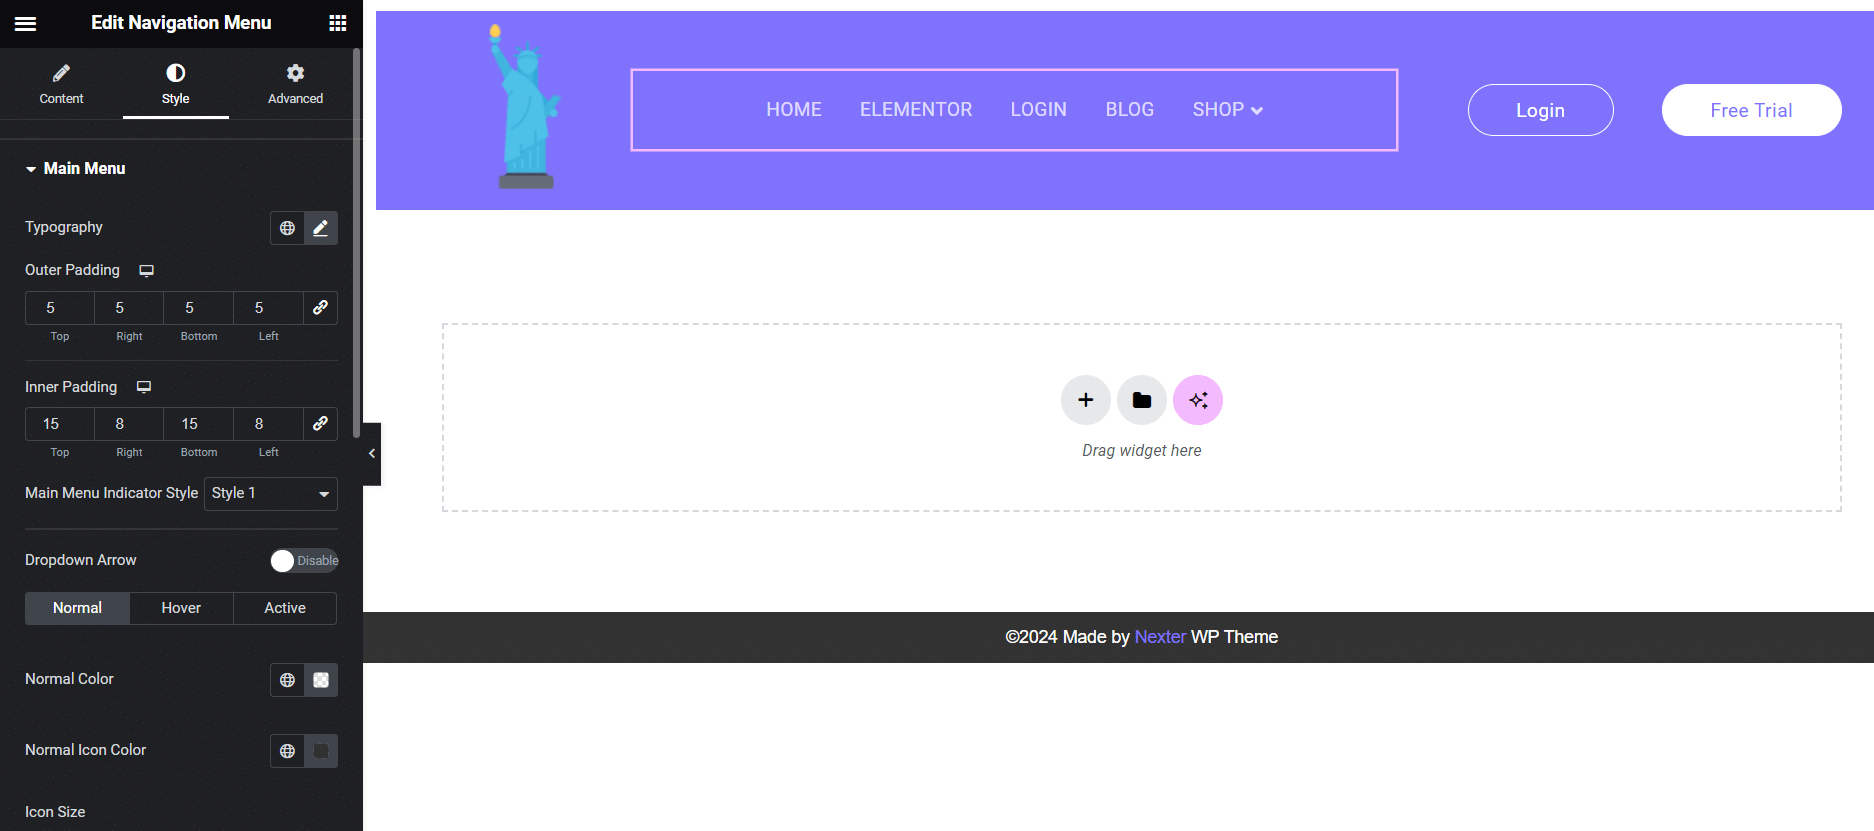
For each widget added to your header, you can also play around with styling options like typography, alignment, background, border, etc.
Just select a widget and experiment with various options in the side menu.
Moreover, you can customize each item’s look when users hover their mouse over them. This adds a subtle layer of interactivity to your header.
Step 4. Save Your Header
Now that we are done with the designing part, we can go ahead and save our newly created template.
Click the Update button to save changes.

This header will now automatically appear on all pages, whether new or existing. Here’s the live version of our custom Elementor header template.
With the header ready, it’s time to design the footer from scratch. You can use the four simple steps shown above to design a custom Elementor footer template as well.
Simply add a new template to the Nexter theme builder, as shown in Step 1. But this time, select the Footer option under the Sections column.
Next, use your learnings from this post and get creative using the above Elementor footer builder!
Further Read: To master the art of designing headers in Elementor, check out our step-by-step guide on how to use Elementor header templates.
Wrapping Up
Headers and footers give your site a professional look and ensure visitors get a consistent user experience across the web pages.
You can also use them to keep the visitors engaged by adding an easy-to-use navigation menu, prominent CTAs, and more.
With the right set of tools, creating headers and footers in WordPress is a cakewalk. Use Nexter theme builder to create a blank canvas upon which you can build a template for the header and footer.
Then, you can customize the template using the Elementor page builder.
However, to get the most out of these sections of your site and make them functional, you’ll need specialized Elementor header widgets.
That’s where the Elementor header & footer builder by The Plus Addons shines.
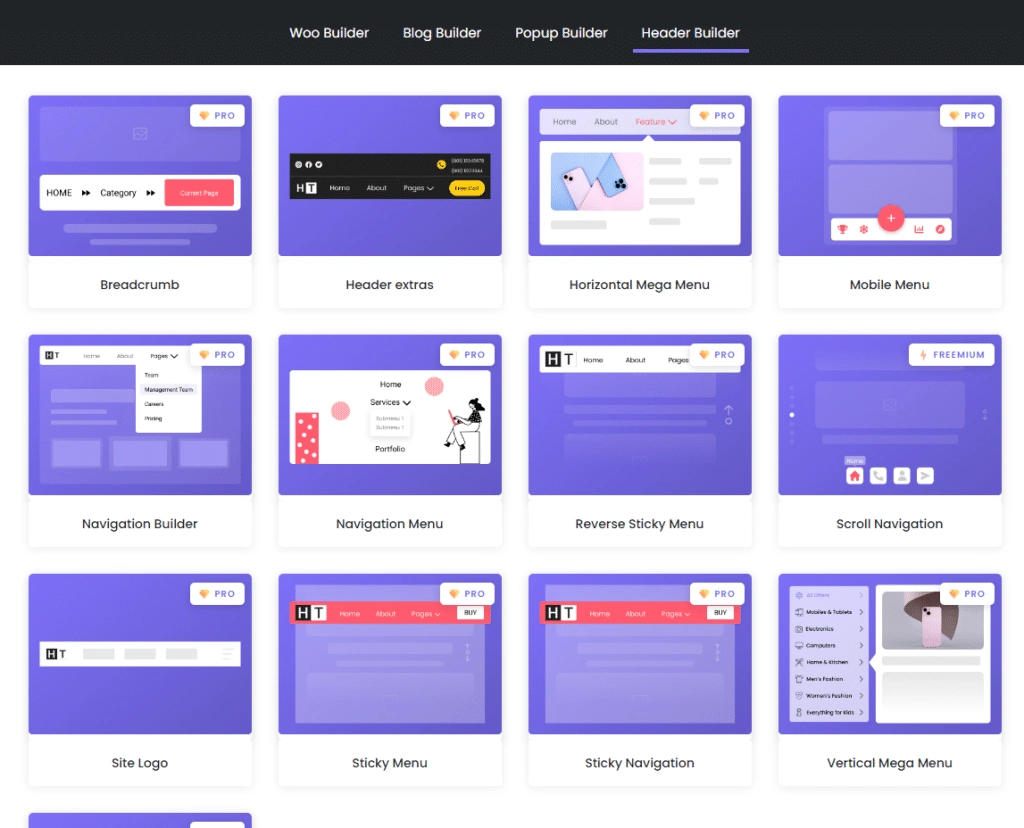
Check the complete list of Header widgets by The Plus Addons
The Plus Addons gives you access to over 35+ FREE Elementor widgets, including a navigation menu, blog builder, buttons, and more.
Not only that, you can unlock the entire catalog of 120+ Elementor widgets, 300+ UI Essential Blocks & 18+ Ready-to-use templates for just $39/year.
