Being a webmaster managing a WordPress site can be daunting, especially when it no longer serves its purpose, whether it’s outdated or underperforming.
Because of all these problems you might think that deleting a WordPress site is only the better option.
No matter you’re running a self-hosted WordPress installation or using WordPress.com, the process requires careful consideration and specific steps to ensure a complete removal.
In this guide, we’ll walk you through the simple yet best way to delete a WordPress site completely, also the best part is that you don’t need to be a tech geek just follow the steps and you are good to go.
Key Takeaways
- Always create a backup before deleting your WordPress site.
- Remove all files, databases, and associated services for complete deletion.
- Consider alternatives like archiving or temporarily disabling your site.
What is the Need for Deleting a WordPress Site?
There are several reasons you might consider deleting a WordPress site. One common scenario is when you’re no longer using the website and want to free up valuable hosting resources.
This can help reduce unnecessary costs and simplify your digital footprint. Another reason to delete a WordPress site is when you’re rebranding or restructuring your online presence.
Sometimes, security concerns might prompt you to delete your site. If your website has been compromised or you suspect it contains malware, removing it can prevent further damage and protect your reputation.
Below are the steps that you should consider if you want to permanently remove your website from the search engine.
How to Completely Delete a WordPress Site [Step-by-Step]
Deleting a WordPress site permanently requires careful consideration and following specific steps. Here’s an outline of what needs to be done:
- Backup Your WordPress Site
- Delete Your Site Files
- Delete WordPress Database
- Delete Domain and Terminate Hosting
- Delete Site Content From Search Engine
- Remove Site from Web Archive
Let’s cover each point in detail below.
1. Backup Your WordPress Site Files and Database
No matter how much you are clear with your decision to delete a WordPress site but still backing up your site data is important.
You want to delete it now but what if you change your mind after 3 or 6 months?
So this precautionary step ensures you have a copy of your content and data should you need it in the future.
To backup your WordPress site, you’ll need to save two main components:
- Files: These include your themes, plugins, uploads, and other site assets.
- Database: This contains your posts, pages, comments, and settings.
When creating your backup, ensure you export it to a secure location. Download the files to your local computer or save them to a cloud storage service.
You can back up your WordPress site by using backup plugins or if you’re technically sound then you can do it manually too.
Let’s take a look at both methods in detail
- Method 1: Backup your site using Backup plugins
There are many WordPress Backup Plugins available that you can use to do this task. Generally, backup plugins provide a convenient way to safeguard your site data without getting your hands dirty.
These tools automate the process, making it easier for you to create regular backups without manual intervention.
Remember to back up both your WordPress files and database. This ensures you have a complete copy of your site, including content, themes, plugins, and settings.
Most backup plugins allow you to store backups on your server, but it’s recommended to use remote storage options like Google Drive, Dropbox, or Amazon S3 for added security.
- Method 2: Backup your site manually using cPanel
cPanel is like a control panel for managing your website. It provides a straightforward way to manually back up your WordPress site.
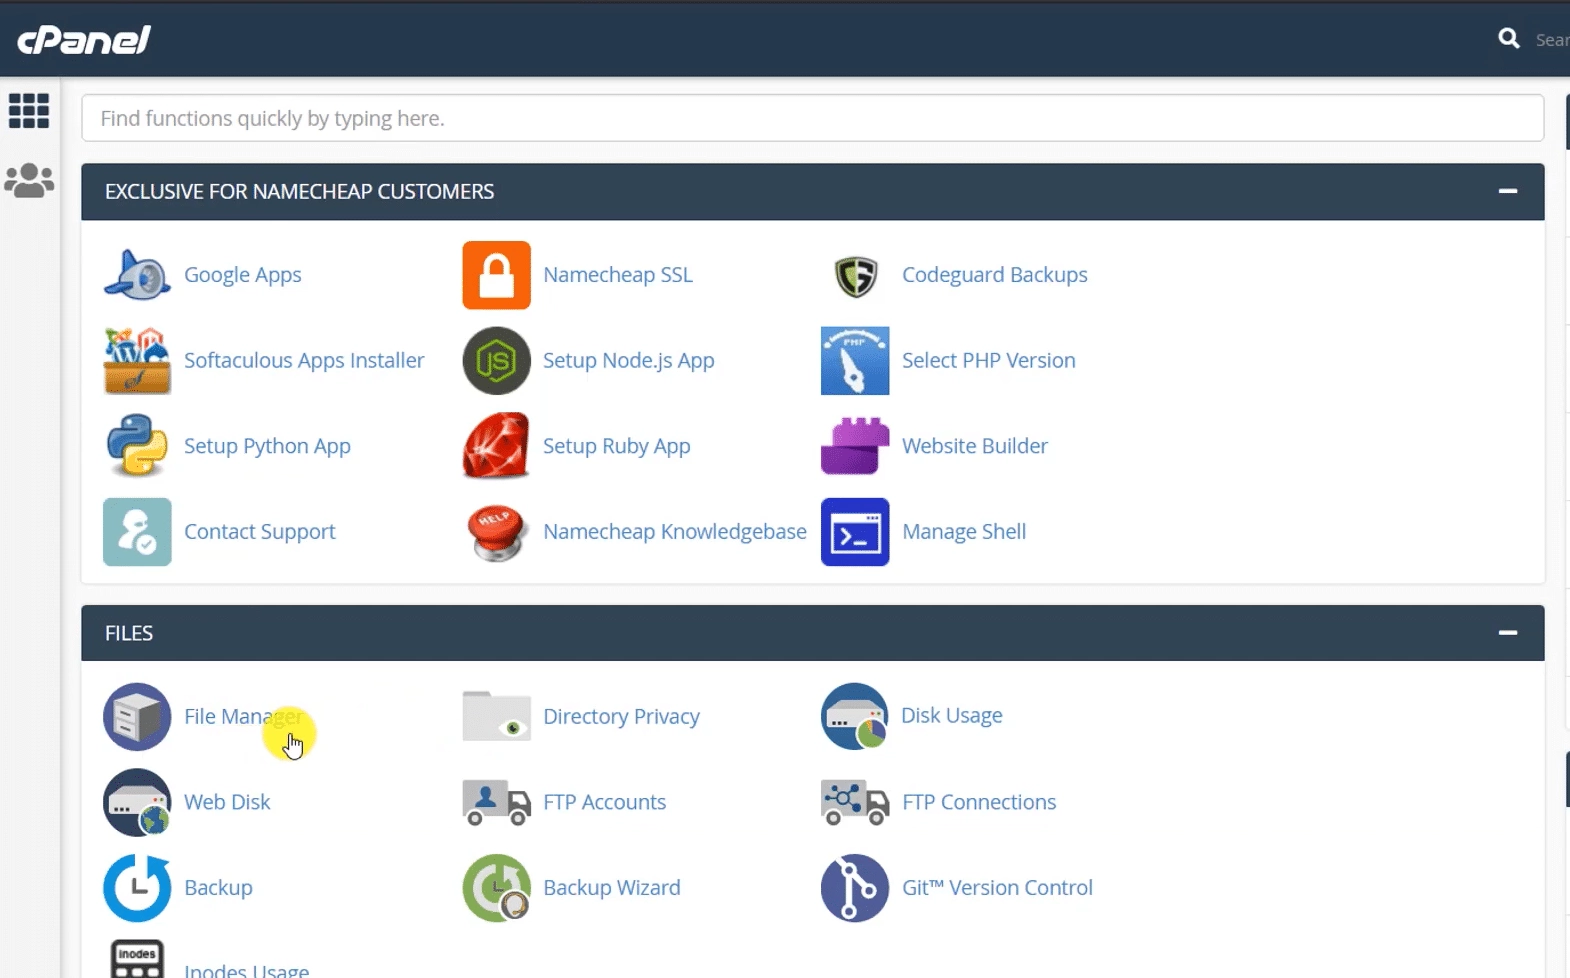
Step 1. Log into your site’s hosting and open the cPanel dashboard, click on the File Manager
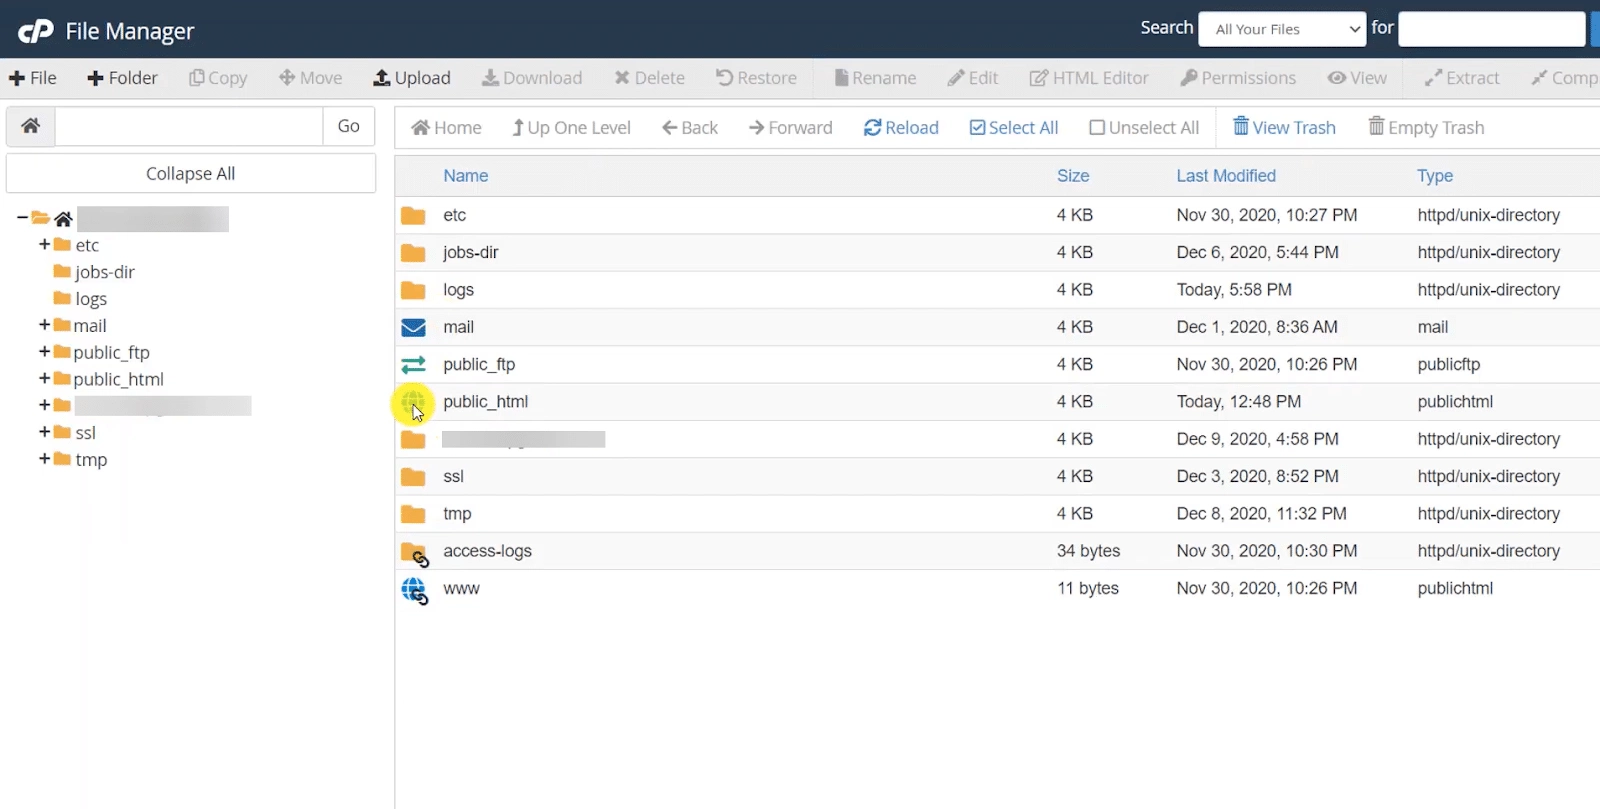
Step 2. In the File Manager, Look for the public_html file and open that file.
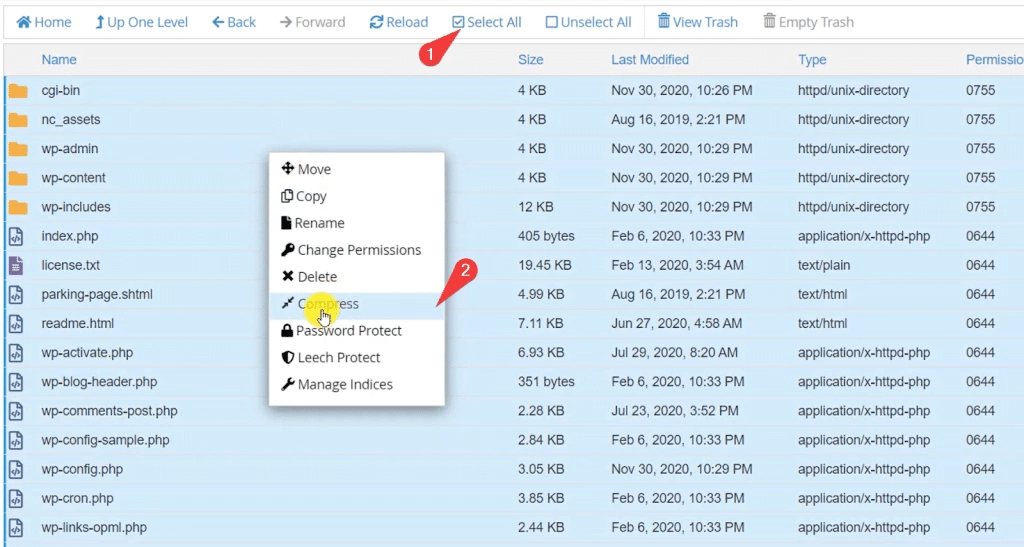
Step 3. After opening you will see all your website files, so what you have to do is click on Select All then right-click and click on Compress.
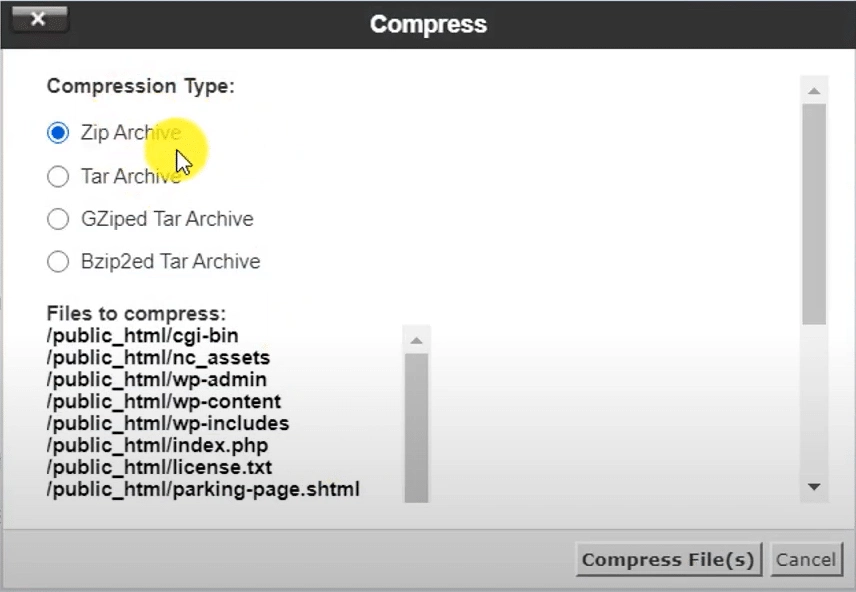
Step 4. After clicking on compress a dialogue box will appear, in that click on zip archive and click on compress files.
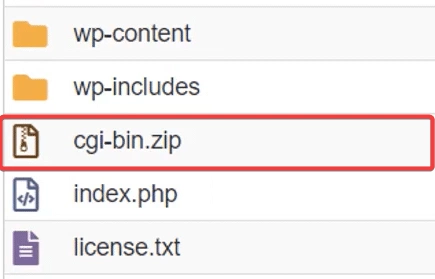
Now you will see a zip file is created you can rename it and also you can download it and store it securely on your computer.
2. Delete Your Site Files
After successfully backing up your WordPress site files, it is time to delete your WordPress site. As we discussed earlier two major components of your WordPress site are files and Database.
So now let’s start with deleting files first.
Here again, we’ll be using the cPanel which you can access by logging into your site’s hosting
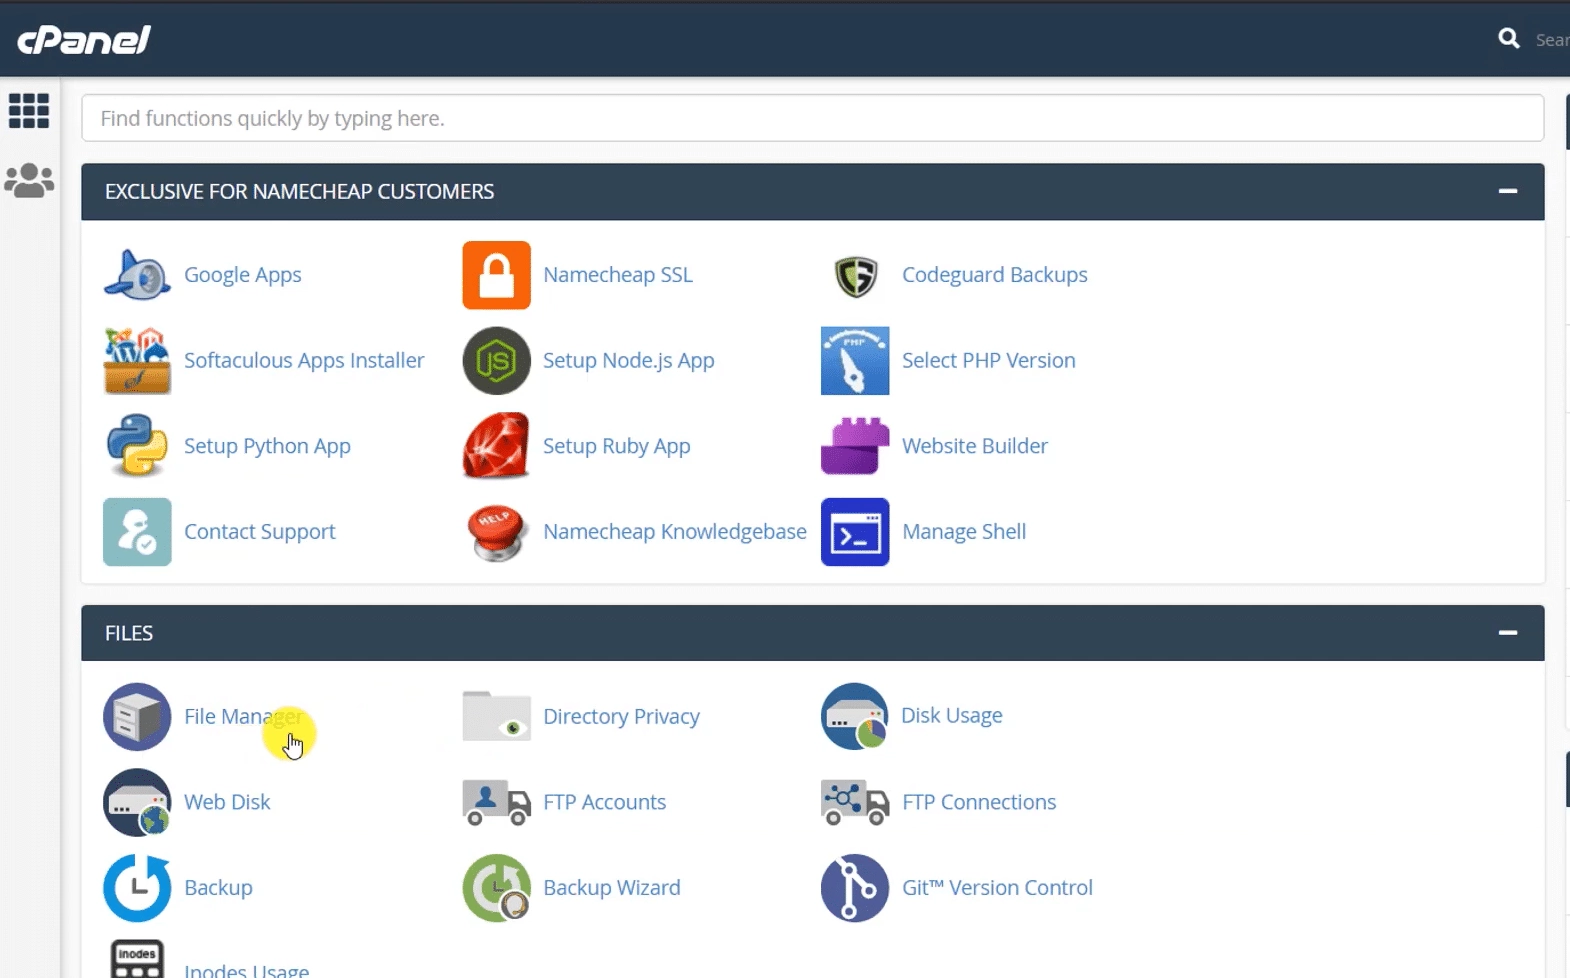
Step 1. In the cPanel dashboard click on the File Manager.
Step 2. In the File Manager look for the Public_html file and in that file, you will see all your website files, simply click on Select All and Delete.
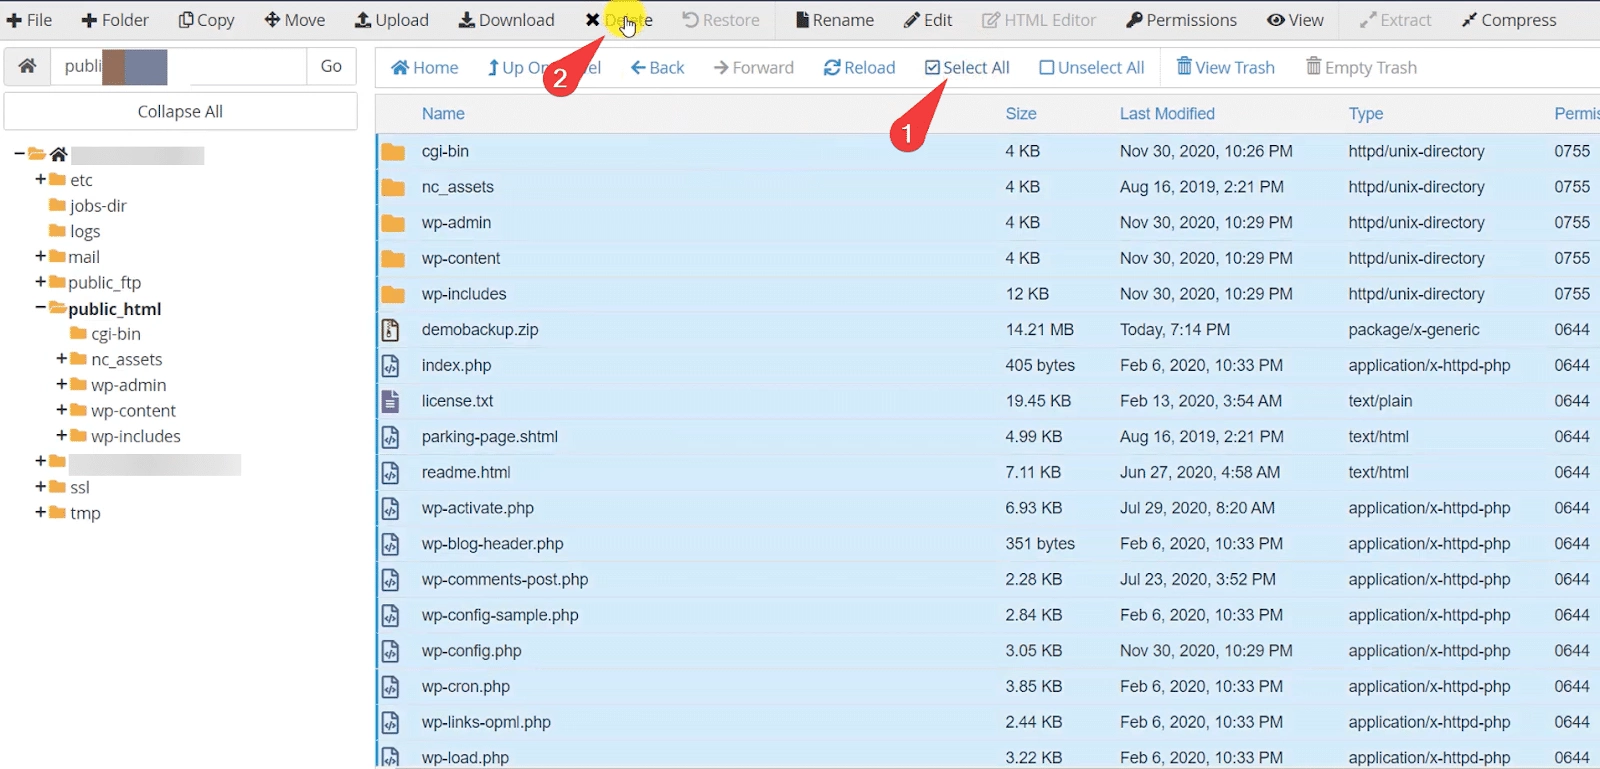
Now your WordPress website files are deleted.
3. Delete WordPress Database
Deleting the database is also an important step along with deleting the website files because it stores sensitive data such as your posts, pages, user info, and settings.
So let’s delete the website database using cPanel.
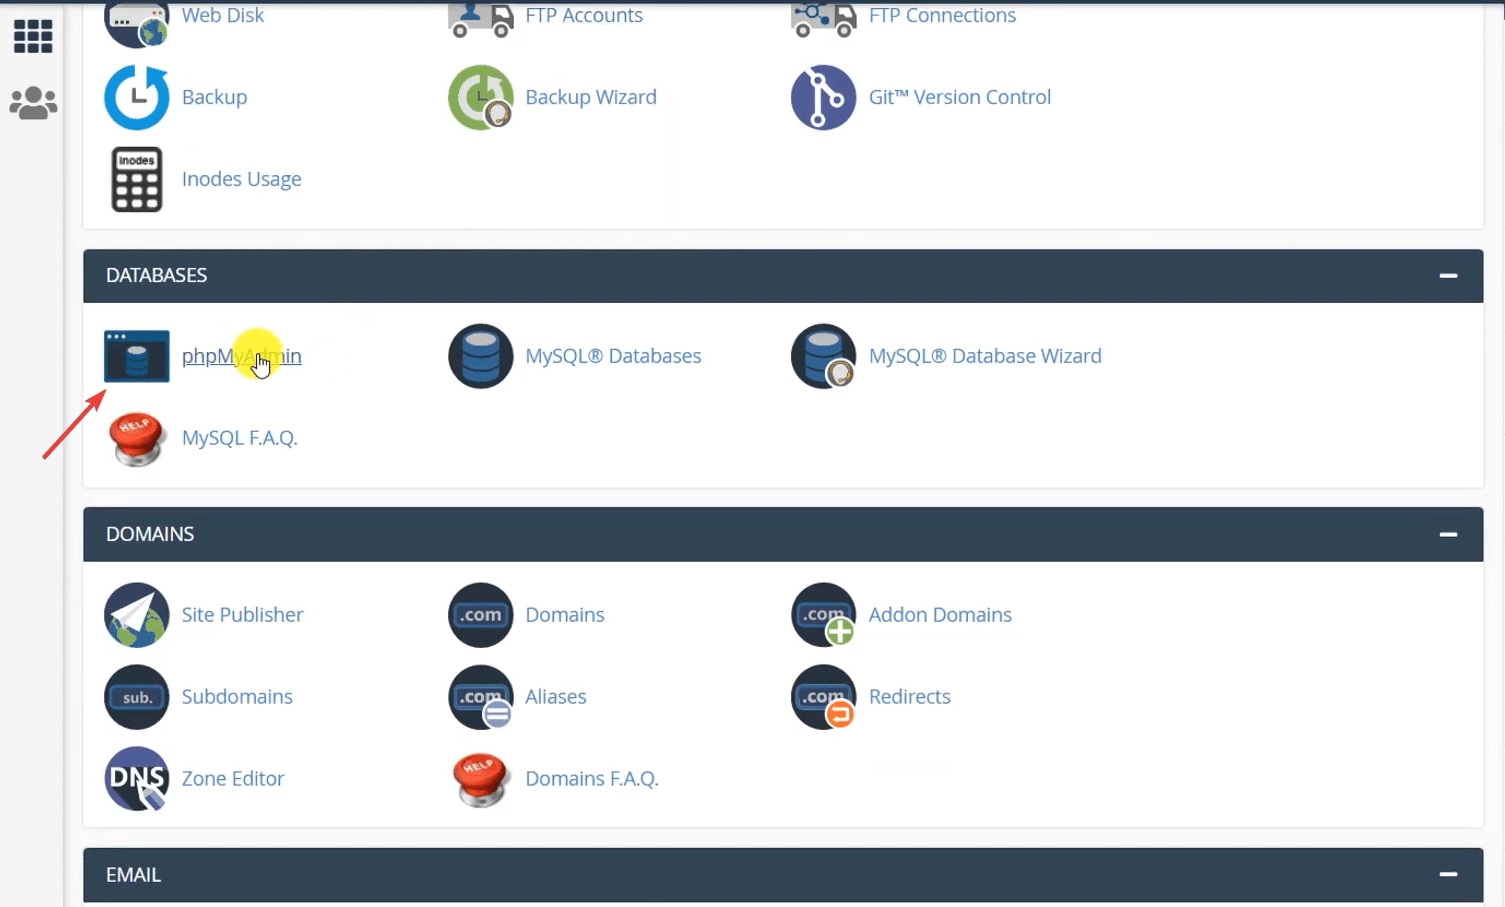
Step 1. In the cPanel dashboard, click on the phpMyAdmin link. This will automatically log you into the phpmyadmin panel, where your database is stored.
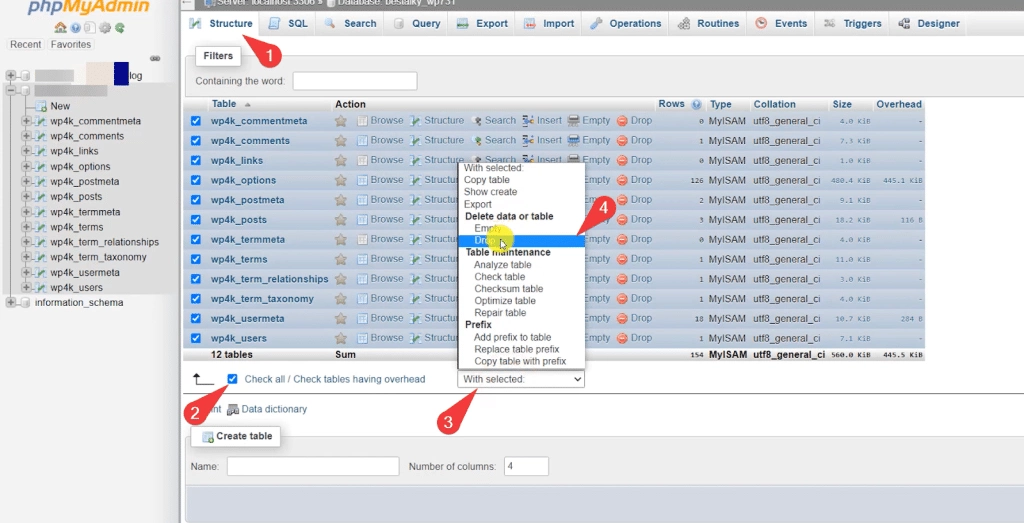
Step 2. You’ll see the entire database for your website. To delete it, click on Structure, then check the Check All box. After that, open the drop-down menu and select Drop.
4. Delete Domain and Terminate Hosting
After successfully deleting the WordPress files and database, you need to delete the domain. By deleting the domain your website will completely go offline and you will have no more online presence.
You can delete the domain using cPanel itself.
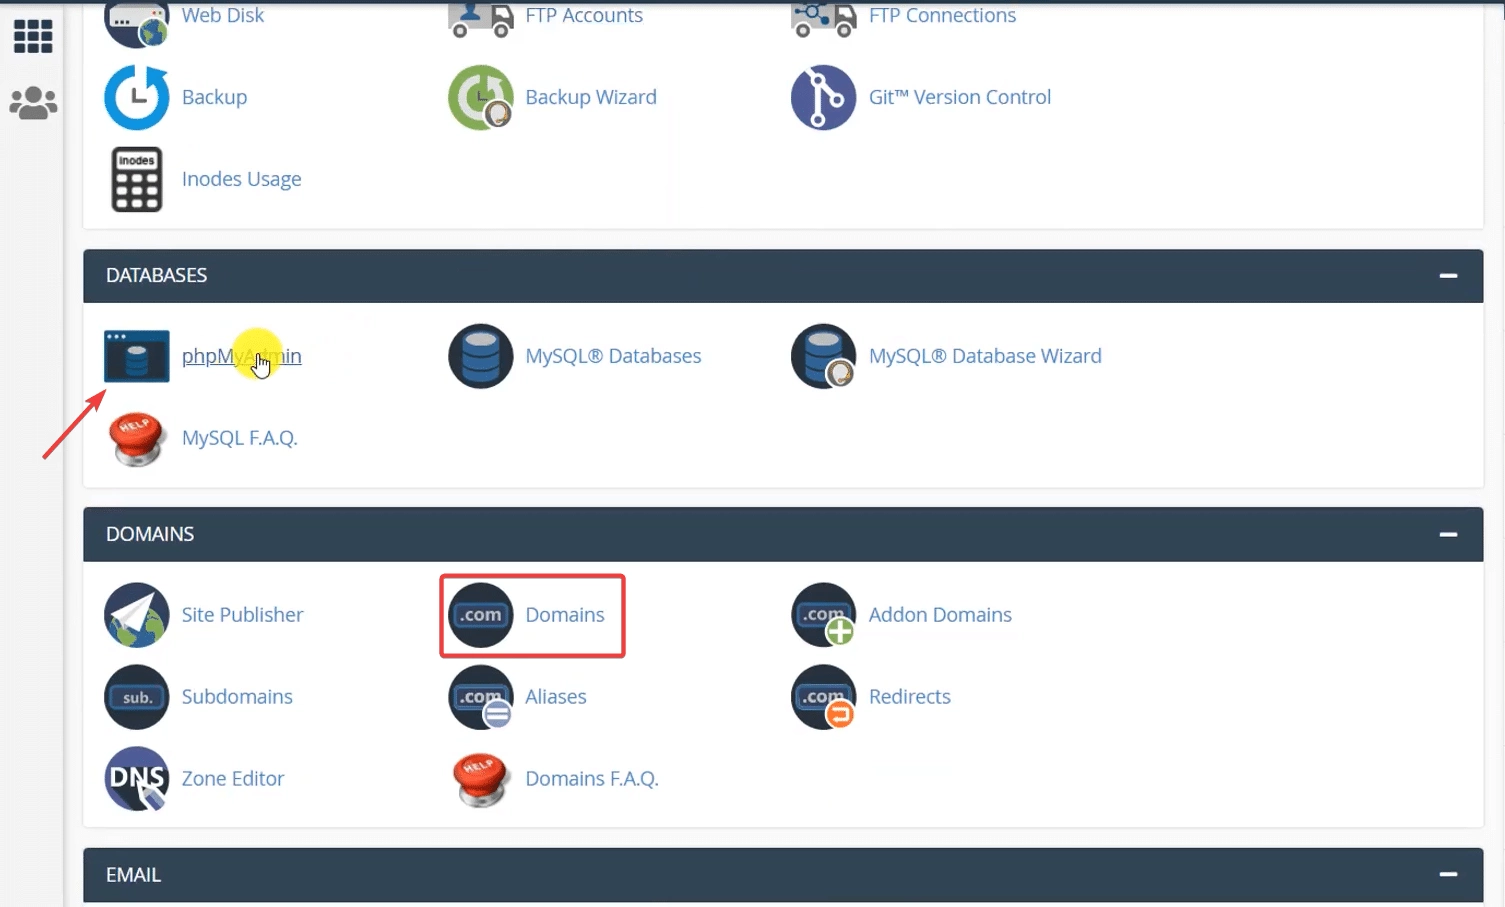
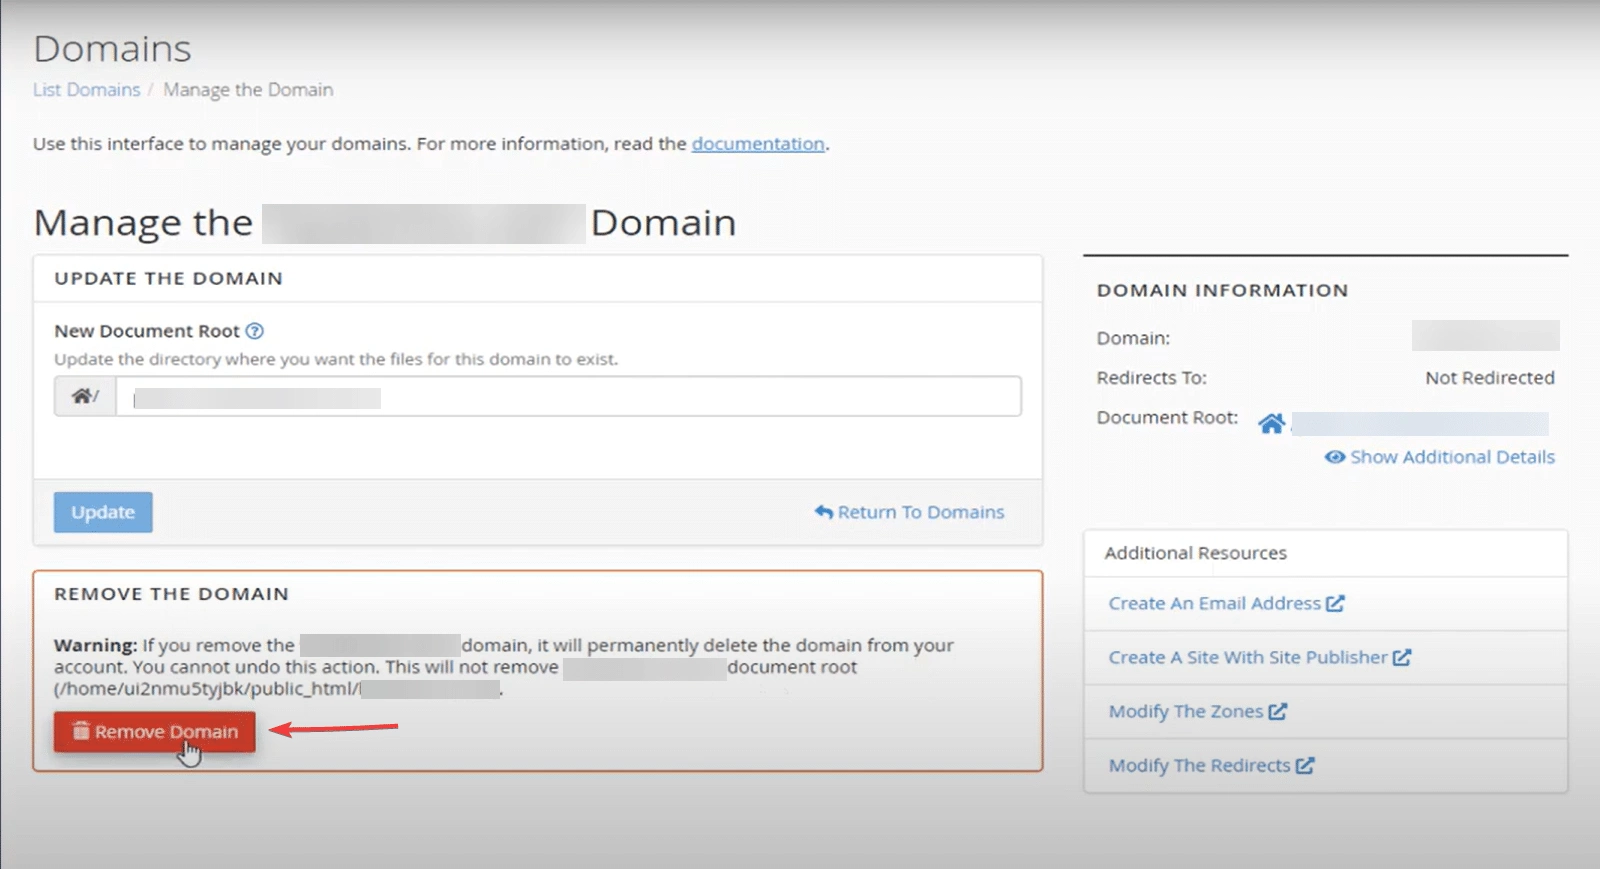
Step 1. Again as always navigate in the cPanel by logging in to your site’s hosting and this time the Domains section, Click on Domains.
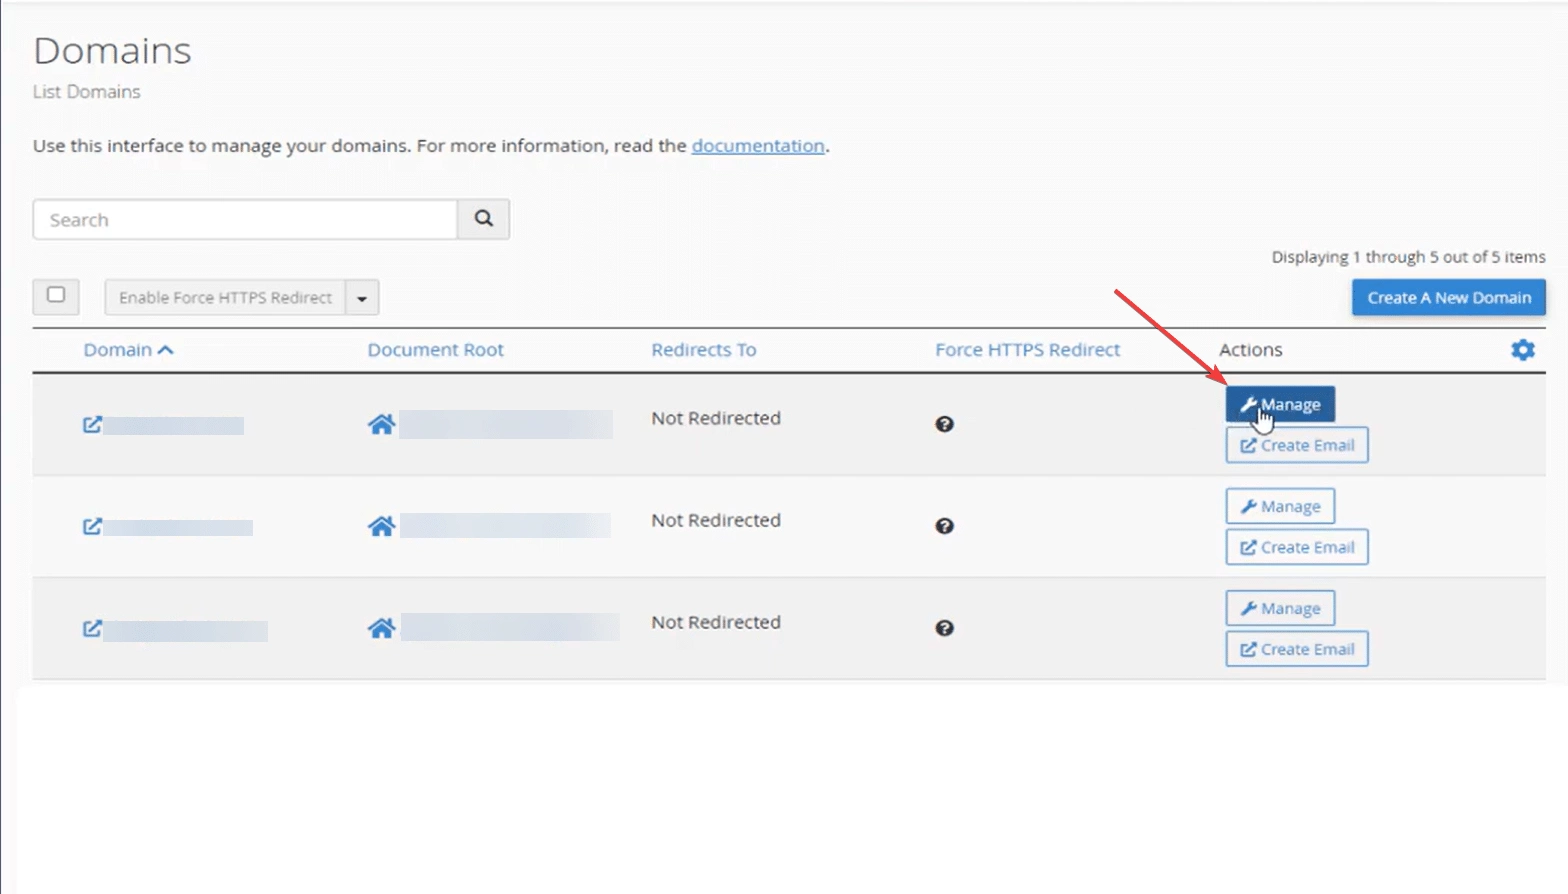
Step 2. In the Domains section, you’ll see a list of all your domains. Find your domain name and click the Manage button next to it.
Step 3. In the manage section, you will see a Remove Domain button simply click on that and your domain will be deleted.
Hold on a second if you search your domain name on Google, it might still show up. That’s not what you want, right? Don’t worry, though.
It’s normal for Google to display pages that were previously indexed. It just takes some time for the bots to crawl your site again and realize the pages are no longer available.
To speed up this process follow the below step to remove your content from the search engine.
5. Delete site content from search engine
As discussed earlier search engines may continue to display your web pages in search results. To fully remove your site from the internet, you need to address this issue.
- Method 1: Remove URLs using Google Search Console (Temporarily)
To Remove URLs from search engines you need to have access to the Google Search Console and your site should be added to it
Step 1. Navigate to the Google Search Console.
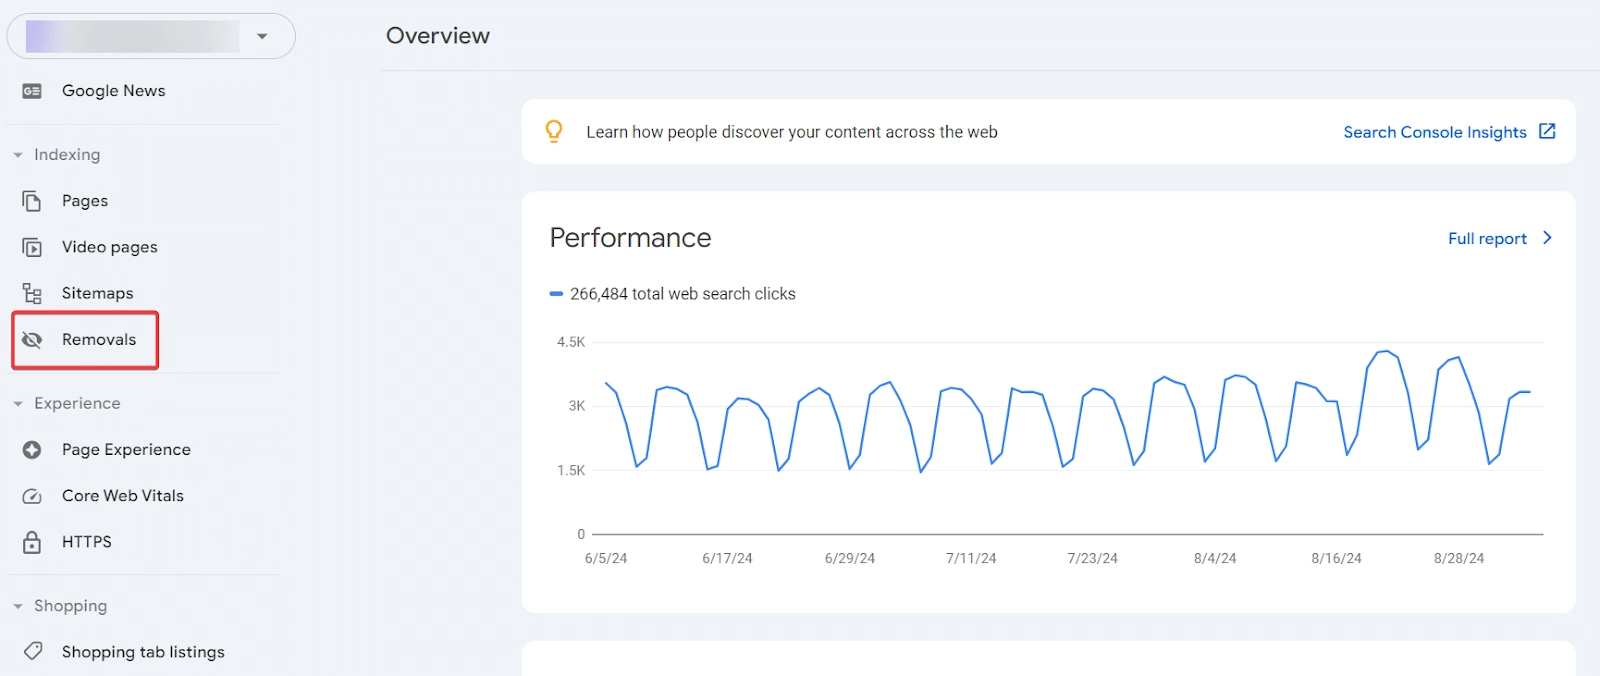
Step 2. In the Google search console dashboard, you will see the different tools on the left-hand side from there click on Removals.
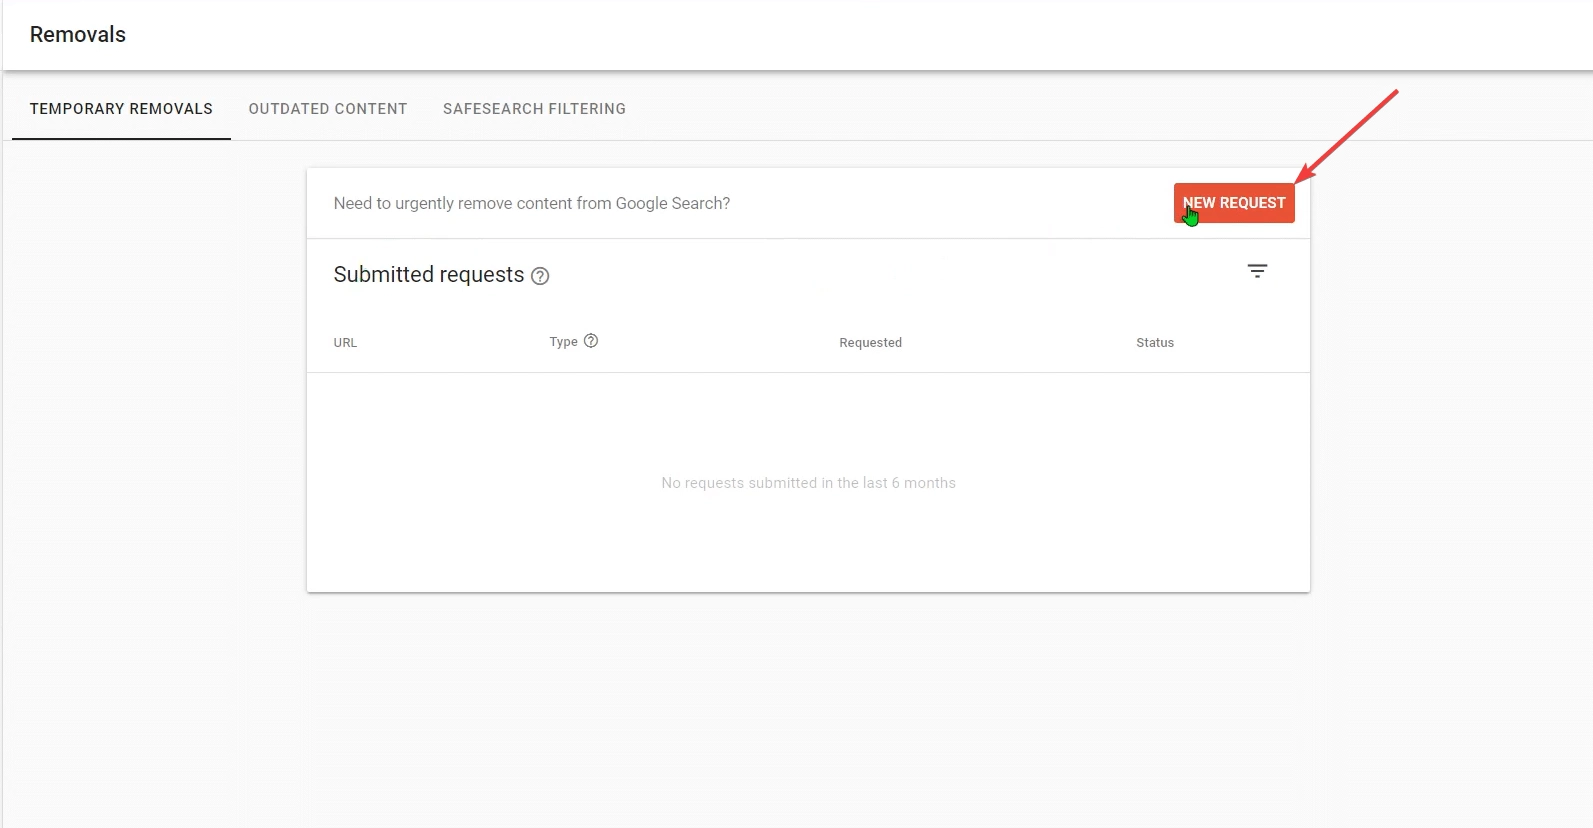
Step 3. In the Removals, Click on the New Request button and a Dialogue box will appear.
Step 4. In that dialogue box, Type in the URL that you want to remove from the search engine.
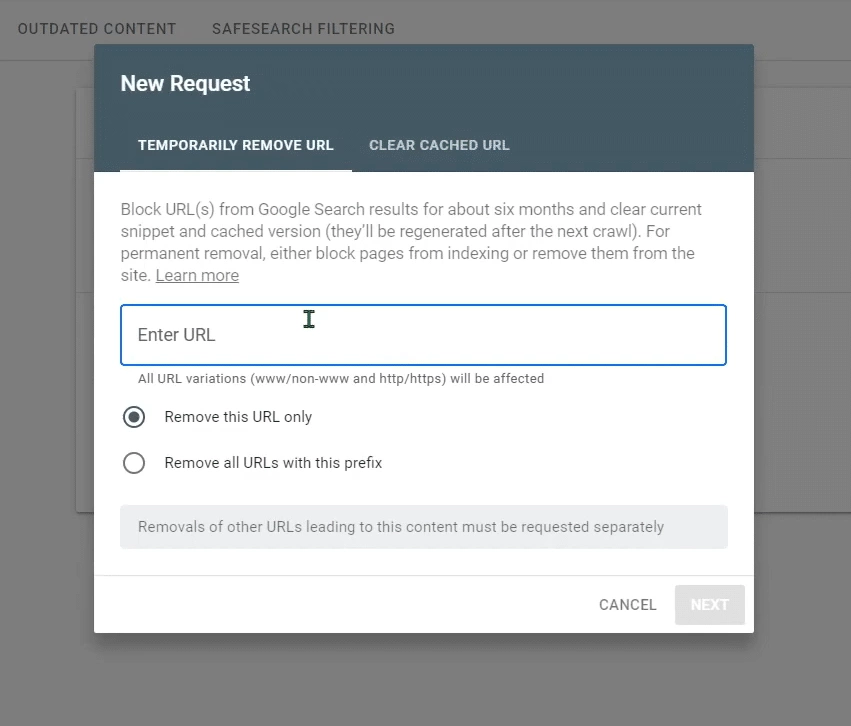
After adding the URL click on Next, and it will remove your URL from Google including all the cached versions, and current snippets temporarily (Six Months).
- Method 2: Prevent search engines to index your site
The easiest way to remove your content from search engines is to ask search engines to index your site. To do this follow the below steps:
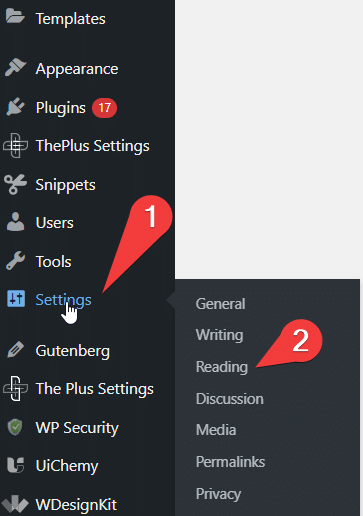
Step 1. Navigate to your WordPress Dashboard, Click on Setting > Reading.
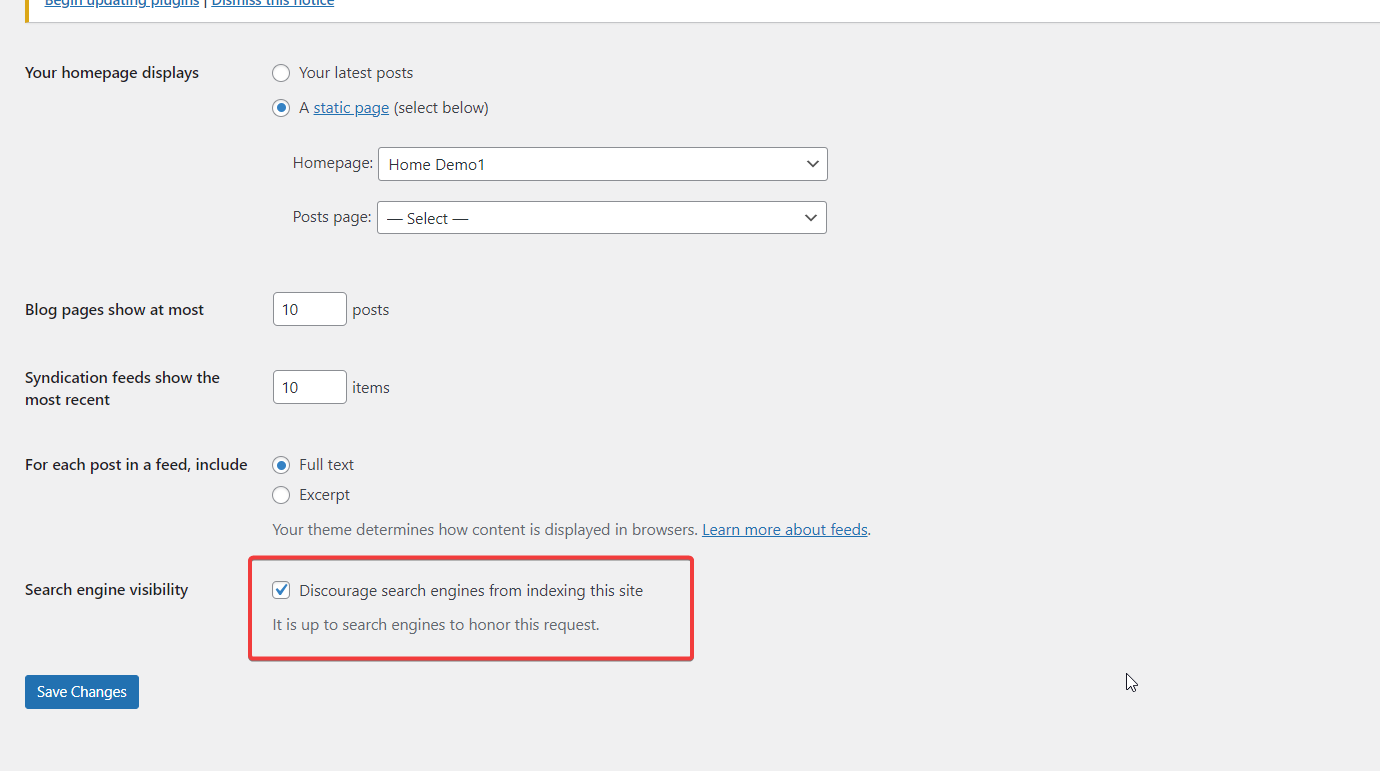
Step 2. Under the Reading, you will find the Search Engine Visibility option check the box that says discourage search engines from indexing this site.
Make sure that the check box is checked so that the search engine can’t index your site and show it in the search.
6. Delete the Site From Web Archives
You are almost there for deleting your WordPress site. Web archives like the Wayback Machine store snapshots of websites over time and store them.
So enter your website URL in the way back machine search box, if your website is listed on the search then you’ll see a calendar view of archived versions.
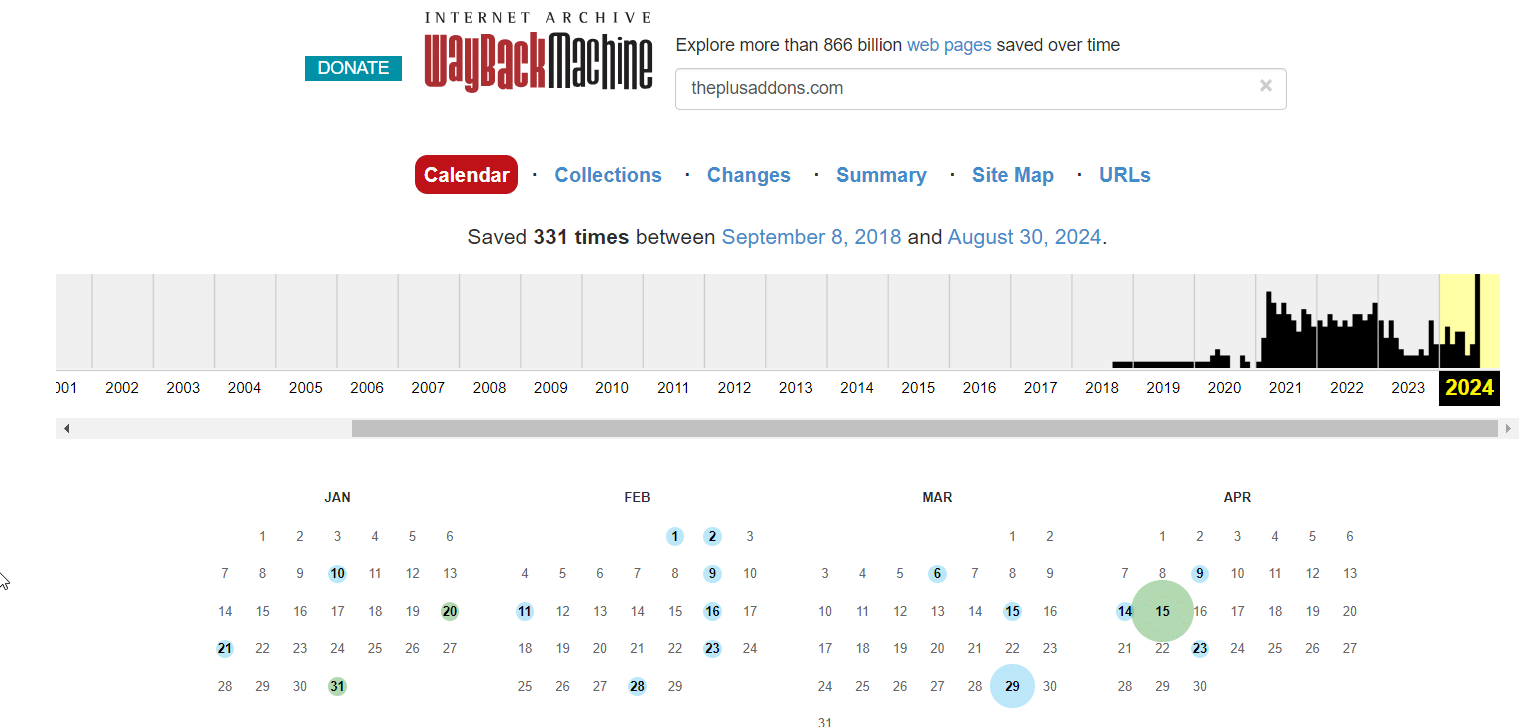
To remove your website from the archived page, contact them via email and request them to remove your website from the archive.
Congratulations! Now your website is nowhere.
Looking to hide certain pages instead of completely deleting the site? Here’s How to Hide WordPress Pages from Google.
Bonus: How to Delete a WordPress.com Site?
Delete a website in WordPress.com is easier as there is no need to cPanel or FTP just a few clicks and your website will be deleted.
To delete your WordPress.com site permanently, follow these steps:
Step 1. Log in to your WordPress.com account and access your site’s dashboard.
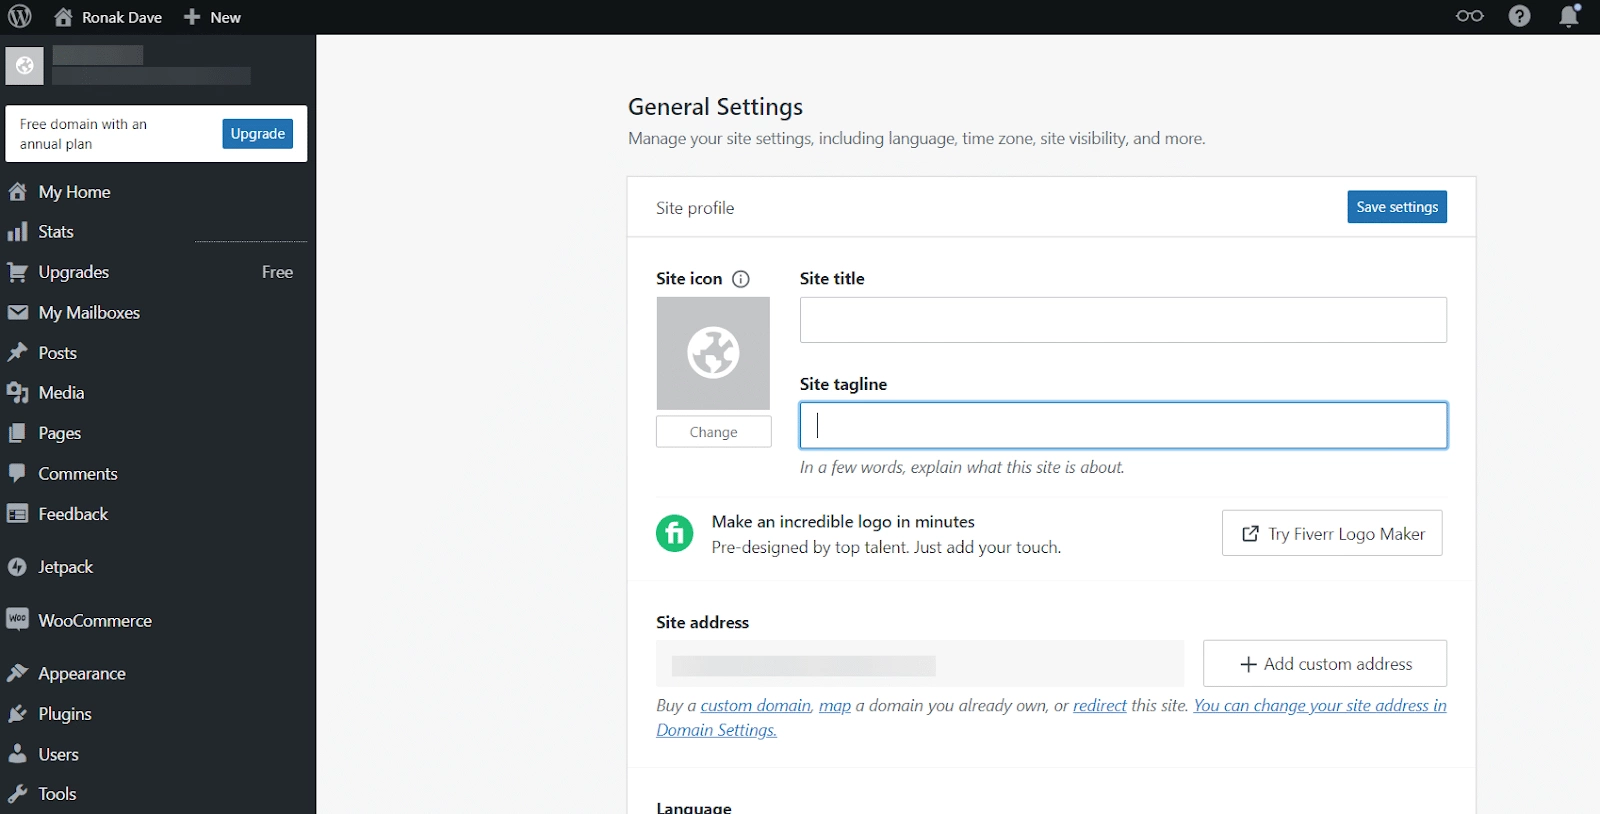
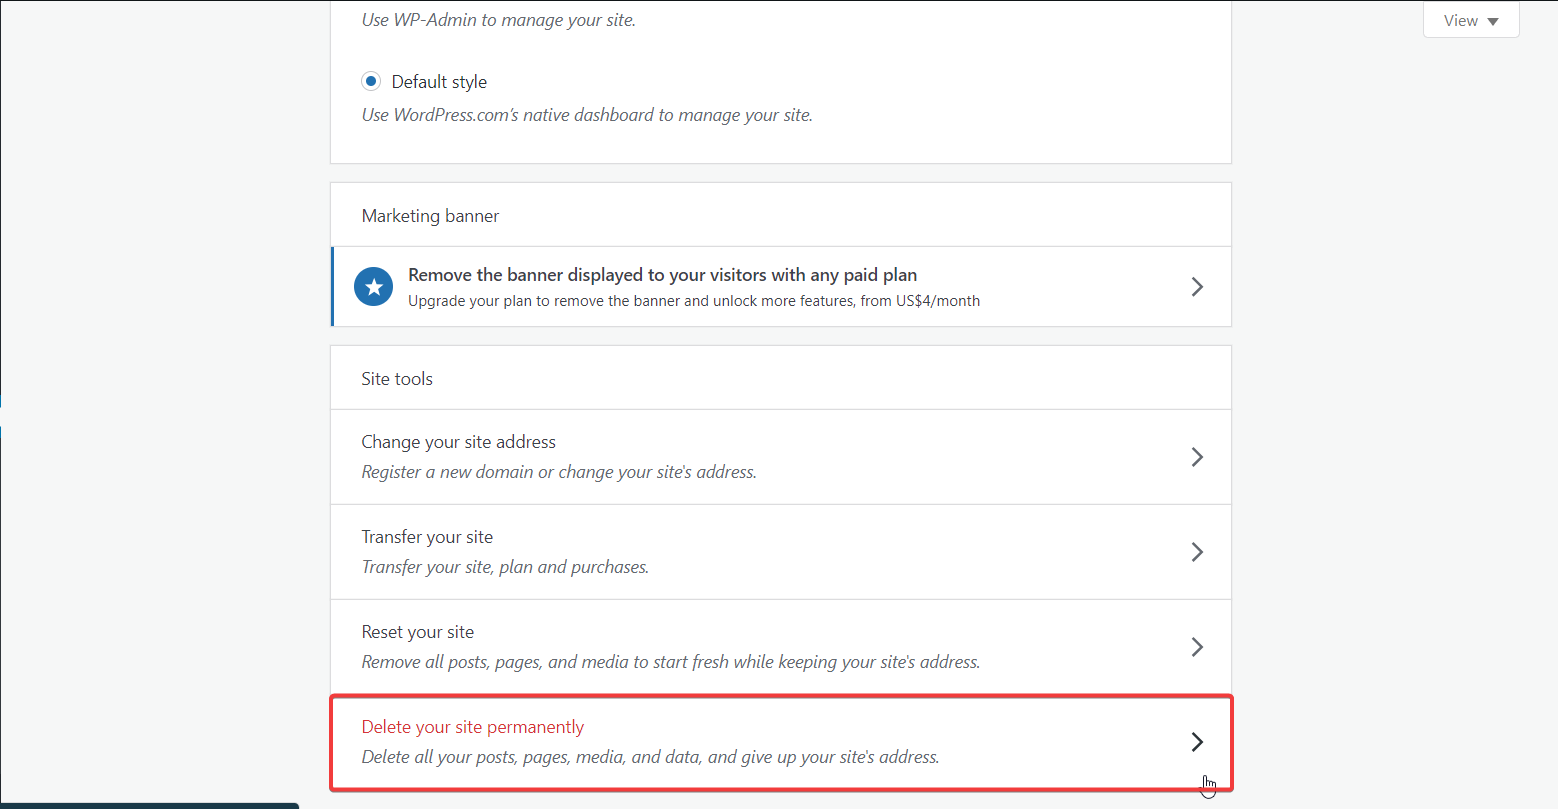
Step 2. Navigate to Settings > General. In General settings scroll to the bottom and click on “Delete your site permanently”.
Step 3. You’ll be prompted to enter your site’s URL to confirm the deletion. And also you will be asked to create a backup of content.
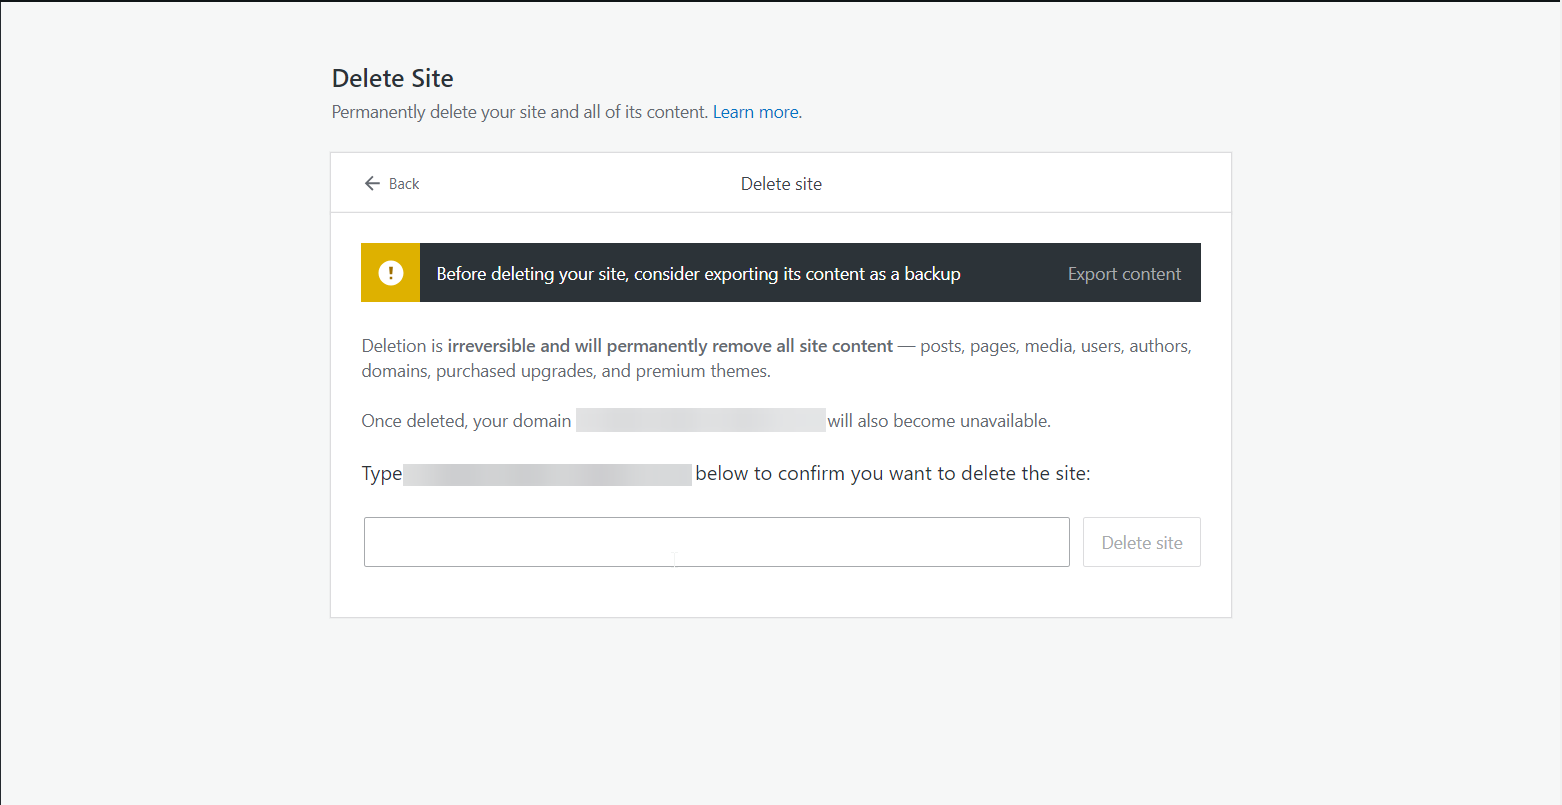
Note: Once you have deleted your WordPress.com site there is no way to get it back and also you will lose your free WordPress.com domain so consider buying it before deleting.
People also read: WordPress.com vs WordPress.org
Wrapping Up
You did it! Now your WordPress site is nowhere on the internet. The decision to delete a WordPress site should be very clear and concise as once it is done it is almost irreversible.
But still, if you change your mind in the future then you can get it back. Make sure to back up your site before you delete it, and think about other options like archiving or temporarily disabling it.
Now that you know the process, you’re all set to make a smooth exit.
But, if you are an Elementor user and deciding to give a fresh start and look to your website after deleting your old one then you should definitely consider using The Plus Addons for Elementor.
With its 120+ widgets and extensions, you don’t need any other plugins for your various website designing needs you will get everything in one place, sounds exciting right?


