Google reviews can add much-needed social proof to any site. They provide useful information about the experiences that others have had with your business and help you stand out.
Customers don’t even need a Gmail address to leave a review. According to research from BrightLocal, 88% of consumers trust user reviews, which is the same as the number of people who trust personal recommendations.
Needless to say, adding a widget that shows regularly updated Google reviews on your site is one of the best ways to improve conversions.
In this article, we’re going to show you how to embed the Google reviews widget on your website.
Let’s get started!
1. Get a Reliable Addon To Include Google Reviews on Your Site
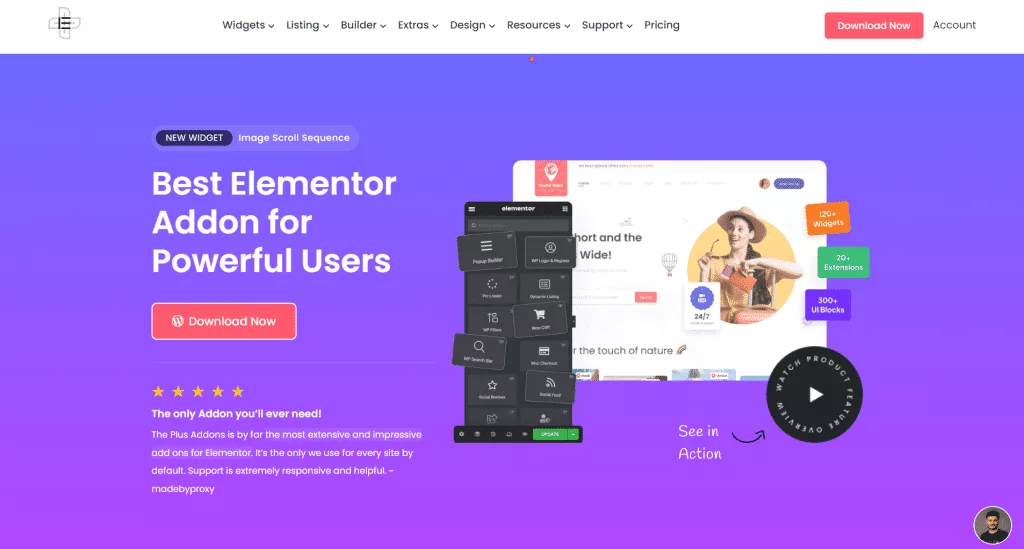
Elementor makes it easy for users to add reviews to your site using a simple addon. There are tons of different addons that you can choose from, all of which enhance Elementor’s functionality in some way.
One of the best choices for adding a Google Reviews widget is The Plus Addons for Elementor.
Along with Google reviews, it consists of 120+ Elementor widgets, 300+ UI essential blocks, and 18+ deploy-ready templates.
Essentially, with this addon, you can add reviews manually or curate them from Google as well as your Facebook page too. It also offers greater customization options for designers at no cost!
You don’t need any technical knowledge to incorporate these addons on your WordPress website. It’s a fully plug-and-play solution, and it’s ideal if you want to enhance the functionality of your site.
By default, Elementor itself comes with a ton of functionality.
However, The Plus Addons add a lot more, and they are fully compatible with popular WordPress themes like Nexter, OceanWP, GeneratePress, Astra, and many others.
You can get The Plug Addons for Elementor WordPress plugin and significantly improve the design and user experience for your website!
Activate The Plus Addons
Once you download the plugin, the next step is to activate it. While a free download is available, you will want to purchase the full license, as it gives you access to the full set of widgets and extensions.
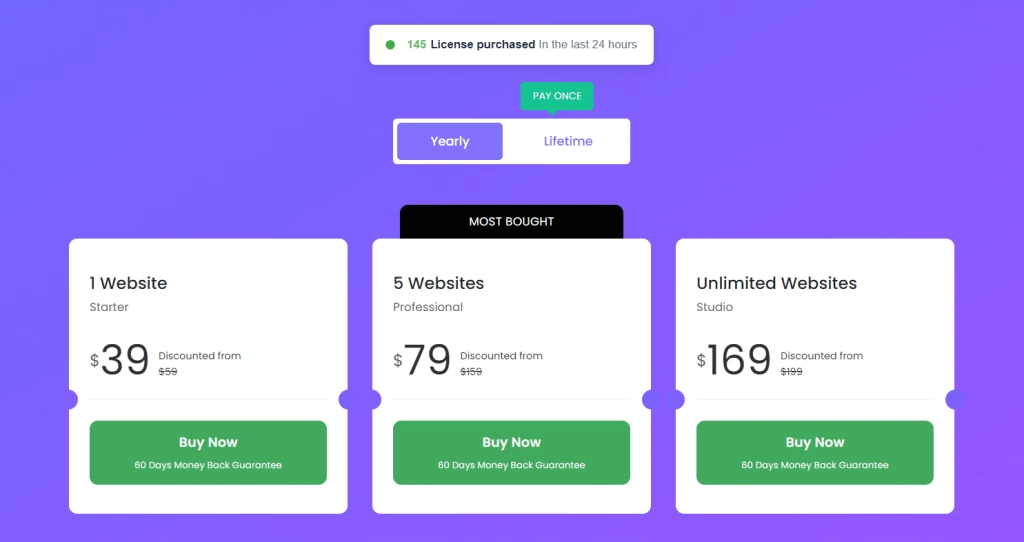
The Plus Addons for Elementor start from $39 per year for a single site license and gives you a year of updates. You also get a 60-days money-back guarantee, so your purchase is secure!
Lifetime plans are also available if you wish to pay just once.
Once you download the plugin, the next step is to activate your license.
Select ThePlus Settings from the WordPress navigation menu, enter your license key and click on Activate.
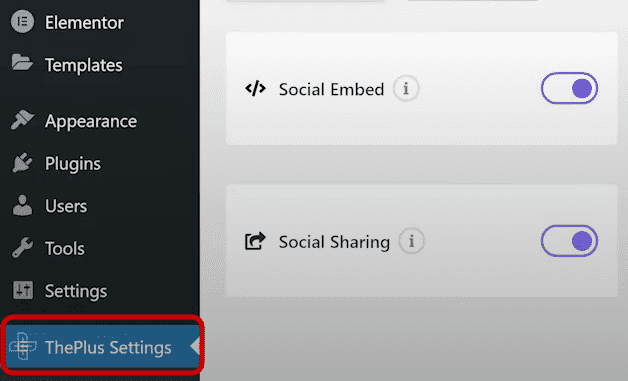
2. Activate the Social Reviews Widget
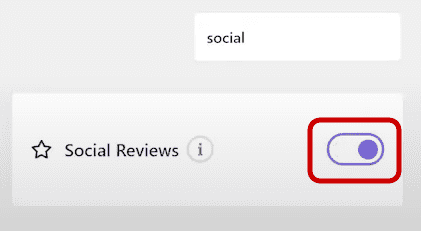
Now that your copy is activated, the next step is to activate the Social Reviews widget.
Click on Plus Widgets, and you’ll see all of the widgets that you can activate on your site.
Scroll down until you find Social Reviews, and toggle it on. You will have to save your changes for them to take effect.

Now, the Social Reviews Widget will be accessible from Elementor!
3. Add the Widget To Your Site Using Elementor
Now, search for the Social Reviews Widget from the Elementor menu (as shown below).
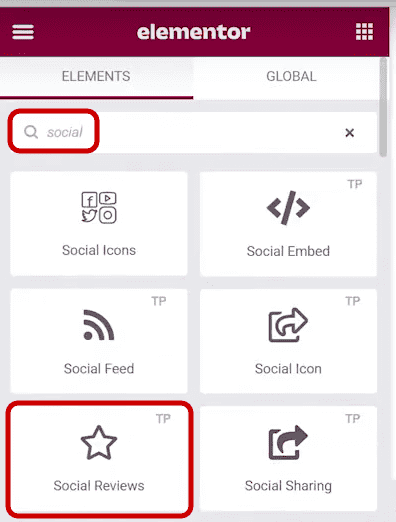
Simply drag the widget to a suitable position on your website, and you can then customize it as you see fit. From the Social Reviews menu on the left, you can choose from three options:
- Manual
The first two are self-explanatory, whereas Manual lets you upload reviews individually by adding a username, the review message, and date, and even assigning a rating value.
To get started, you’ll need the Google Maps Platform API and the Places API. The Places API is used for sending place requests, such as Place Details, which returns information about specific businesses, including reviews about them.
Ideally, you should have an API key to authenticate requests to the Google Maps Platform APIs. If you haven’t got an API key yet, here’s how the reviews will appear:

To create an API key, here are the steps you should follow:
- First, go to the Google API Library.

2. Now, activate the Places API and the Maps Javascript API.
3. You’ll see an API-enabled mark once you have activated it.
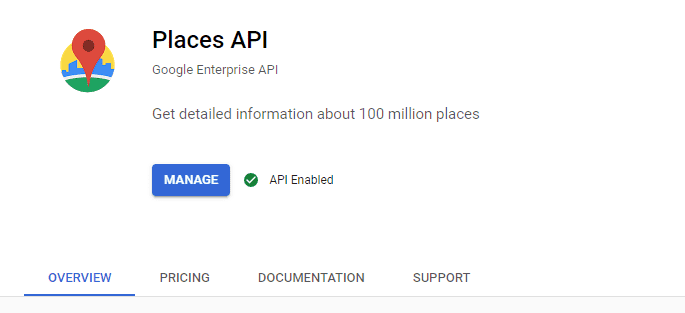
4. Once enabled, go to Credentials from the left navigation menu. And click on Create Credentials. You’ll see the generated API key, as shown below.
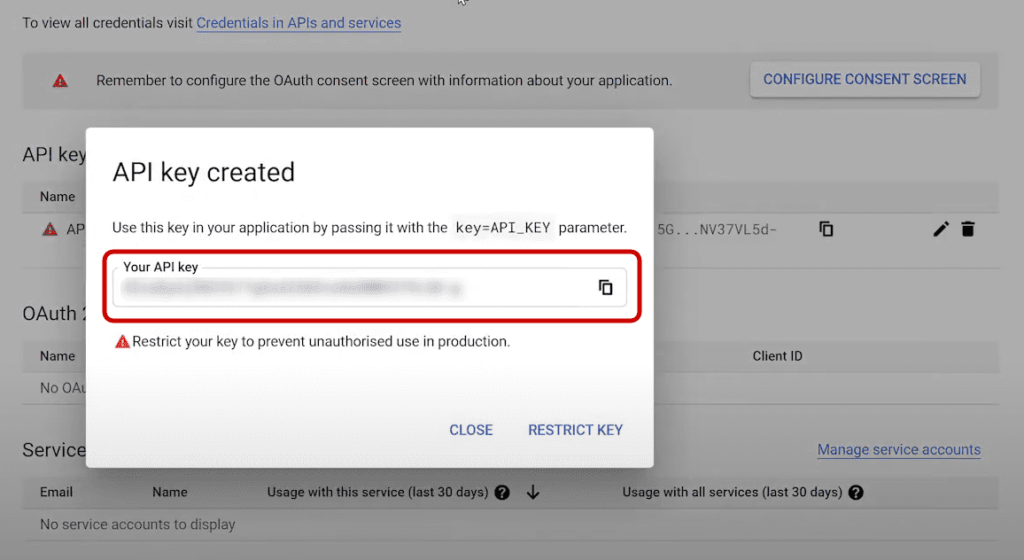
5. Copy the API key, and paste it under Access Token.
6. Now, the next step is to create a Place ID. For this purpose, you can use the Place ID finder. For instance, shown below is the Place ID for POSIMYTH Innovations.

7. Copy the Place ID and paste it into the appropriate section.
And that’s it! Once you do, you’ll be able to see Google Reviews showing up on your website too!
Important Note About The API & Your Customers’ Data
We feel it’s important to note a couple of things with regard to the use of this API, as we do receive a number of similar questions.
Once your API has been added, the Reviews Widget will be able to pull Google reviews across to your website dynamically.
So, if you wish, it can automatically check for any new reviews that have been posted and publish them immediately on your website.
You can filter these, of course, so, for example, you may wish only to have reviews published if they include a minimum number of stars.
However, you can set the Widget to work manually instead so that you can manually approve reviews for display on your website.
A second point worth mentioning is that no data or credentials are collected by us at all.
The Google review widget Elementor is 100% GDPR compliant, as all of the data relating to your API keys are stored on your own WordPress server. No data of any kind is ever sent to The Plus Addons for Elementor.
4. Customize The Google Reviews Widget
You can choose from three built-in styles, customize the layout (choose from grid, masonry, and carousel), and even select different style layouts.
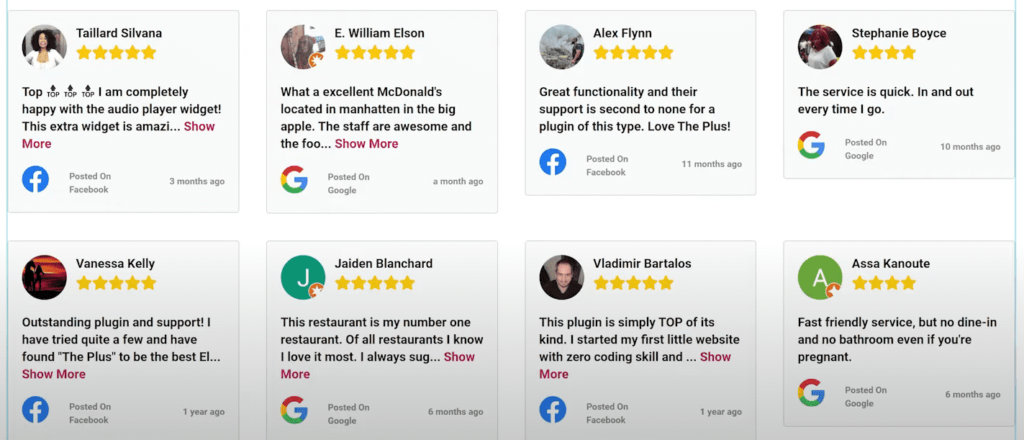
The Grid Layout
The Grid layout will show all of your reviews in multiple rows, with each row being the height of the tallest item. As you can see in the image below, the height of each review box may be slightly different, but the tops of every row are lined up regardless.
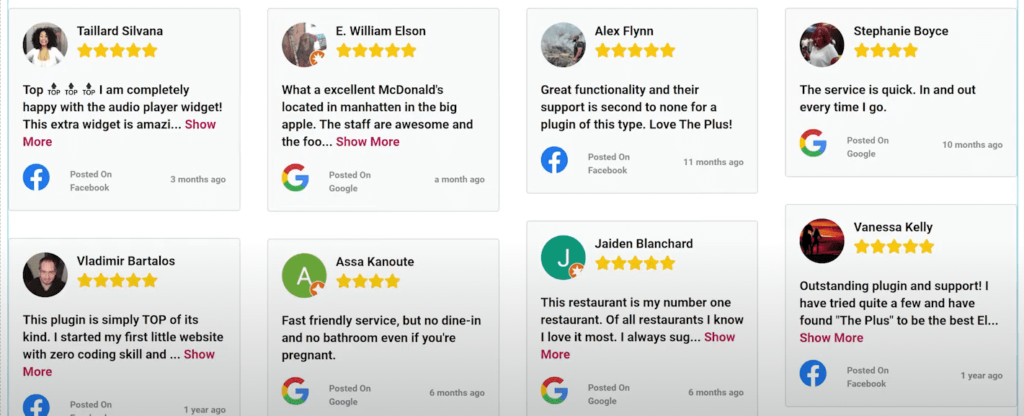
The Masonry Layout
The Masonry layout is similar to the grid layout but with one main difference. The reviews are displayed in columns, with a fixed gap between each review, but this means that as reviews are different heights, the rows will not be at the same level. This means that you have less empty white space on the screen, and more reviews can be visible. This is especially useful if you have some longer reviews and others much shorter.
The Carousel Layout
The Carousel layout is entirely different and a very popular choice, especially where space may be limited on the page. With this layout, a limited number of reviews are displayed on a single row, which takes up much less space on the page. But the reviews periodically slide to the left, introducing the next selection.
Visitors can click on the dots at the bottom to go back to a previous selection of reviews or jump further ahead.
Using this layout, you can ensure a high number of reviews are visible without sacrificing too much space on the page. If you enable the carousel to load each new selection of reviews automatically, this adds a nice movement that helps to catch the eye.

You also have the option of displaying both reviews from multiple sources, such as Facebook and Google (or another source) combined.

Note: The Google API restricts the maximum number of results to 5 initially, but over time, it’ll automatically increase to the Max results you’ve selected.
You can also define categories for your reviews, which makes it easy for users to filter through them based on what they’re looking for.
You can even take this further by adding multiple Google Reviews if, for example, you are a business owner with multiple stores and want to show different reviews for ‘Bakery of London’, ‘Bakery of America’, and such.
You also have the option to lazy load reviews, which is a good idea if you want to optimize your website for speed.
Other options include:
- Setting the refresh time
- Limiting character count
- Content scrolling bar
- Column management
- Performance management
- Setting a minimum threshold for negative review stars to be shown
Performance Management
A particularly powerful and useful feature included relates to performance management. One of the concerns some people have is that if every visitor loads up a page that contains thirty reviews, then that would translate to a large number of HTTP requests to Google’s Reviews service, which could potentially harm site speed and ranking. However, we have taken care of this with Transient.
Transient are files that the Widget creates locally on your WordPress server, and in these files are stored all of the data for your reviews. It is these local files that are then fed into the web page, meaning that once they have been fetched from the Google API, they don’t need to be immediately fetched again for the next visitor.
The Transient is set to automatically expire after a period of time, after which the new review data is fetched, and this happens at regular intervals. This ensures your reviews are kept up to date, but not by sacrificing server speed or HTTP requests.
Filtering Out Negative Reviews
Once you select the basics, you can improve the way reviews are presented too. There are lots of options to choose from, such as:
- Custom typography for usernames, messages, and time
- Color choice
- Borders
- Profile radius
- Content, footer, and header padding
- Box shadows
- Backgrounds
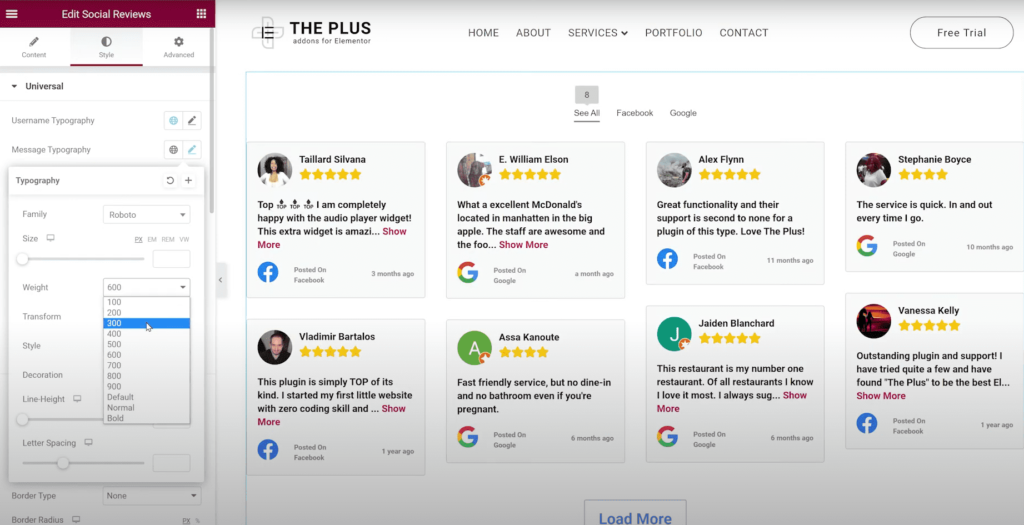
You can even add motion effects, including entrance animations, to further improve the presentation. And you can always add custom CSS code to the Social Reviews widget.
That’s it! You’ve now learned how to add Google reviews to Elementor website without writing a single line of code!
Is your Elementor site slowing down? Check these 25+ Guaranteed Ways to Speed Up Elementor Website Performance.
Is It Possible To Add Google Reviews Without 3rd Party APIs?
Yes, it is! The Plus Addons for Elementor Google Reviews Widget has two modes – automatic and manual. We have covered the automatic mode in this article, which will allow the widget to pull reviews from Google, filter them as you require (such as minimum star ratings), and then publish them live on your site.
However, if you would prefer not to use any 3rd party APIs, then the widget can be used in manual mode. This will allow you to copy the review content manually into the template and then have this displayed on your site.
This gives you full control over the reviews on your website without any need for 3rd parties or APIs, although it won’t, of course, update with any new reviews – that’s something you’ll need to do manually each time.
Why Add Google Reviews To Your Site?
There are several reasons why you should consider adding a Google Reviews widget to your site. Here are just a few reasons.
Improve Your Website’s Credibility
Google is an established platform, and the reviews are pulled from the Maps API. Since these are mainly added by people who have interacted with your brand before, it’ll add significant credibility to your platform.
Turn Satisfied Customers into Brand Ambassadors
Brand advocacy is what sets good businesses apart from great ones. The latter often find a way to turn their best customers into brand ambassadors. With a Google Reviews widget, you can do just that.
If a customer’s on the fence about whether they should buy from you or not, these reviews might be just what they need to go ahead with their purchase!
Reduce Bounce Rate
People who are looking for more information about your products or services might stay longer on the site to read reviews from other customers. Essentially, you’re looking at better user engagement, which ultimately reduces the bounce rate for your site.
Improved SEO
Bounce rate is one of the many signals that Google uses to determine a website’s ranking. As users start spending more time on your site, you’ll notice its domain authority rising too. SERP rankings will improve, which means more traffic!
After Action Report – Embed Google Reviews To Build Trust
Once you’ve added your Google Reviews widget, you’ll immediately start making a real difference to the confidence in which new visitors and potential customers see your business.
But that’s not the end. The next challenge is actually to get those reviews in the first place and to keep positive reviews coming.
For this, you’ll need to think about strategies for encouraging past and current customers to leave reviews, and you can learn more about this from Google’s own support page about getting Google Reviews, as well as reading this guide which teaches 16 easy ways to get more Google reviews.
Further Read: Did you know you can easily add CSS to your Elementor site for free? Check these 4 Methods to help you Add Custom CSS in Elementor.


