Looking to add Facebook login on WordPress website? You’re in the right place.
What do you do after multiple failed login attempts? Most probably, you click the “forgot password” option and reset your password.
However, almost 92% of users leave the website login page without trying to recover login credentials.
If you have a login/registration page set up on your site, this may be one of the reasons your site has a high bounce rate. It also hinders your ability to create a personalized user experience and drive engagement.
This is where a “Sign in with Facebook” option comes in handy.
So, let’s explore some benefits of using Facebook to log in and the steps to add a sign-in with a Facebook button.
What is Facebook Login for WordPress Website?
Facebook login for a WordPress website is a feature that allows users to register and log in to your site using their Facebook credentials instead of creating a new username and password specific to the website.
This functionality can be integrated into a WordPress site using plugins or custom coding that utilizes the Facebook SDK for JavaScript or the Graph API.
Upon implementation, a “Login with Facebook” button appears on the login, registration, or comment sections of the site.
When users click this button, they are prompted to log in to their Facebook account (if not already logged in) and then to grant permission to the WordPress site to access their public profile information from Facebook.
Why Add Facebook Login to Your WordPress Site?
Here are some benefits of using a Facebook login for your website:
- Improves User Experience: Facebook has over 3.065 billion monthly active users. So, the chances of your audiences already using this social platform are quite high. A social login button will simplify the login process for these users, allowing them to log in without the need to remember their credentials.
- Boost Engagement Levels: With an easier login and registration process, audiences may be more likely to engage with your content, be it by leaving a comment or sharing a post on their social accounts.
- Collect User Data: Depending on the permissions granted, you can access user data from Facebook, such as the user’s name, contact email, and profile picture. You can use these details to personalize the user experience on the WordPress site.
- Offer Tailored Recommendations: You can also track details such as likes and friend lists of users who sign in with Facebook. This allows you to understand the preferences of these users and recommend relevant content, promotions, and products to them.
Have a YouTube channel with tutorials and useful videos for your audiences? Use any of these five YouTube plugins to embed videos on your site.
How to Add Facebook Login on WordPress Website (Step-by-Step)
Now, let’s see how you can add a Facebook login to a WordPress site:
Step 1: Install The Plus Addons for Elementor
On other platforms, you may need to use coding to add a login, but on WordPress, you can simply use The Plus Addons for Elementor plugin. The addon includes over 120 unique widgets, including a Login & Register widget.
You can drag and drop this widget on your site using the Elementor page builder to enable Facebook login on your site and customize it using a point-and-click interface.
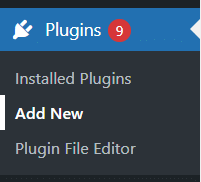
To install The Plus Addons, go to your WordPress menu and select Plugins > Add New.
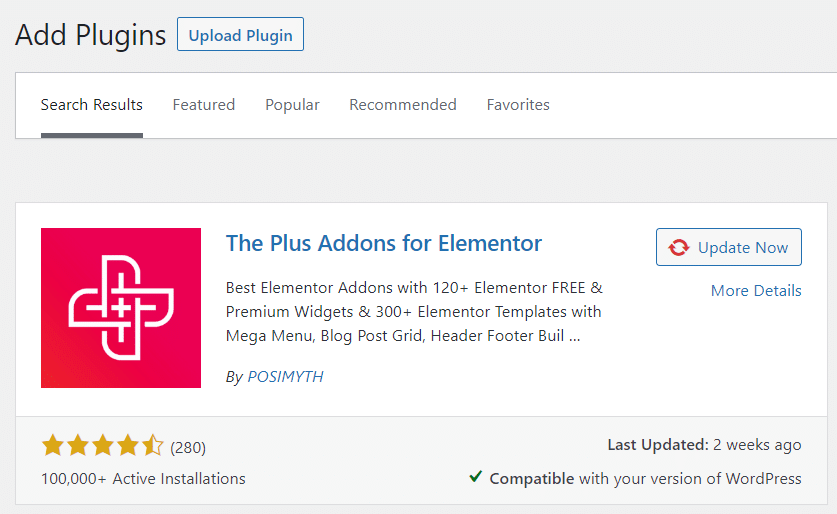
Then, search for The Plus Addons for Elementor, install it, and click Activate.
The Login & Register widget is part of the premium version, so you must upgrade to The Plus Addons Pro. Check out our guide on how to upgrade to The Plus Addons Pro in a few simple steps.
Once you’ve upgraded, you’ll be able to use the Login & Register widget and many more cool and advanced features that come with the addon.
Step 2: Create a Facebook Developer Account
Next, you must create a Facebook developer account. It will give you access to tools used to create Facebook apps and integrations for websites and mobile apps.
First, log in to your Facebook account. In a new tab, open the Facebook Platform for Developers.

Click the Get Started button, complete the simple registration process, and move on to the next step.
Step 3: Build a Facebook Web App
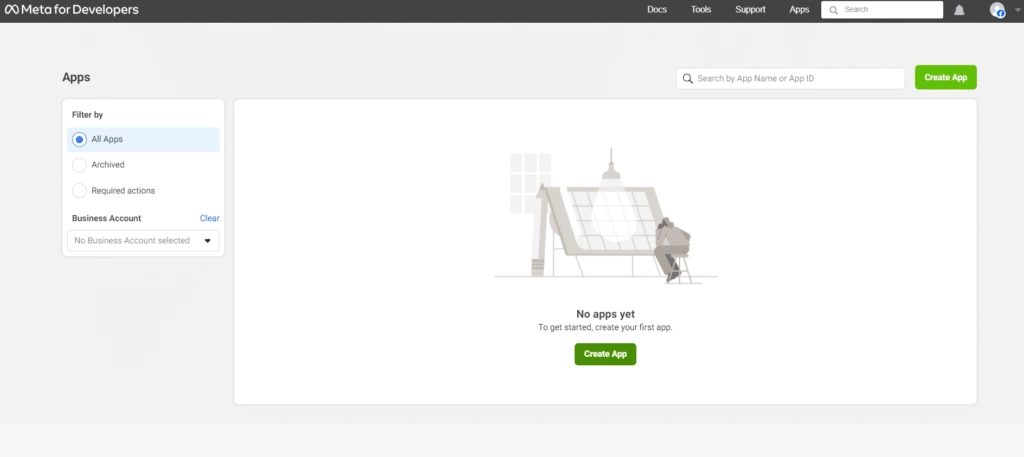
Once you’re logged into the Facebook developer account, click the Add New button.
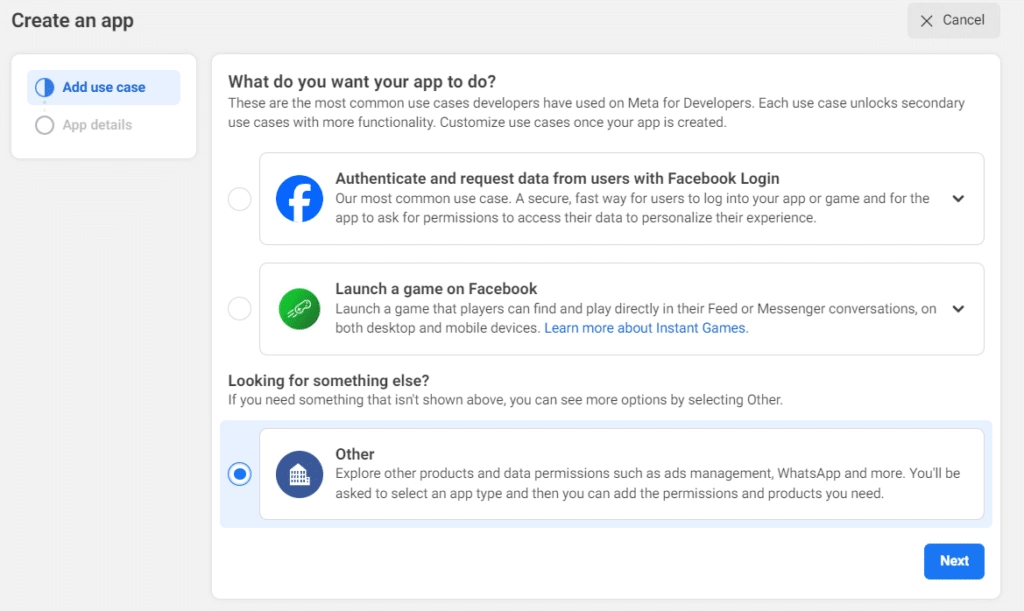
Then, select the third option that says Other, and click Next.
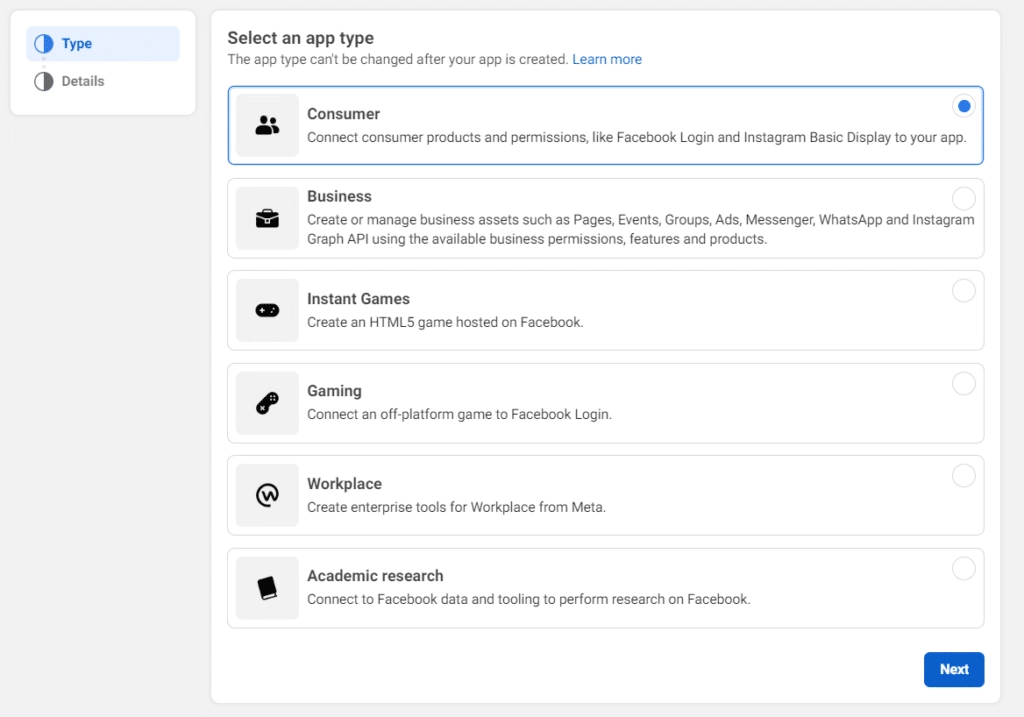
Now, select the first option, i.e., Consumer, and click Next.
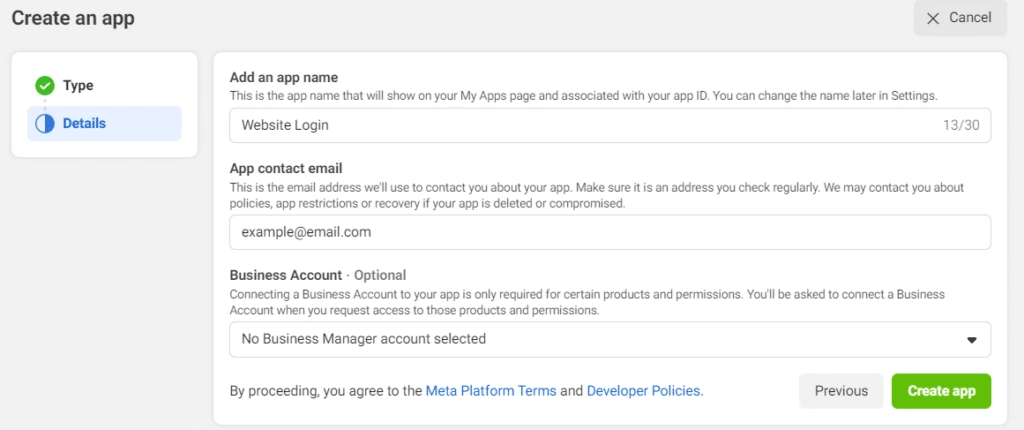
Give your app a name, enter your email address, and click the Create App button.
Step 4. Set Up the Facebook Site Login
Now, you’ll be in the Facebook developer account’s dashboard.
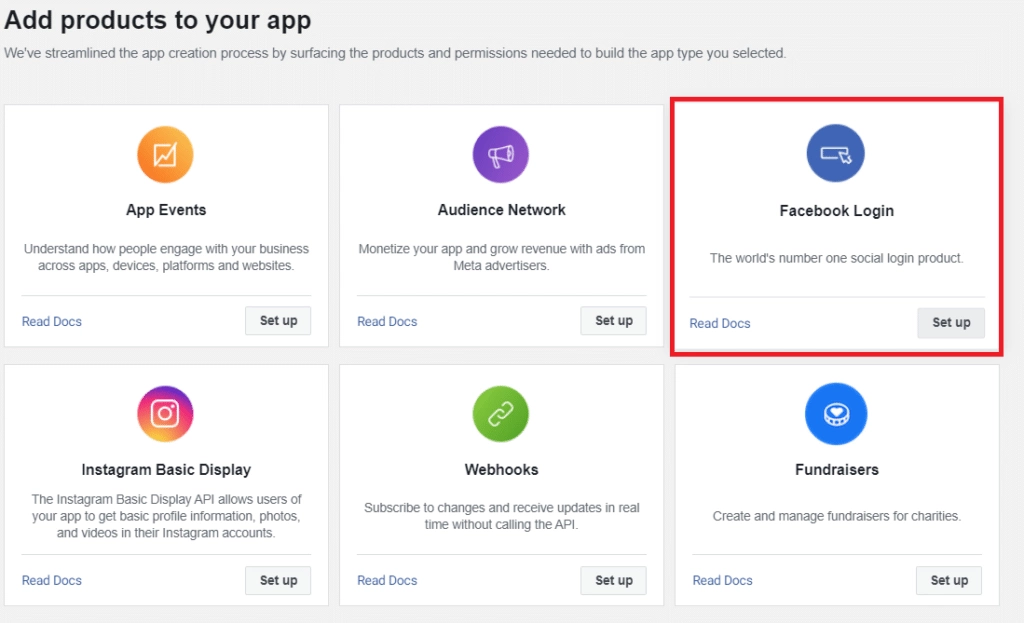
Under the section Add products to your app, hover your mouse over Facebook Login and click the Set up button.
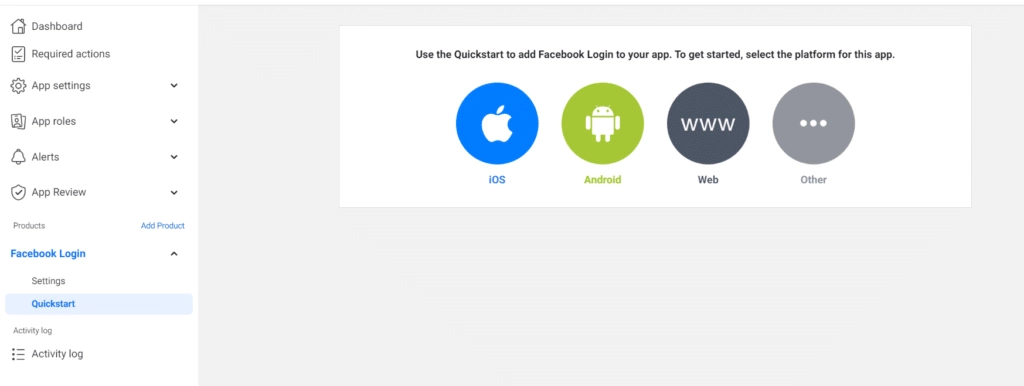
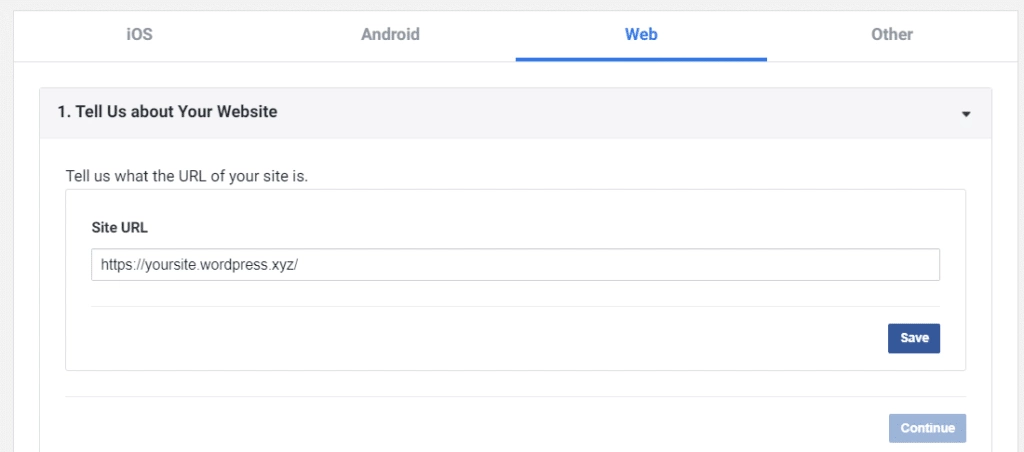
Since we are adding a Facebook login to our website, we’ll select the www or web option.
In the Tell Us About Your Website section, enter your site’s address.
Click Save. All remaining options are suited for advanced users so we can skip them.
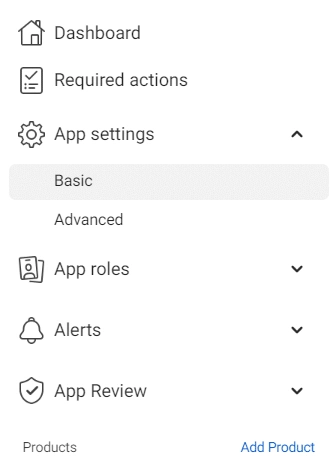
Now, head over to the left side of your screen, expand App Settings, and select Basic.
Here, you’ll see your App’s ID and Secret Key.
But before we can use them, we must enter URLs to our website domain, its privacy policy, and terms of service.
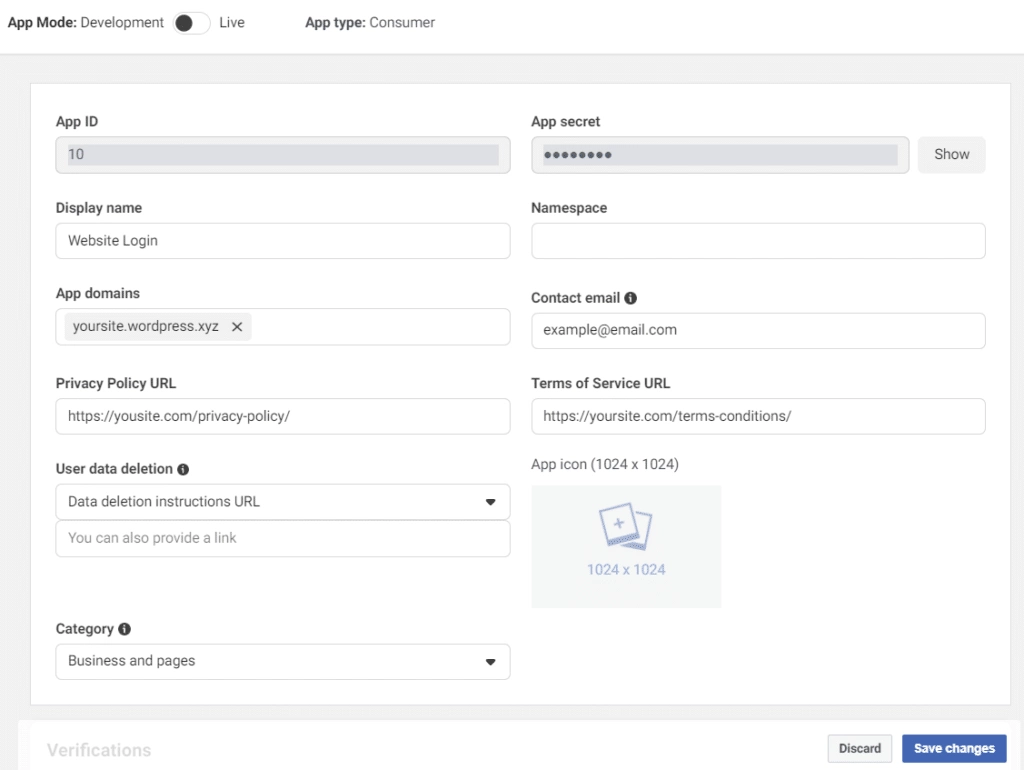
Next, choose your site’s Category and click the Save Changes button.
Finally, head over to the top menu bar and toggle the App mode from Development to Live.

Note: Privacy Policy and Terms of Service page must be accessible on your live site in order to switch to Live mode. If you don’t have these pages on your site, you must add them and then continue with the procedure.
Step 5: Integrate Your Facebook App with The Plus Addons
Now, we need to head back to the WordPress admin dashboard, so we can integrate the Facebook app with The Plus Addons.
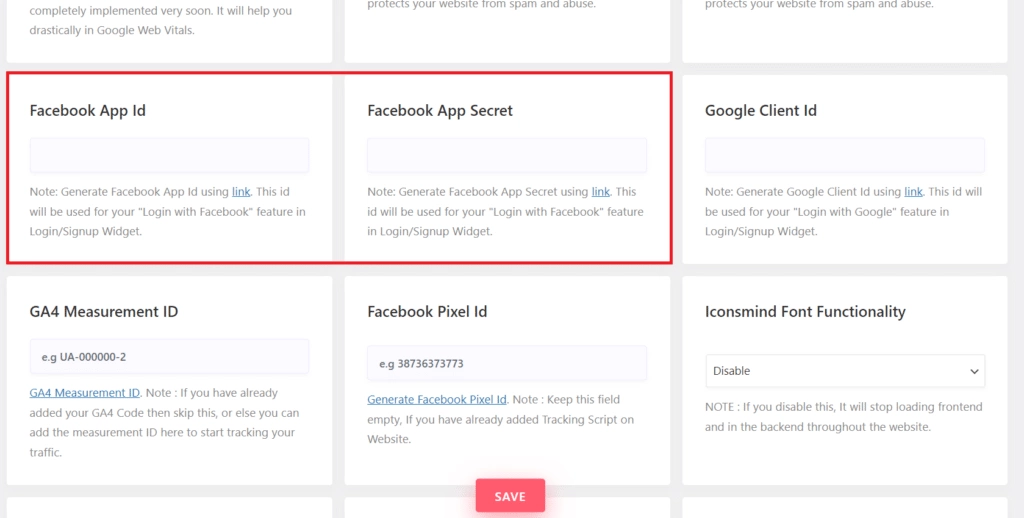
From the left menu bar, open The Plus Settings and navigate to Extra Options.
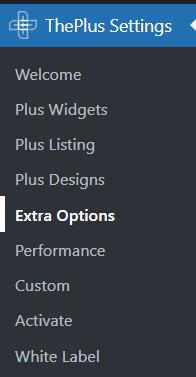
Scroll down, and look for the Facebook App ID and Facebook App Secret boxes.
Simply copy your ID from the developer account tab and paste it into the Plus Addons’ Facebook App ID box.
Repeat the steps for the secret key. Click the Save button.
Do your contact forms get spammed with fake responses? Learn how to stop Elementor contact form spam completely.
Step 6: Add The Plus Addons Login & Register Widget to Your Site
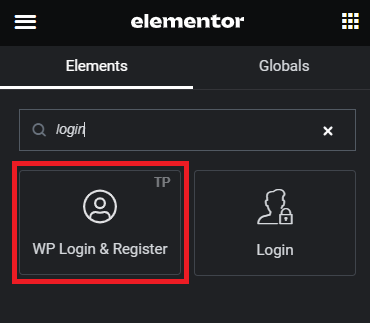
Next, open the page where you want to add a Facebook login in the Elementor page builder.
Search the WP Login & Register widget and drag and drop it to your page. You can set this widget to allow users to register, log in, or do both.
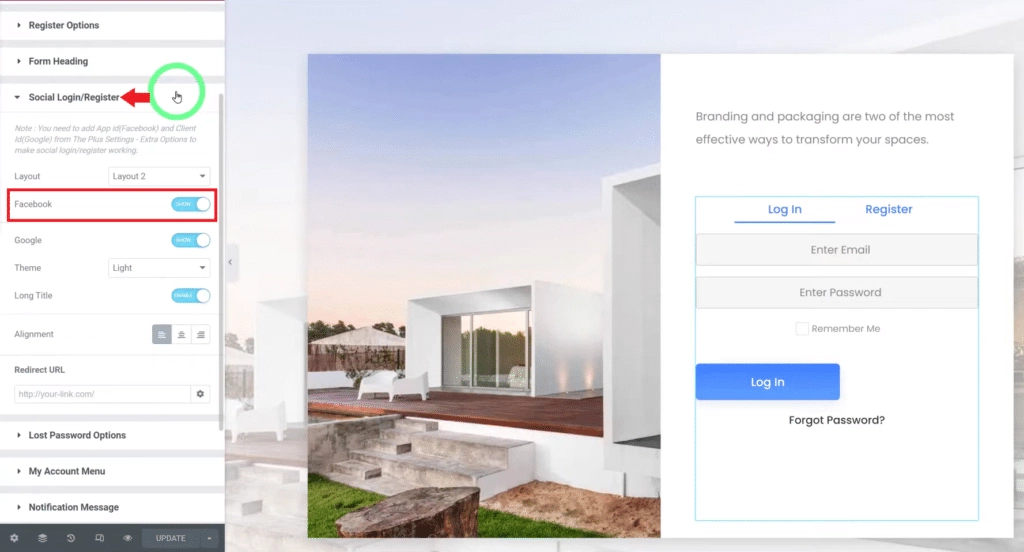
By default, the form will only allow manual login and signup.
To enable Facebook login, scroll down, expand the Social Login/Register section, and toggle Facebook login.
This will enable both Facebook login for existing users and registration for new users.
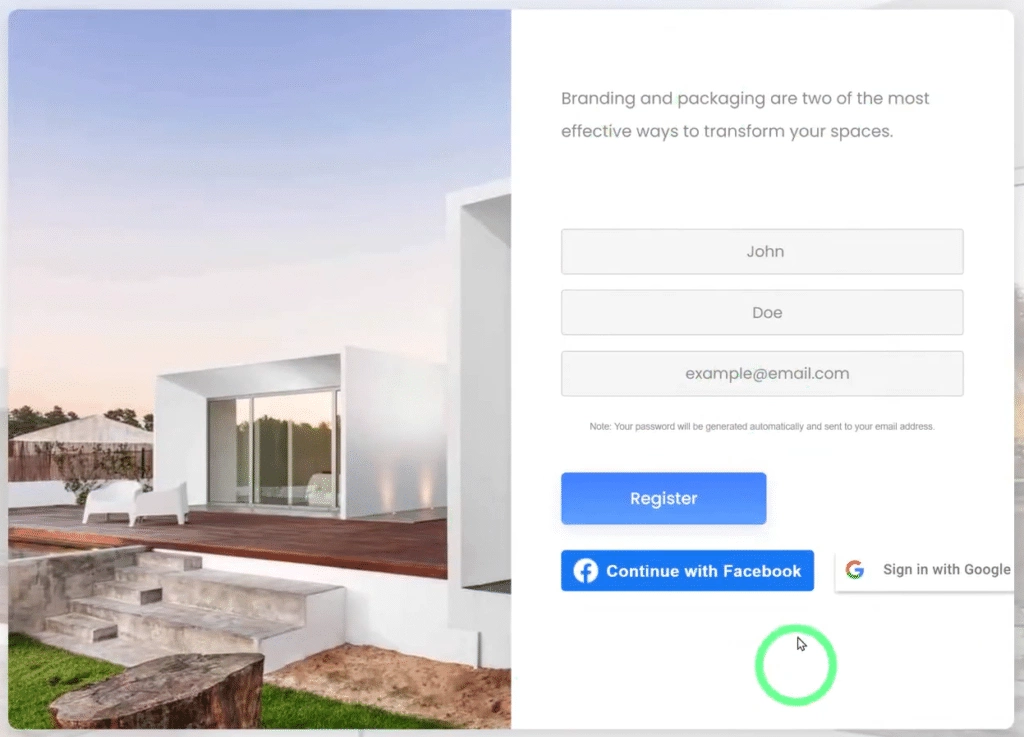
And that’s it. Your new Facebook login button is ready and you can publish your new page. Or, you can customize the look and feel of your login forms to match your site’s design.
The Plus Addons lets you tweak options like typography, background, colors, borders, animations, and more.
If you don’t want to design a login form from scratch, that’s no problem either.
Simply head over to The Plus Addons’ Login & Register landing page, scroll down, and pick a template you like.
Click the Copy button that appears on the right side of your screen when you hover your mouse over a prebuilt form.
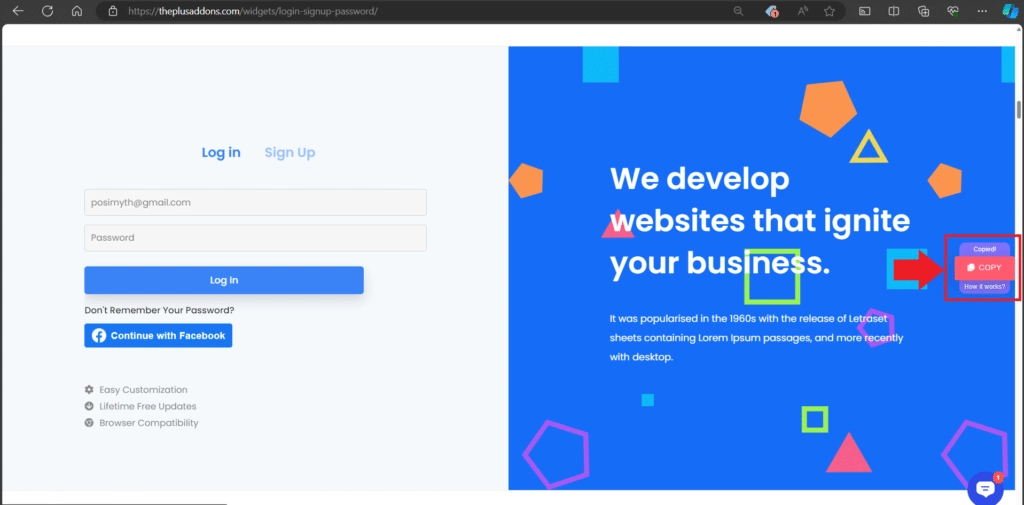
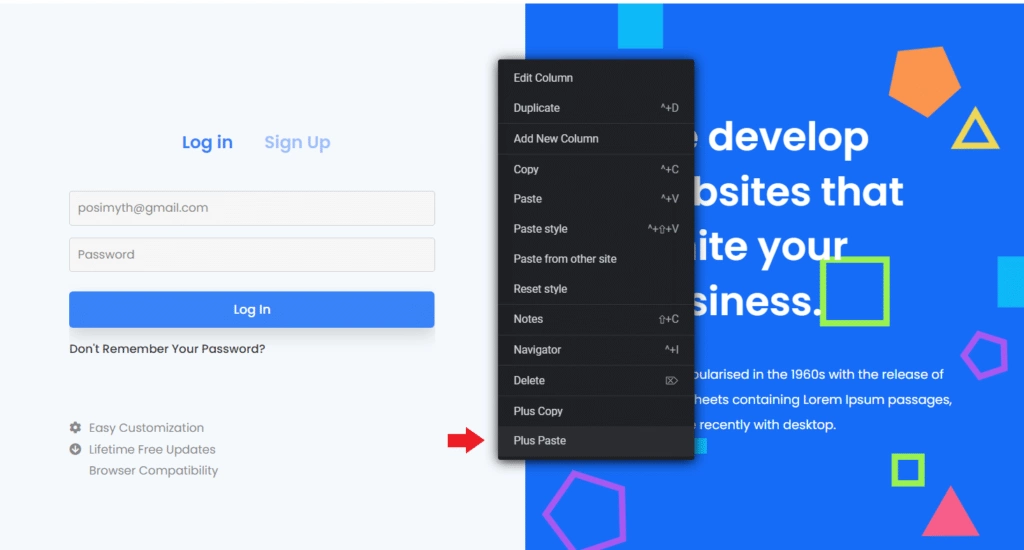
Once copied, head back to the Elementor page builder, right-click, and select the Plus Paste option.
The copied template will be added to your page and ready to go live.
Wrapping Up
A Facebook social login button helps you enhance the user experience by allowing visitors to log in or register to your site with a single click of a button.
What once was a code-intensive exercise, WordPress widgets make it a breeze even for beginners.
Simply install The Plus Addons for Elementor to add a Facebook login/signup to your site using the drag-and-drop widgets.
This widget is fully customizable and lets you enable features like forgot password, subscribe to the newsletter, Google login, my Account menu, spam protection, password difficulty, and more.
If you use forms to collect leads, you must use reCAPTCHA to prevent bot responses and spam. Here’s how you can add reCAPTCHA to your Elementor forms.
