


If you have a WordPress website or page that you don’t want visitors to access yet, a question that often arises is how to password-protect a page in WordPress.
Password protection for a particular WordPress page is a good idea if you want to control who sees specific content, reduce security issues, or gate-published pages while you’re editing them.
WordPress password protection can help protect any sensitive information from unauthorized users in the backend or publish exclusive, protected content.
So, how do you password-protect a WordPress page? Thankfully, password-protecting your WordPress page or post is easy with built-in settings and third-party plugins in WordPress.
Let’s dive into the step-by-step process to password-protect WordPress sites using WordPress editor settings and plugins.
Why Password Protect a Page in WordPress?
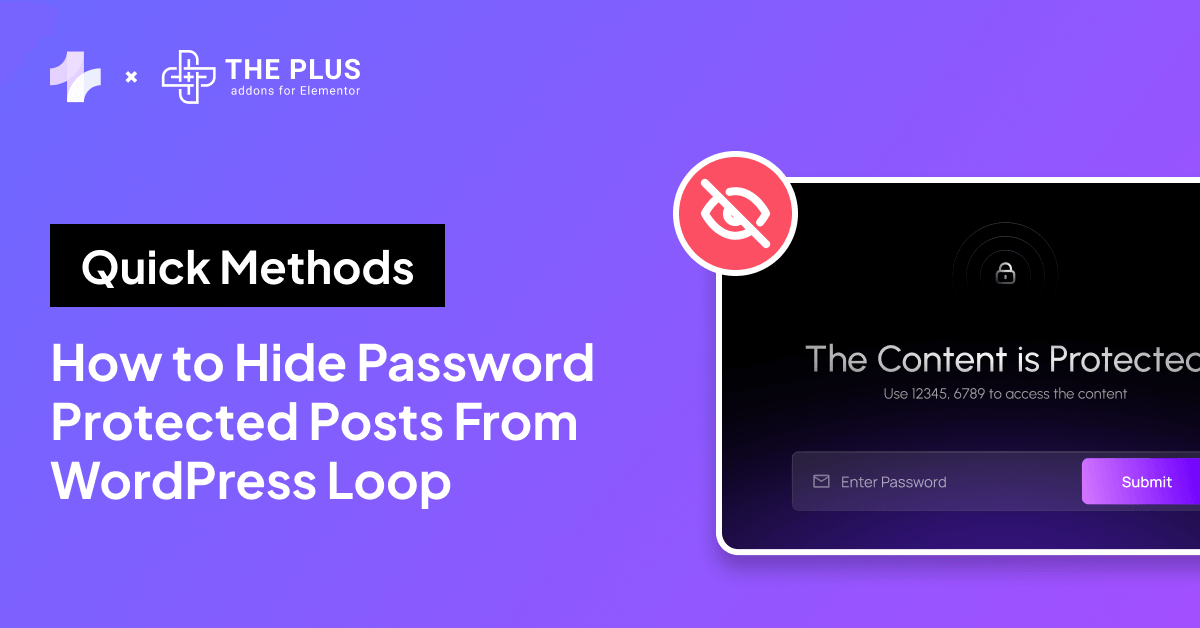
When you protect a page on your WordPress using a password, it is not visible publicly to your website visitors.
Here are various reasons why you might want to protect your website page with a password-

- To limit content visibility: You can restrict public access to certain pages of your website, such as under-construction pages, drafts, or unedited work. Visitors won’t be able to see the password-protected content, but you can still collaborate easily with your team members.
- To ensure privacy: If a WordPress page contains sensitive information such as client details or financial documents, you can use the password protection feature to hide it from unauthorized content access.
- To share exclusive content: Password-protecting your WordPress page is an excellent way to share premium content for your members-only website. You can easily manage members and ensure that only paying members get access to exclusive content.
- To prevent search engine indexing: Password-protected pages are not indexed by the search engine, so they don’t show up on the search engine.
How to Password Protect a Page in WordPress [Step-by-Step Methods]
Password-protecting your entire WordPress site content is easy with these two simple methods.
Let’s explore them one by one.
Method 1: Using The WordPress Editor
WordPress has a built-in feature to let you password-protect content. Here’s how you can go about it-
1. Create a new page or edit an existing one
From your WordPress admin dashboard, go to Pages/Posts to create new content or open existing pages or posts that you want to password-protect.

2. Set password-protected visibility
Once you’re done editing the page, go to the Page/Post tab on the right and click on the Draft link next to Status.
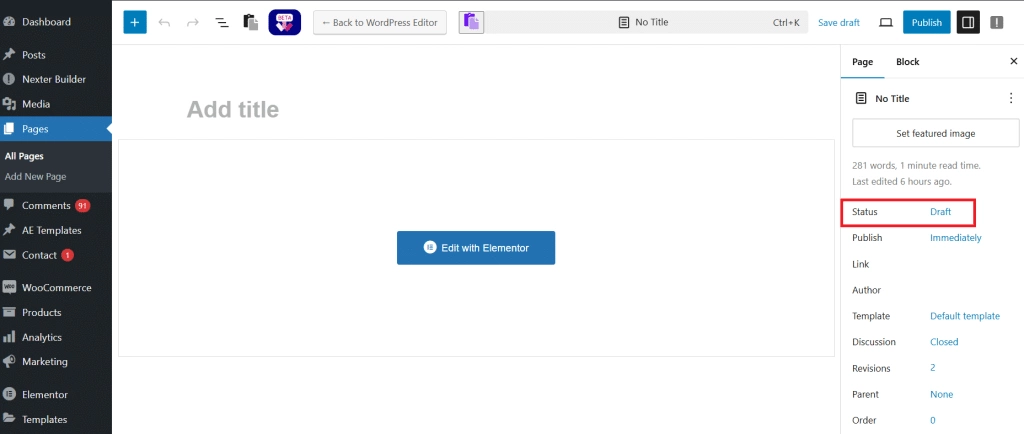
This will open the status and visibility dialogue box. Here, check the “Password Protected“ box and create a strong password in the box below.
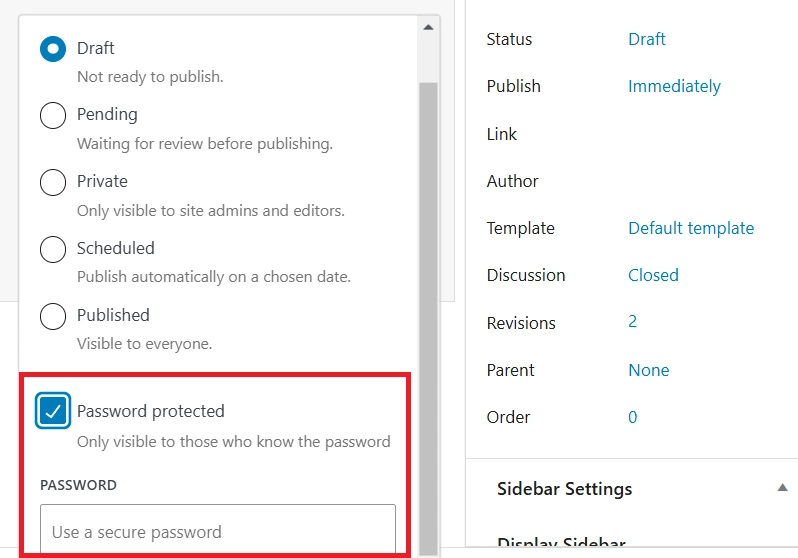
3. Publish the protected WordPress page
Publish the page or post and visit your website to check if it works.
Restrict unauthorized access to your WordPress backend and protect your login. Learn How to Secure WordPress Login Page in 11 Ways.
Method 2: Using a Plugin
A password-protect WordPress plugin is another great way to protect your WordPress site.
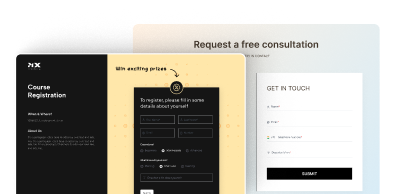
You can use a lightweight widget, like Elementor Protected Content from The Plus Addons for Elementor, to restrict sensitive content on your site in multiple ways.
Here’s how you can use this plugin-
1. Install and activate The Plus Addons for Elementor
On your WordPress dashboard, go to Plugins > Add New and search for The Plus Addons for Elementor. Install and activate the plugin.
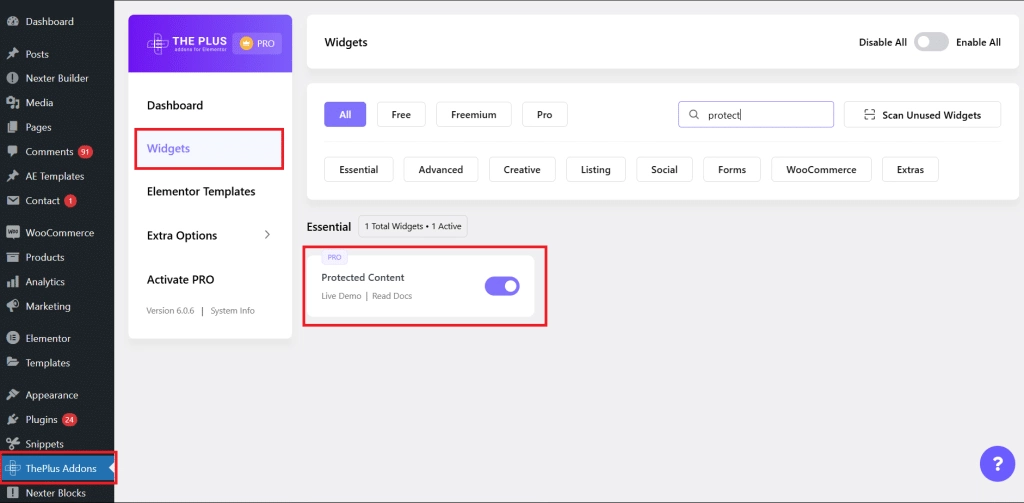
2. Enable protected content widget
Once you’ve activated the plugin, go to ThePlus Addons on the admin dashboard and navigate to Widgets. Search for the Protected Content widget and turn on the toggle.
With this widget enabled you can easily add a single password and multiple passwords to protect your content, restrict content based on different user roles, and add protected content with an Elementor template.
3. Password protect WordPress page
Open the page where you want password protection using the plugin. Start by saving the entire WordPress page as an Elementor template.
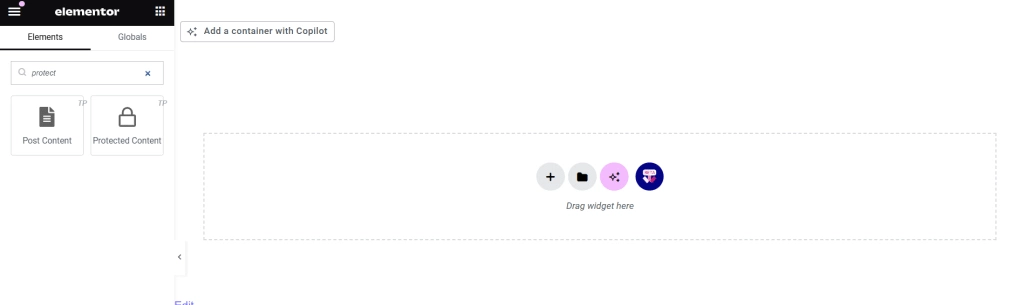
Next, remove all the content from the page, update, and reload the page. Drag and drop the Protect Content widget to the page.
Navigate to the Edit Protected Content on the left and select Page Template from the Content Source tab. Select the template you’ve saved from the Elementor Templates dropdown.
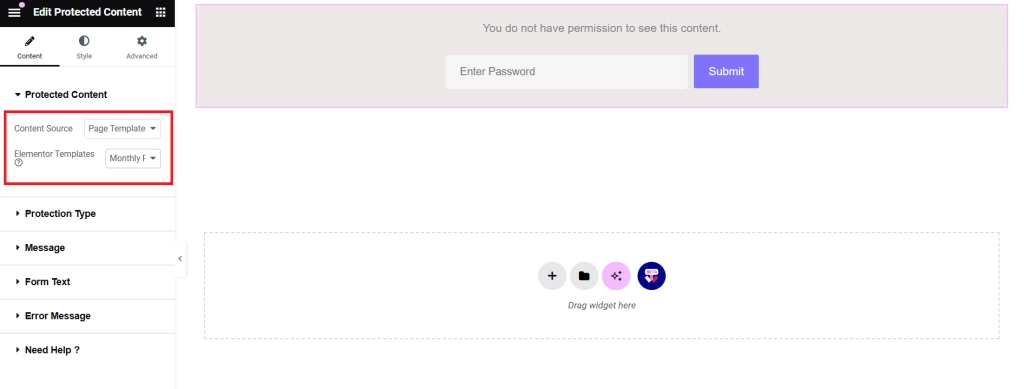
From the Protection Type dropdown, you can select if you want to put in single or multiple passwords or restrict access based on user role.

Then, you can set a secure password, and your page will be restricted from unauthorized access.
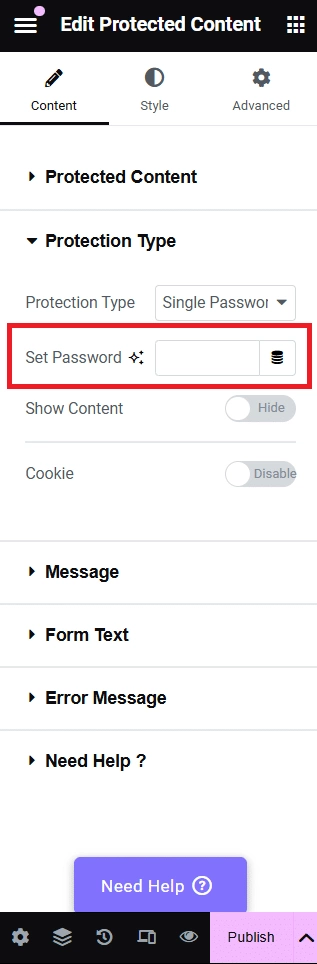
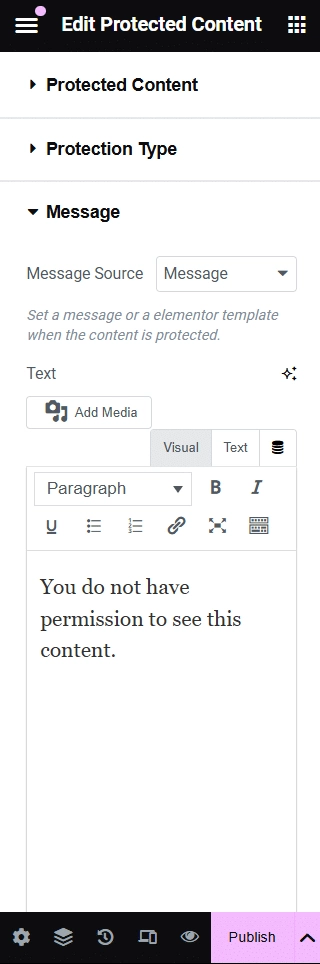
You can also customize the message you want to display on the protected page and stylize the password page easily.
Further Read: Compete Guide on How To Create Elementor Password Protected Page

Wrapping Up
WordPress password-protected page will help you restrict access to certain WordPress pages or posts that you don’t want to show your visitors.
It not only enhances your website privacy and limits content visibility but is also a good way to share premium content with visitors if you have a members-only website page.
Plus, password-protecting your page is easy with WordPress plugins like The Plus Addons for Elementor. Its Protected Content widget is a simple tool that makes it easy to add a password to your website content.
It further lets you choose from protection type, add a custom message on the protected content, and even customize the said content easily. But that’s not it.
The Plus Addons for Elementor is a complete WordPress plugin featuring 120+ unique widgets to elevate the features and functionality of your site.
Install the plugin to explore all the amazing features it has to offer.