Do you want to accept payments through Google Pay on WooCommerce? Learn how in this easy guide.
If you have an e-commerce store, integrating your store with popular payment platforms is key to offering a great shopping experience to your users.
It not only gives them the flexibility to pay via multiple modes but also enables faster checkout and seamless payments.
Fortunately, WooCommerce, the popular e-commerce plugin allows integration with various payment platforms for your website, like Google Pay. Not to mention, it makes it fairly easy to add and set up Google Pay for websites and start transactions immediately.
In this article, we’ll guide you through the step-by-step process to enable the Google Pay payment gateway for WooCommerce.
What is WooCommerce Google Pay?
Google Pay for WooCommerce (or WooCommerce Gpay) is a payment method for your e-commerce store that allows users to make online payments for their purchases via Google Pay.
Did You Know?
Google Pay is a digital wallet platform by Google, enabling users to make online purchases, send money, and pay in stores securely using their smartphones.
When integrated with WooCommerce, users can carry out payments on an app or website using their Google Pay account. You can share payment requests to any credit card or debit card stored in the customer’s Google Pay Account using the Google Pay API.
However, to enable this function you’ll need to use a payment plugin like Payments Plugin for Stripe WooCommerce that allows easy integration of Google Pay with your WooCommerce store through Stripe.
With this plugin, users can make secure and faster payments, resulting in an exceptional purchase experience.
Design a feature-rich e-commerce website on Elementor. Choose from the 4 Best WooCommerce Addons and Plugins for Elementor.
What are the Benefits of Using Google Pay in WooCommerce?
There are various benefits of adding Google Pay to WooCommerce for your business.
- Fast and secure payments:
Google Pay offers a faster payment process that leads to a seamless experience for your customers. You can simply add a Google Pay button on your website and allow quick payments.
Plus, Google Pay relies on advanced security infrastructures, with multiple security layers protecting your transactions. This makes it a safe payment platform.
- Widely available:
Google Pay is used by millions of users across 40 countries. Its wide accessibility makes it a popular payment gateway system and a must-have integration for your WooCommerce store.
- No need for sign-ups:
Unlike other payment systems such as PayPal, Google Pay does not require you to sign up. The payment is directed straight to your linked bank account when a customer completes the payment.
- Increase in conversions:
A smooth and quick payment process enabled by Google Pay results in a great website experience for your customers.
This adds to their convenience and can help increase conversions for your online store.
How to Set Up Google Pay on WooCommerce [Step-by-Step]
Wondering how to add Google Pay in WordPress? Here is the step-by-step process to integrate and set up Google Pay on your WooCommerce.
For this guide, we’ll be using the Stripe plugin as an example to enable Google Pay in WooCommerce.
1. Install and Activate Stripe Payment Plugin
In order to learn how to add payment method in WordPress WooCommerce, you’ll require a plugin.
To enable Google Pay in Stripe, start with installing and activating the Stripe payment plugin.
For this, go to your WordPress dashboard and navigate to Plugins > Add New. Search for Stripe Payment Plugin for WooCommerce, and click on Install Now.
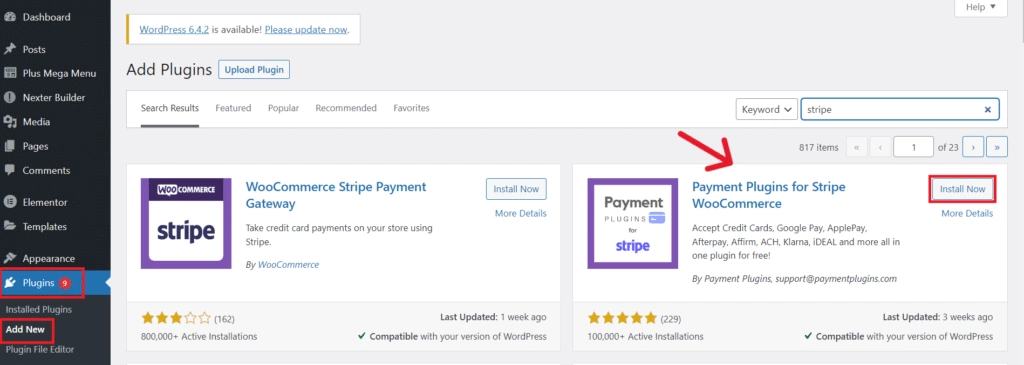
Once the plugin is installed, click on Activate to get started.
2. Configure the Plugin Settings
Once the plugin is activated, it’s time to configure stripe with your e-commerce store.
To do so, go to WooCommerce > Stripe by Payment Plugins on your WordPress dashboard and click on Settings.
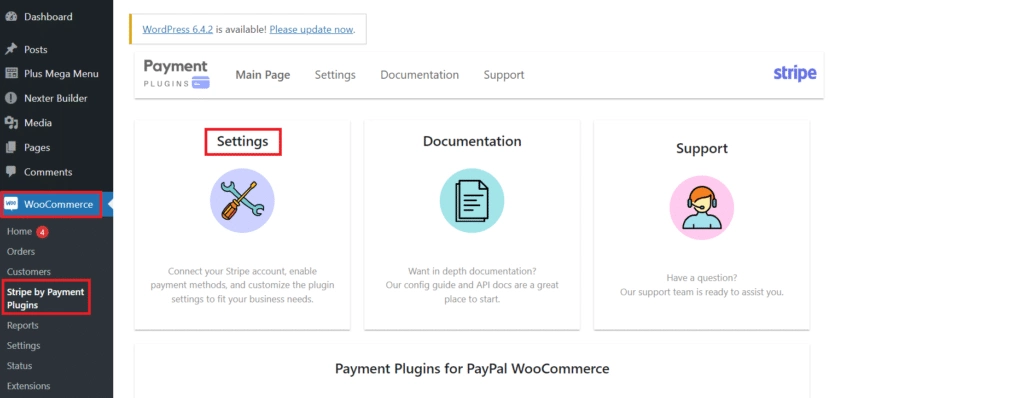
In the Stripe API settings, select the mode as Live and click on the Click to Connect button below it to connect Stripe to your WooCommerce store.
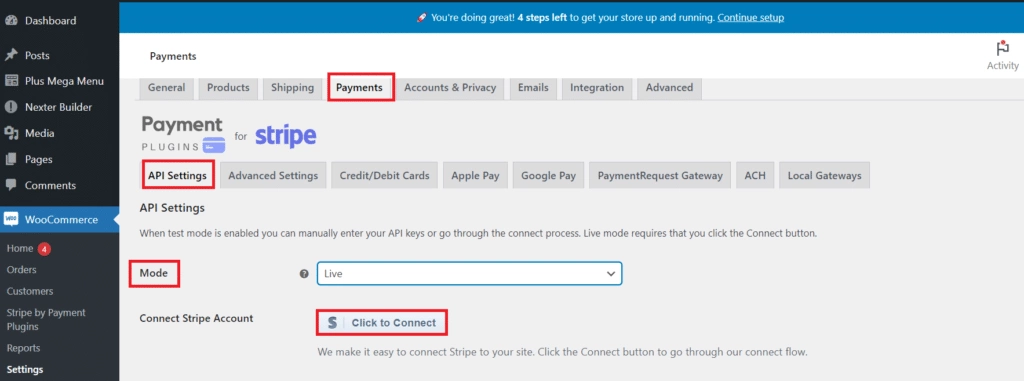
This will prompt you to enter your personal details, professional and bank details, as well as other public details to connect your Stripe account.
3. Connect Google Pay with Stripe
The next step is to enable Google Pay in Stripe. Go to WooCommerce > Settings > Payments.
Scroll down to find the Stripe Google Pay option, turn on the toggle to ‘Enabled’, and click on Finish set up to get started with the configuration.
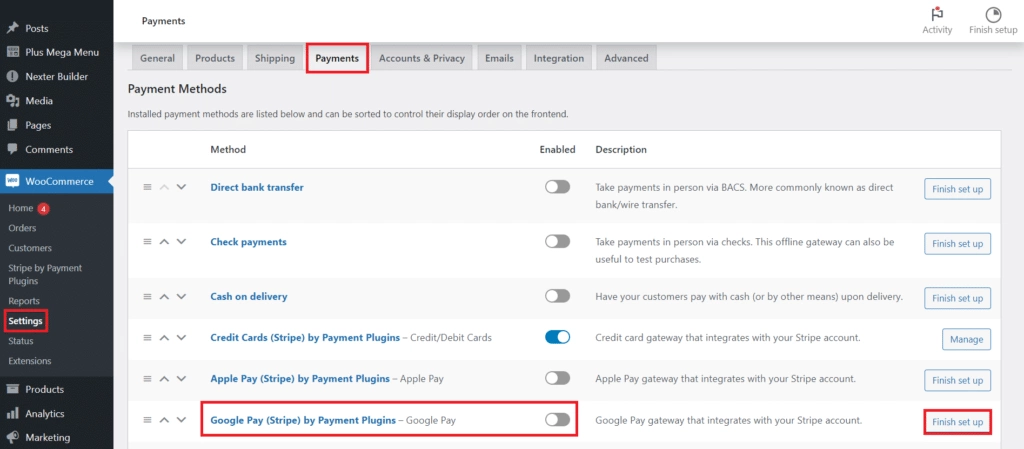
Then navigate to Stripe by Payments Plugin > Settings.
Here, click on the Google Pay tab for WooCommerce and check the Enable option to allow Google Pay for your e-commerce store.
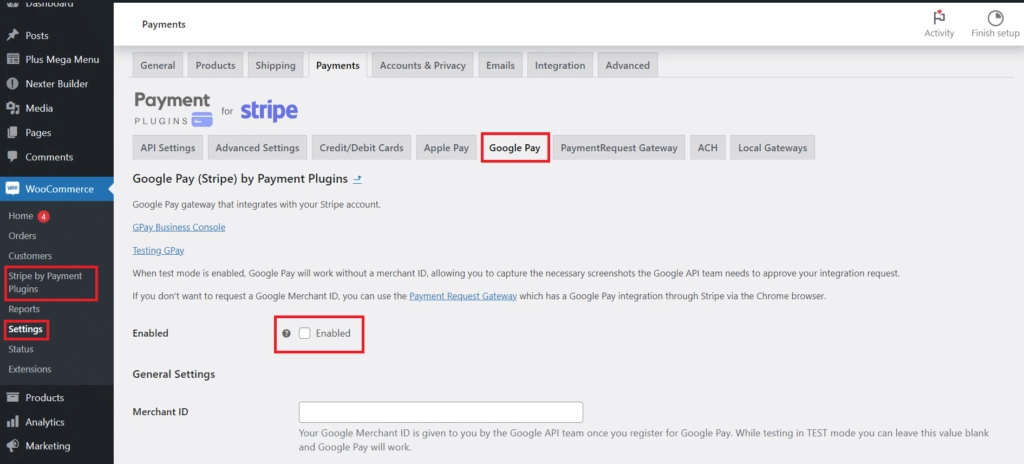
Next, under the General Settings section, add your Google Pay merchant ID account (this is made available by the Google API team when you register for a Google Pay account).
On this page, you will also find settings for the payment method, such as title, description, merchant name, button options, and more.
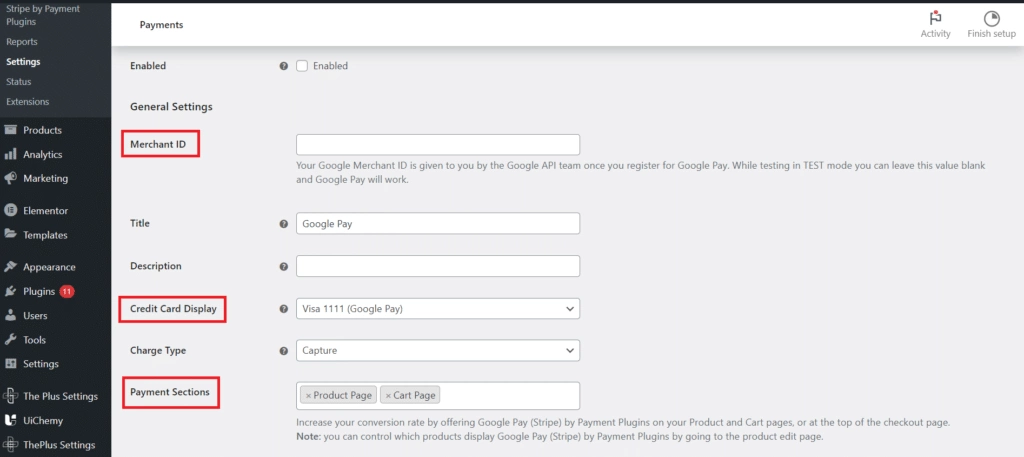
Similarly, you can also change settings for the icon style, dropdown menu options, and credit card display.
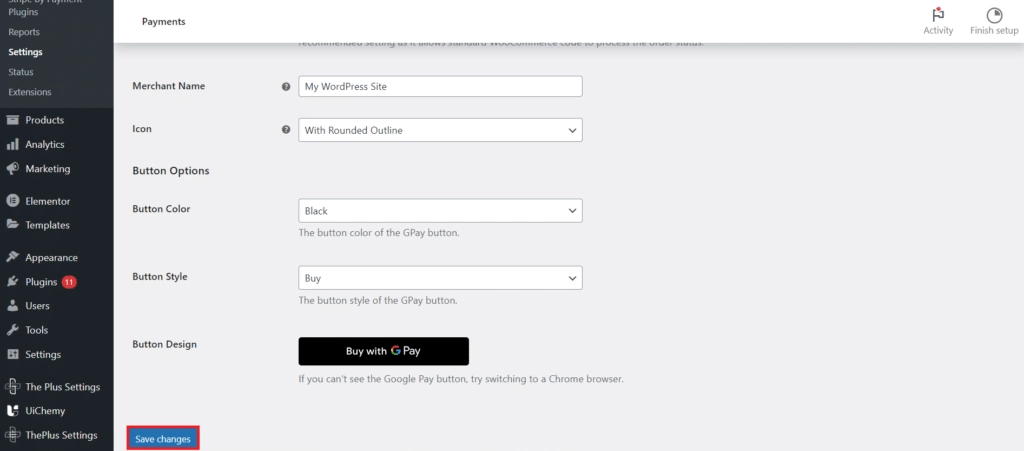
Now your WooCommerce Stripe Google Pay integration is ready.
4. Check the Google Pay Integration
Now, go to the front end of your website to check the Google Pay payment method on the checkout page. You can also add the Google Pay button on the product page to facilitate quicker purchase and payment.
However, if you want to test the process first, before configuration, you can do so from the API settings on your dashboard.
In the API settings, enter the publishable and secret keys, which can be accessed from your Stripe account.
Go to your Stripe account settings, and click on the toggle to enable the Test mode.
Click on the Developer option and go to the API Keys tab. You can copy the Publishable and Secret keys from here.
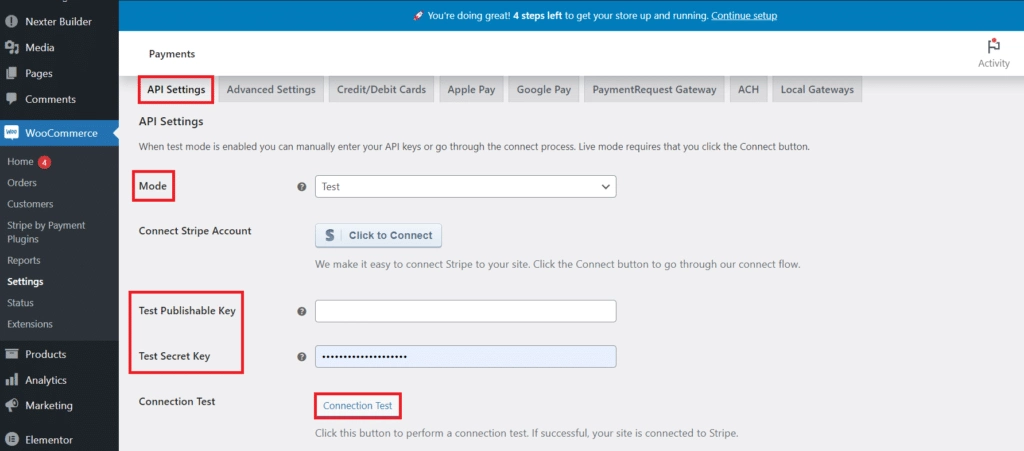
Back on your WordPress dashboard, go to WooCommerce > Stripe by Payment Plugins > Settings.
Here, change the Mode to Test and enter the Test Publishable and Test Secret Keys. Click on Connection Test to test the connection and select Save Changes if it is successful.
Want to build a stunning, feature-rich WooCommerce website? Explore the 7 Best WooCommerce Website Builders.
How to Build an Advanced WooCommerce Store Easily?
If you have an e-commerce website, engaging design, interactive features, and seamless store navigation are the keys to excellent user experience.
While the WooCommerce plugin comes with a range of features and customizations for your website, you might be looking for more.
If you want to unlock additional functions, design elements, and widgets for maximum conversions, WooBuilder by The Plus Addons for Elementor will make it convenient to do so.
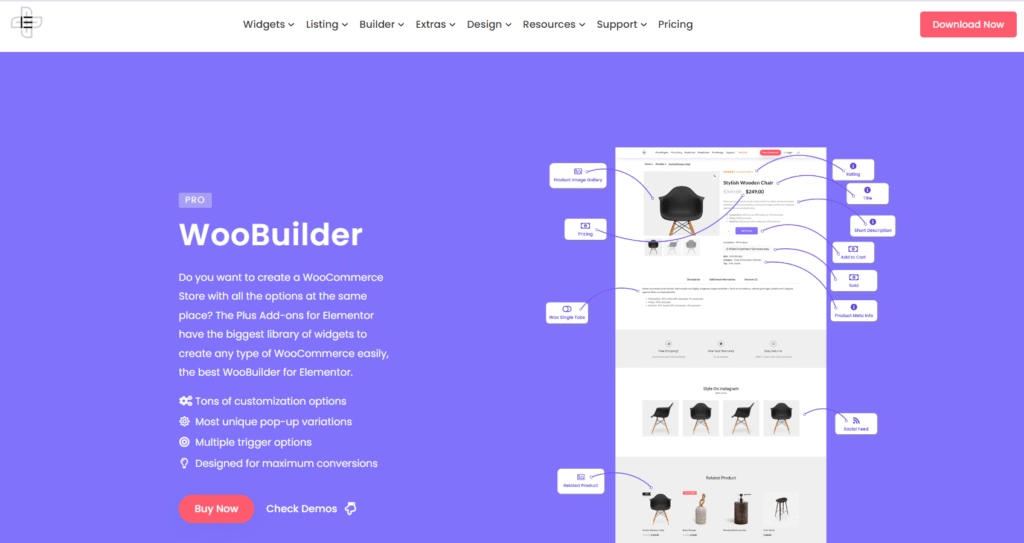
WooBuilder features a vast library of WooCommerce widgets to create stunning, feature-rich product pages.
Here’s what all you can do with WooBuilder by The Plus Addons for Elementor-
- Fully customized WooCommerce website: With access to a wide range of WooCommerce widgets for product pages, categories, my account, pricing, product info, and more, you can create a fully customizable WooCommerce website.
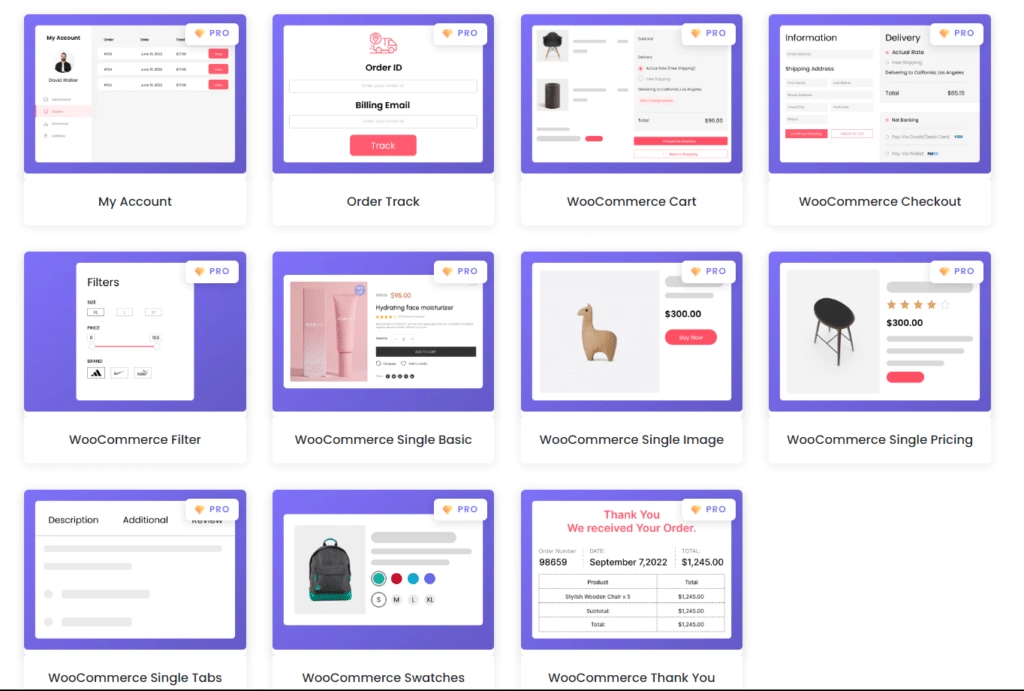
- Custom page layouts: WooBuilder offers you a great collection of page layouts for single products, cart, thank you page, checkout, and order tracking. You can choose from their readymade page layouts or create one on your own using its extensive design elements.
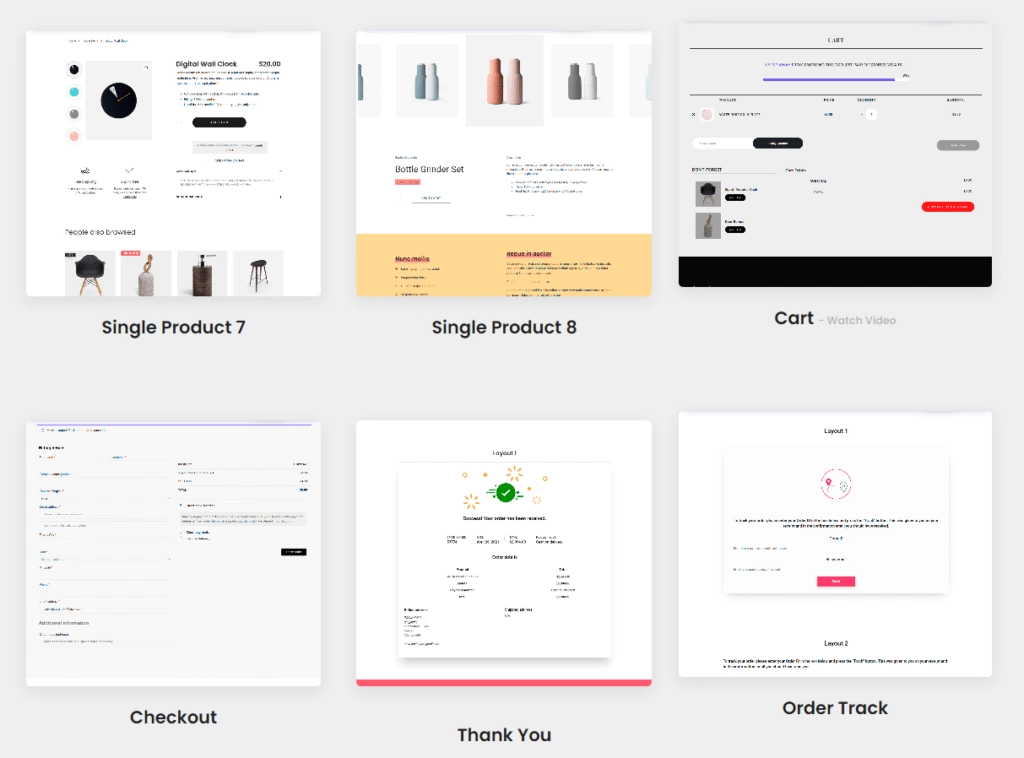
- Create single product pages: With WooBuilder, you can create more than just single product pages. Create and customize checkout pages, Woo categories, product listing pages, Thank You page, and more to align with your branding.
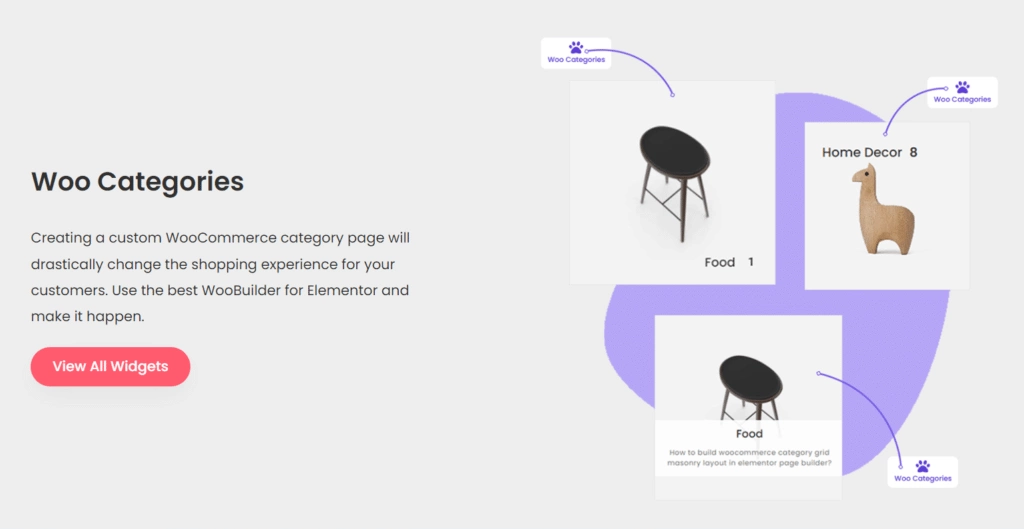
- Woo Categories: Use the Woo Categories widget to create a custom product category page which will allow your customers to browse through your products easily and enjoy a seamless shopping experience.
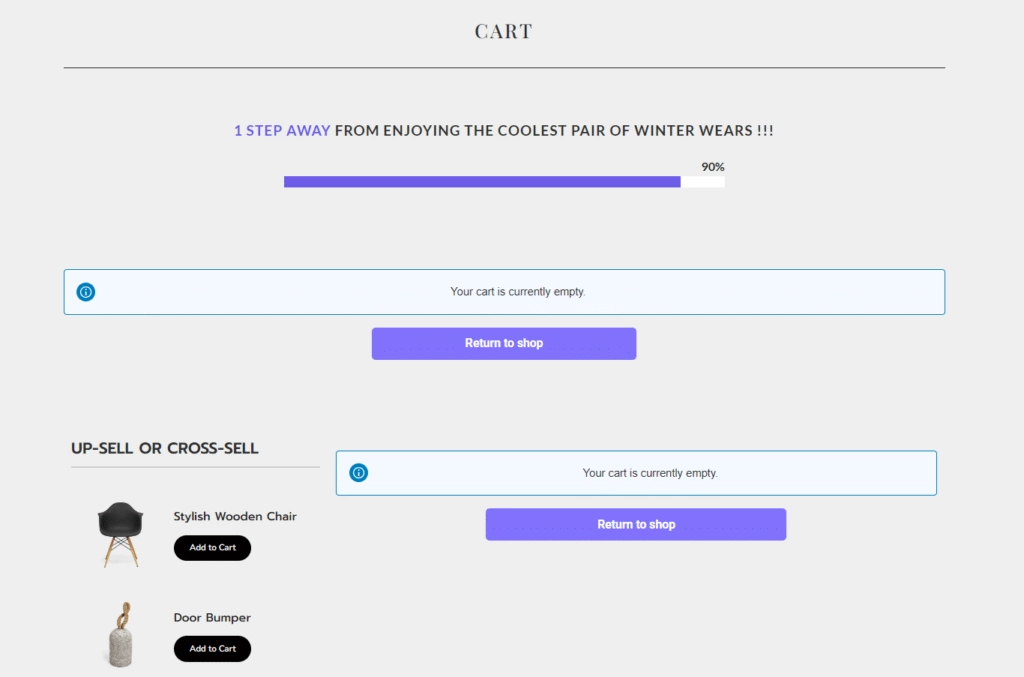
- Cart widget: Add custom cart icons and design fully customized cart pages that make it easy for your customers to add and review purchases before checking out. Use readymade templates for your cart page and customize individual components like coupon code section or cart total.
- WooFilter: WooFilter is a widget with which you can add filtering feature to your product listings page. This will allow your customers to filter and look for products based on categories, price ranges, ratings, tags, and search queries using AJAX.
- Seamless checkouts: The Checkout Page Widget lets you design and customize stunning checkout pages to improve user experience. You can add or customize fields as you want, add multiple payment options like Google Pay, and display the cart in an engaging way.
WooBuilder by The Plus Addons for Elementor comes with the best design and customization options for maximum conversions, multiple trigger options, and unique pop-up variations.
Most of all, the widget is highly responsive, so any page design you create will be equally responsive for various screen sizes.
Further Read: Simplify the shopping experience for your customers with easy search options. Check out the 5 Best WooCommerce Product Search Plugins for your website.
Wrapping Up
Adding Google Pay and other popular payment methods on your WooCommerce website can help enhance the shopping experience for your customers.
With a high-quality GPay WooCommerce plugin like Payments Plugin for Stripe WooCommerce, you can quickly add the Google Pay payment option to your checkout page from your WordPress dashboard and allow your customers to make quicker payments.
To build a stunning WooCommerce website that offers your customers a convenient purchase experience, check out WooBuilder by The Plus Addons for Elementor.
The widget is packed with unique features, custom page layouts, and tons of customization options to create any type of WooCommerce easily.
But that’s not it. Along with WooBuilder, The Plus Addons for Elementor features 120+ widgets for design, customizations, image gallery, header builder, custom pop-ups, event management, and so much more.
