Do you want to add a Google login to your Elementor website? By allowing users to log in with their Google accounts, you not only make the login process seamless but also add a layer of security.
With the WP Login & Register widget from The Plus Addons for Elementor, you can easily add a Google login to your Elementor website.
To check the complete feature overview documentation of The Plus Addons for Elementor WP Login & Register widget, click here.
Requirement – This widget is a part of The Plus Addons for Elementor, make sure its installed & activated to enjoy all its powers.
First, you have to generate your Google Client ID.
Generate Google Client ID
1. For this, you have to login to your Google account and go to the Google Developers Console.
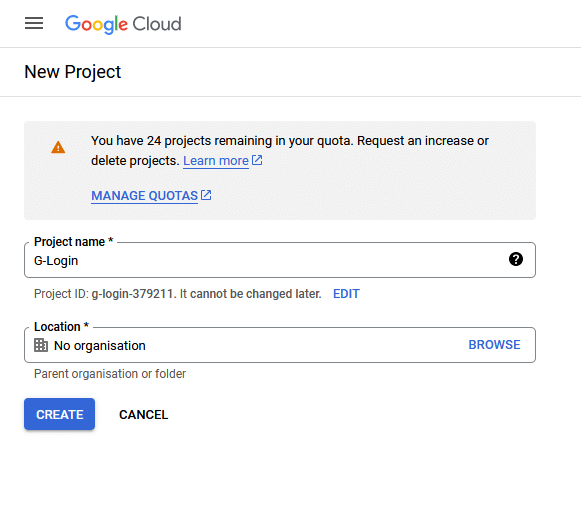
2. If you don’t have any project created then click on CREATE PROJECT link.

3. On the next screen add your Project name and click the CREATE button.
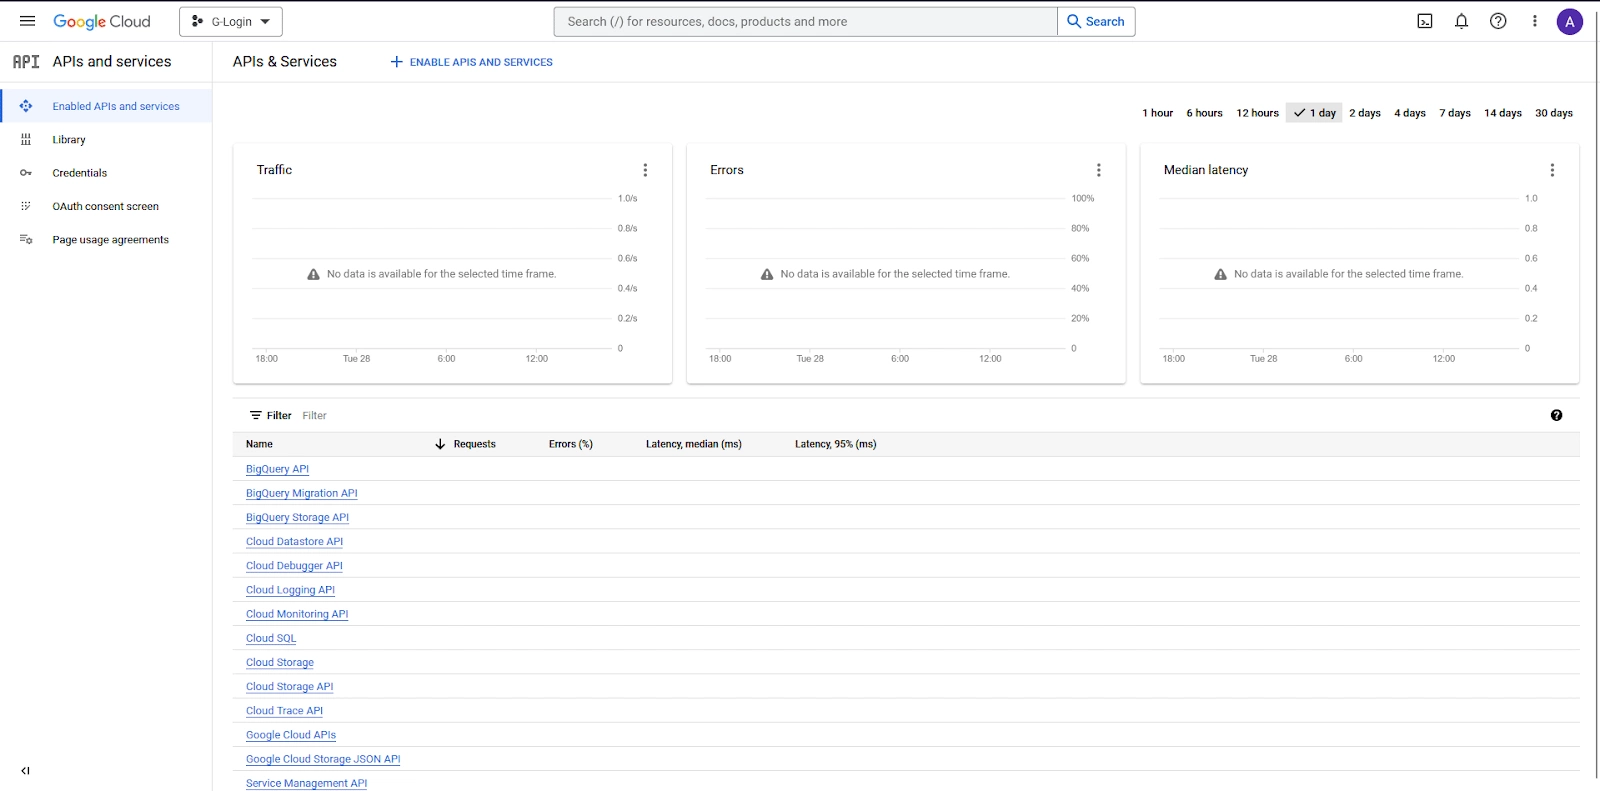
4. Then click on the OAuth consent screen on the left sidebar.
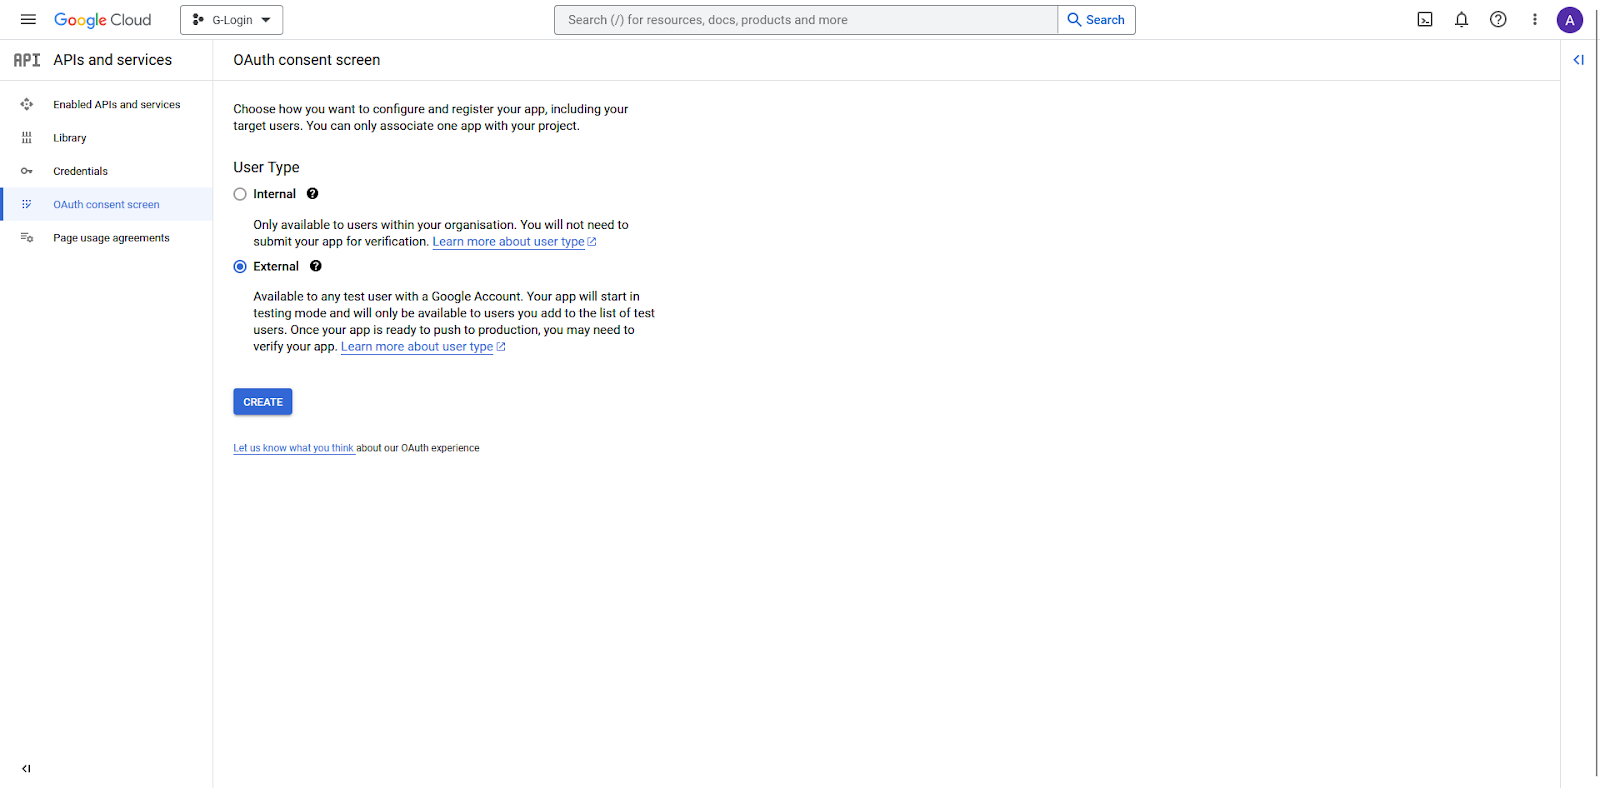
5. On that page, select the User Type and click the CREATE button.
- Internal – Only available to users within your organization.
- External – Available to any user with a Google Account.
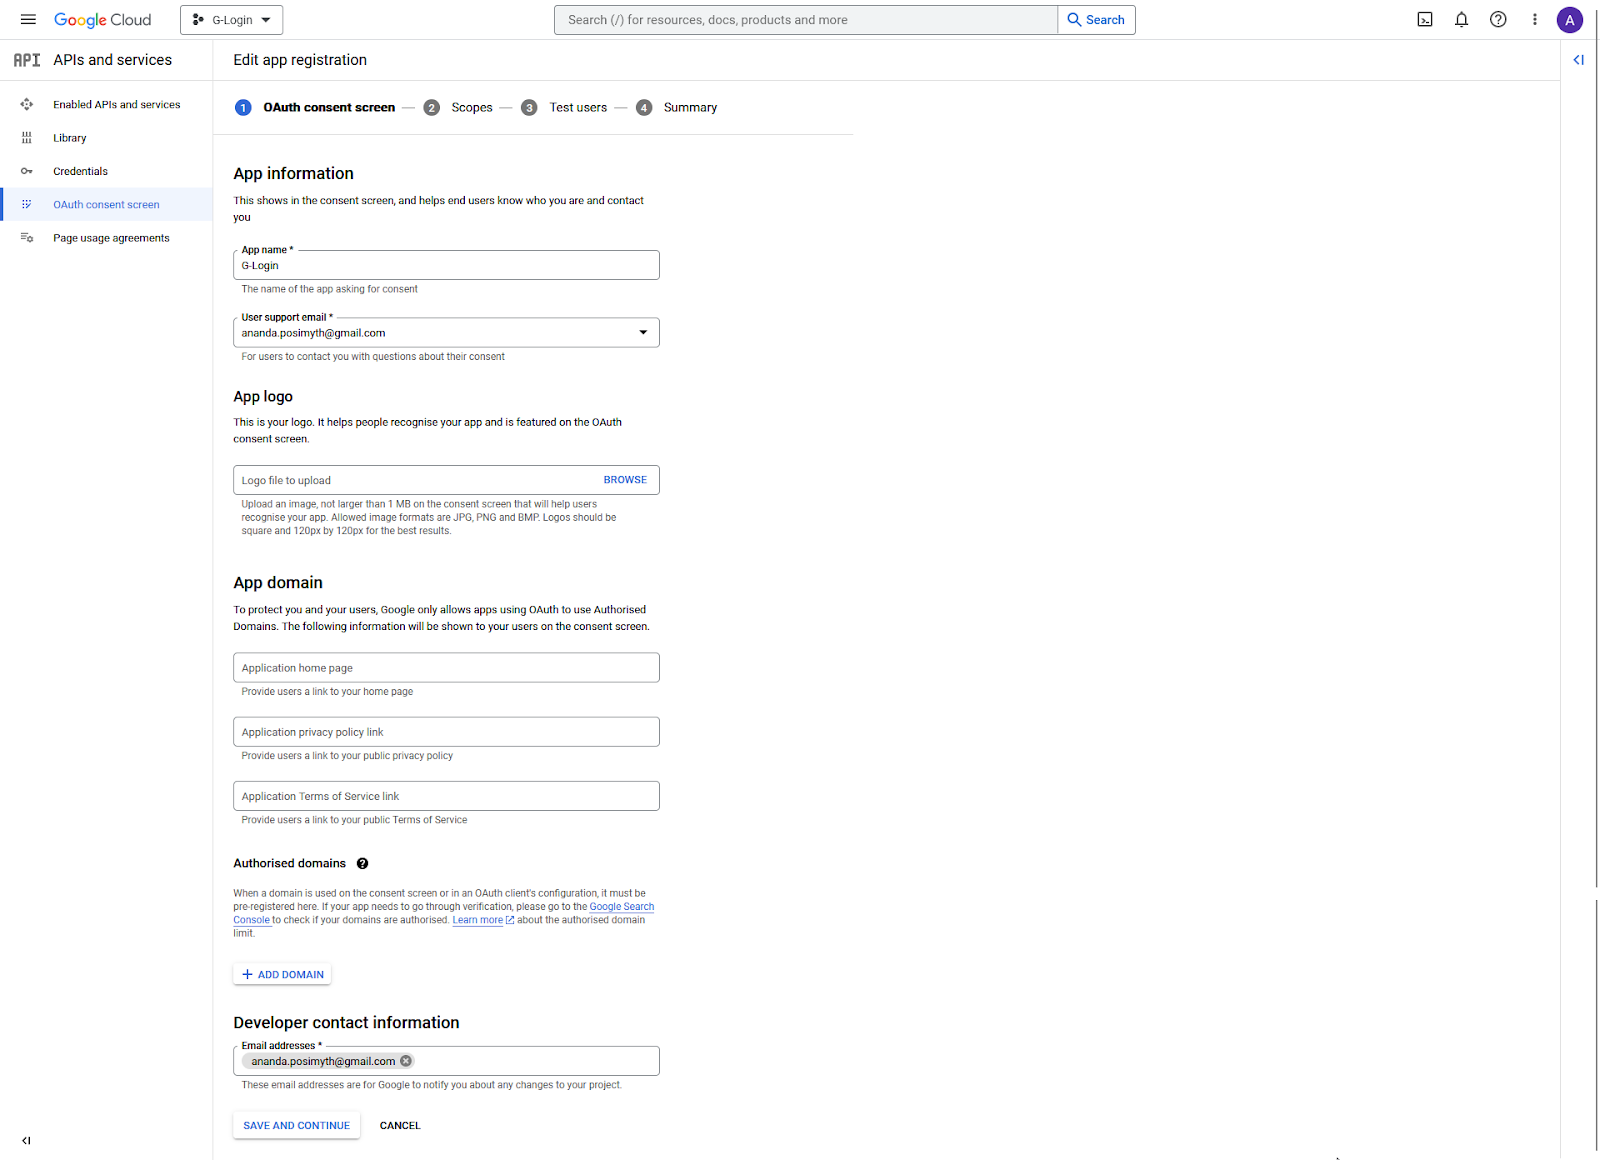
6. On the next page, add your app information. App name, User support email and Developer contact information fields are mandatory rest are optional until you deploy your app.
Then click on the SAVE AND CONTINUE button.
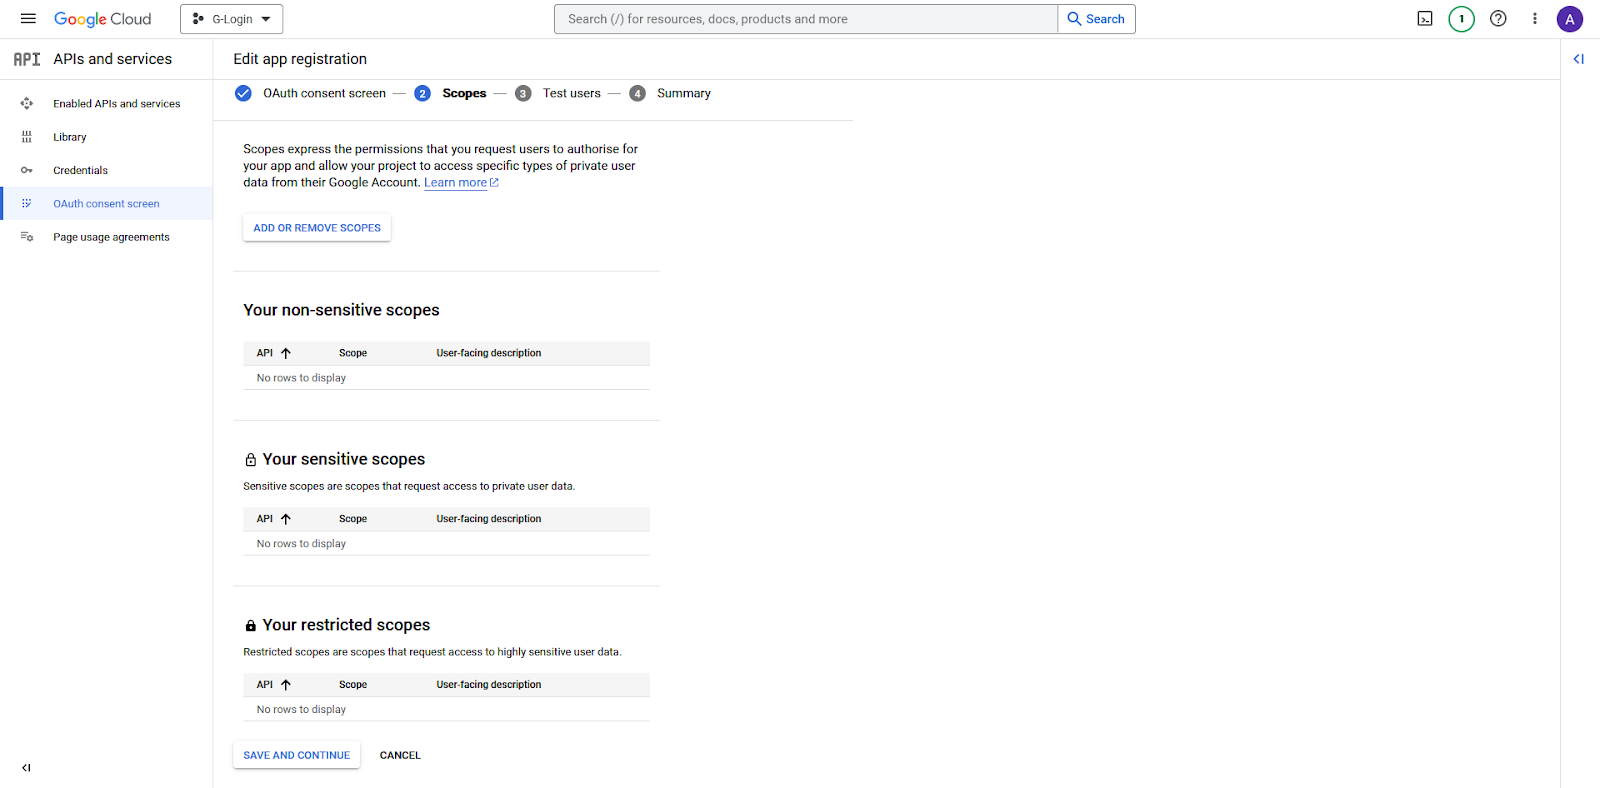
7. On the Scopes page, click the SAVE AND CONTINUE button.
8. Also on the Test users page, click the SAVE AND CONTINUE button.

9. On the Summary page, click the BACK TO DASHBOARD button at the bottom.

10. On the next page, click on the PUBLISH APP button to publish your app.
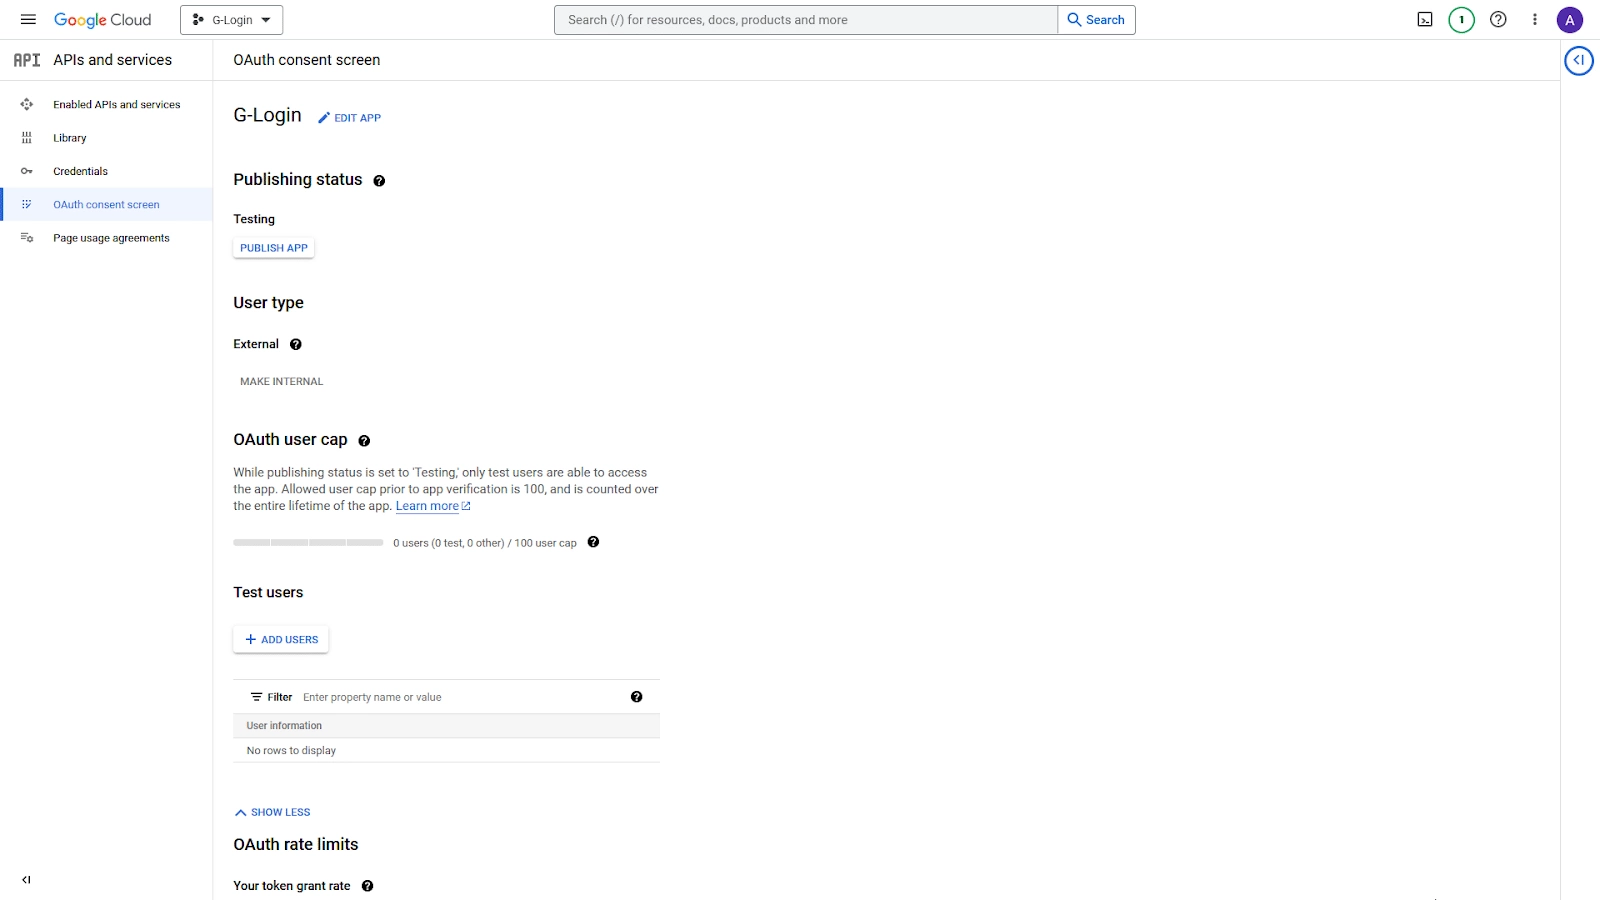
11. Once done click on Credentials in the left sidebar.
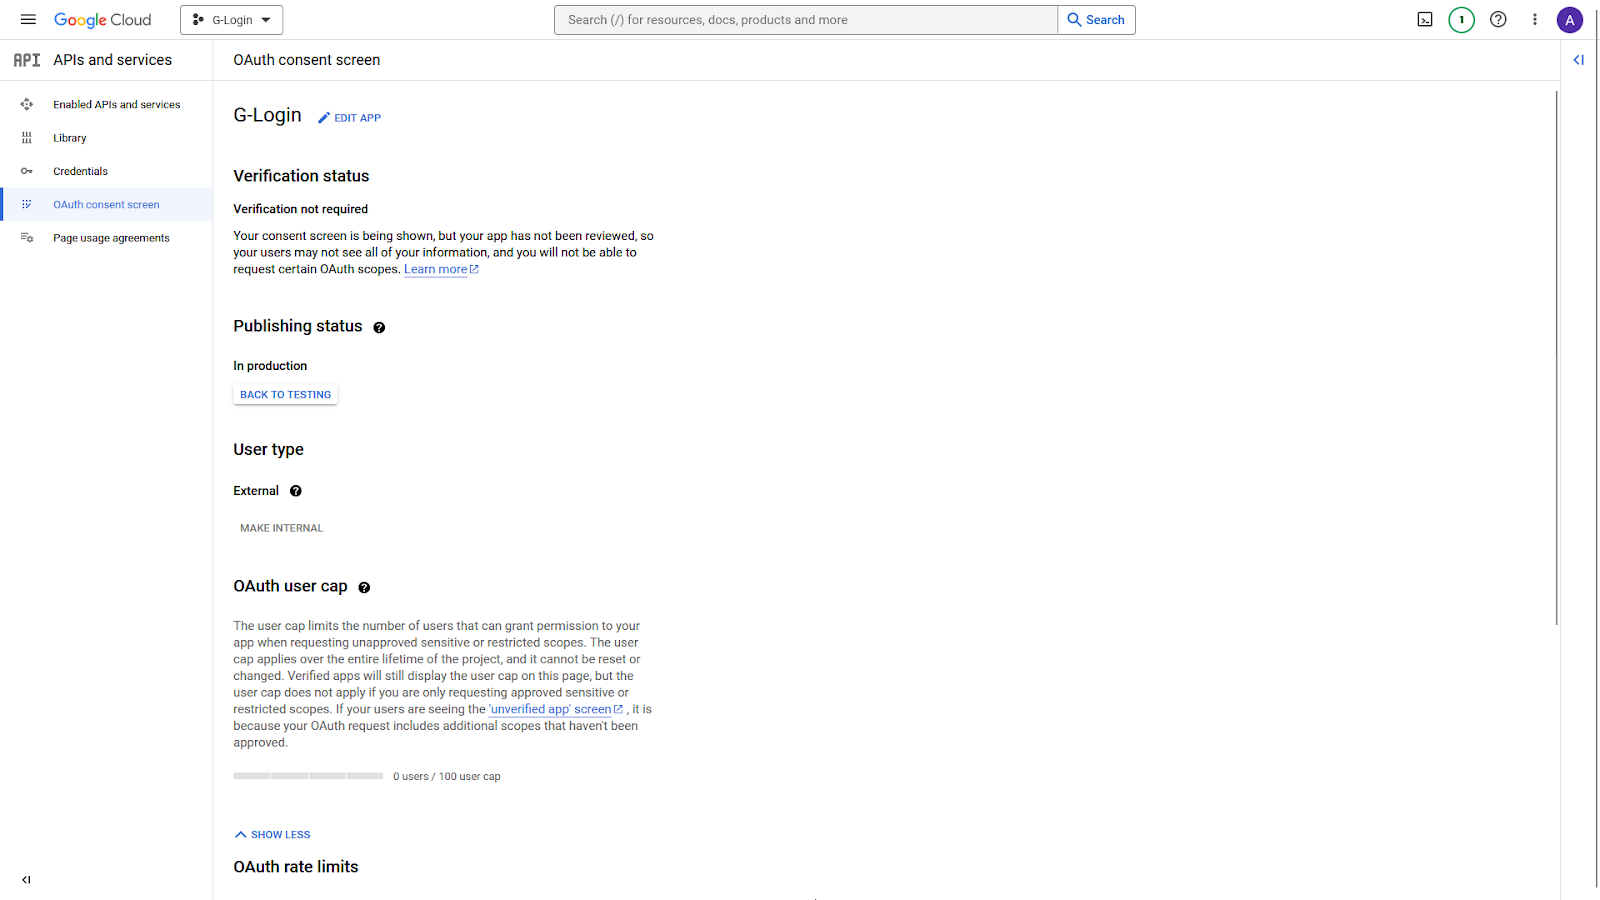
10. On the Credentials page, from the top, click on + CREATE CREDENTIALS > OAuth client ID.

11. Then from the Application type dropdown, select Web application.

12. Once you select the option then, you have to add the following details.
• Name – Add your application name.
• Authorised JavaScript origins – Click the ADD URI button to add your website URL – Example: http://www.yourwebsite.com.
• Authorised redirect URLs – Click the ADD URI button to add your website URL – Example: http://www.yourwebsite.com.
Once done, click on the CREATE button.
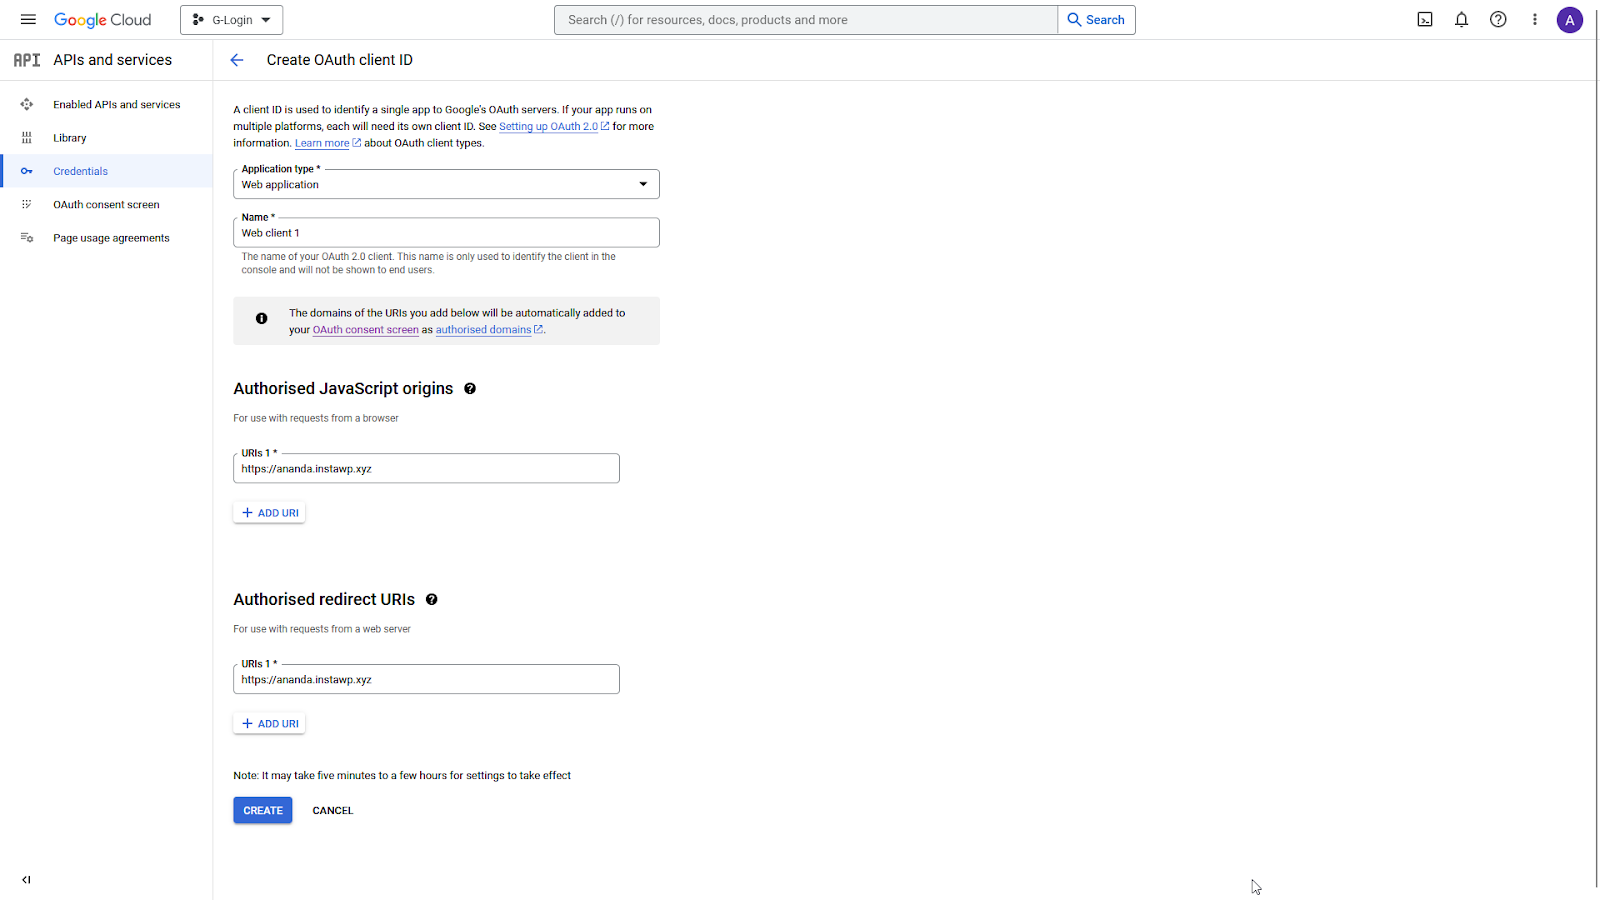
13. On the next page, you’ll get your Client ID and Client Secret, copy and paste them in a notepad.

Add Google Client ID in The Plus Addons for Elementor
Once you have your Google Client ID, go to
- The Plus Addons → Extra Options → Settings
- Scroll down to the Login with Google section then click on the Setting Icon and you can see the Login with Google popup section.
- Then in the Popup section paste your Google Client ID and click on Save.
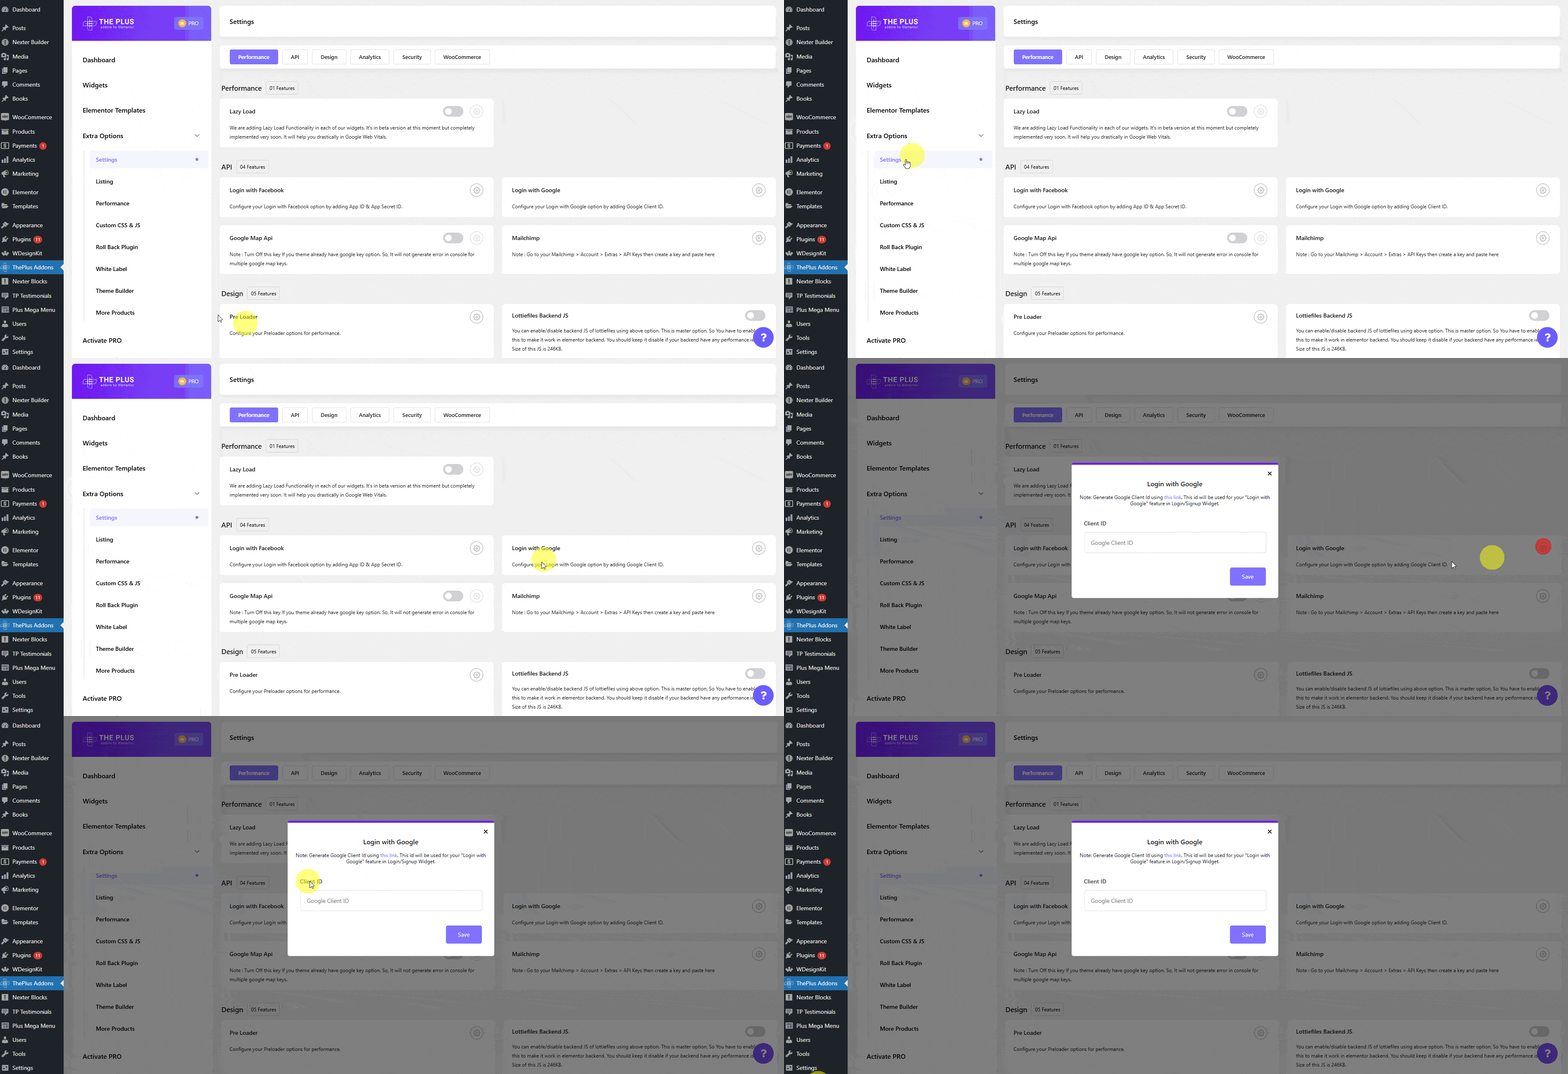
Enable Google Login in the WP Login & Register widget
Add the WP Login & Register widget on the page and follow the steps –
1. Select the appropriate form type (except Forgot Password) from the Type dropdown under the Forms Layout tab.
2. Then enable the Google toggle from the Social Login/Register tab.
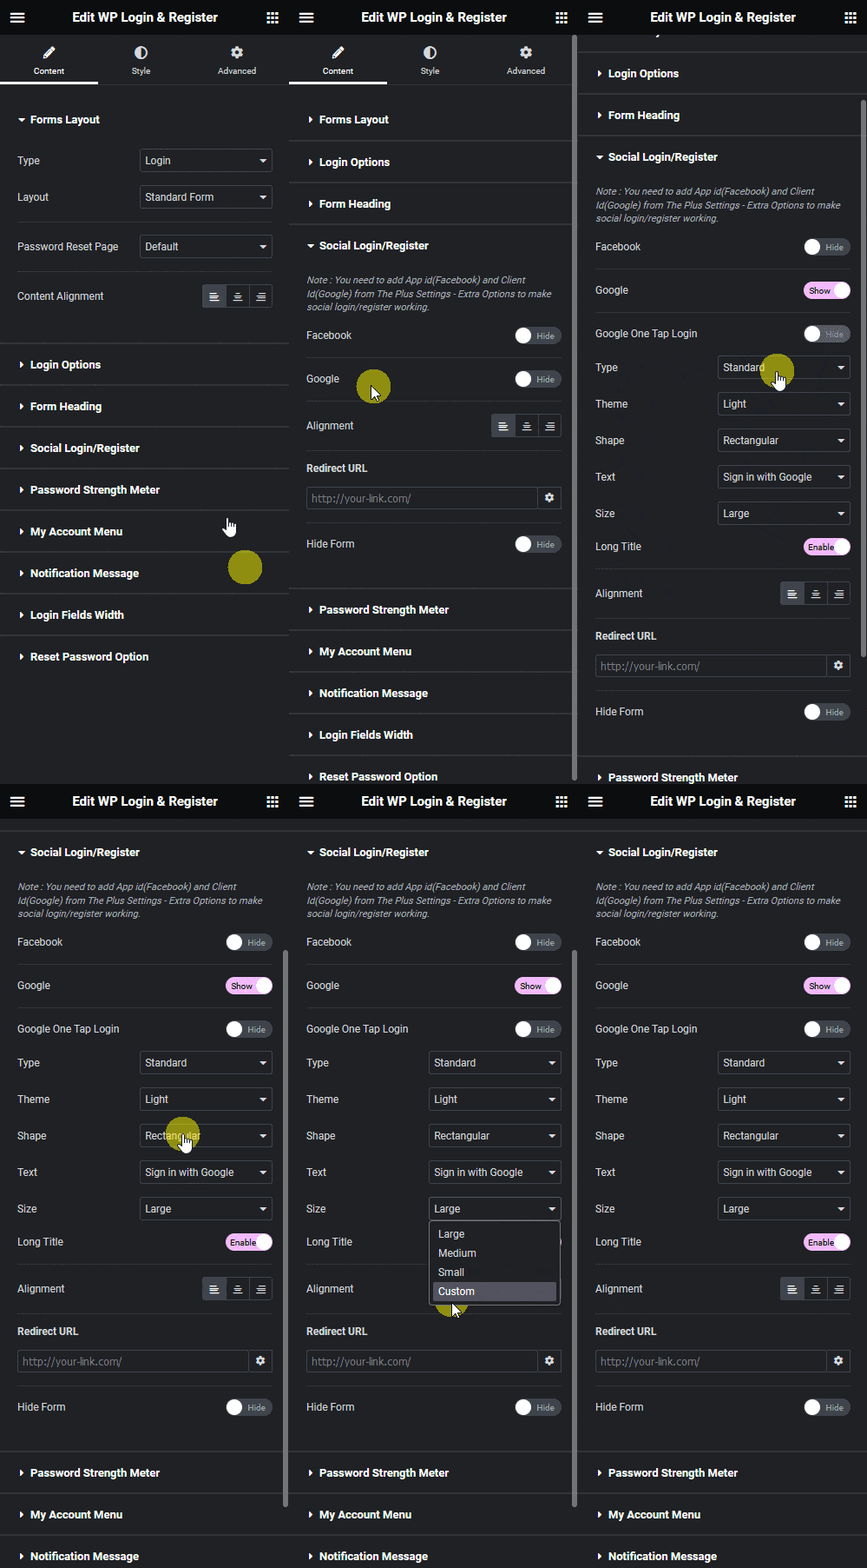
You can enable the Google One Tap Login toggle, to automatically show a popup asking the user to log in via Google.
But if you don’t enable Google One Tap Login, you’ll see a few more options.
Type – From here, you can choose the button type, Standard or Icon.
Theme – From here, you can select different button themes.
Shape – From here, you can select different button shapes.
Text – From here, you can choose from different button texts for the Standard button.
Size – From here, you can select the button size.
By enabling the Long Title toggle, you can show
From the Alignment, you can align the button in the form.
Then in the Redirect URL field, you can add a page link to redirect users to a specific page after login.
By enabling the Hide Form toggle, you can hide the manual form and only keep the Google login button.
This is how easily you can add a Google login option to your Elementor website.
