Are you looking to add an Elementor language switcher in the header? With the Header Meta Content widget from The Plus Addons for Elementor, and the Translatepress plugin you can easily add a language switcher on your Elementor website.
To check the complete feature overview documentation of The Plus Addons for Elementor Header Meta Content widget, click here.
Requirement – This widget is a part of The Plus Addons for Elementor, make sure its installed & activated to enjoy all its powers.
To do this, you have to install and activate the Translatepress plugin.
Then make sure you have set the site languages and other relevant settings in the Translatepress plugin.
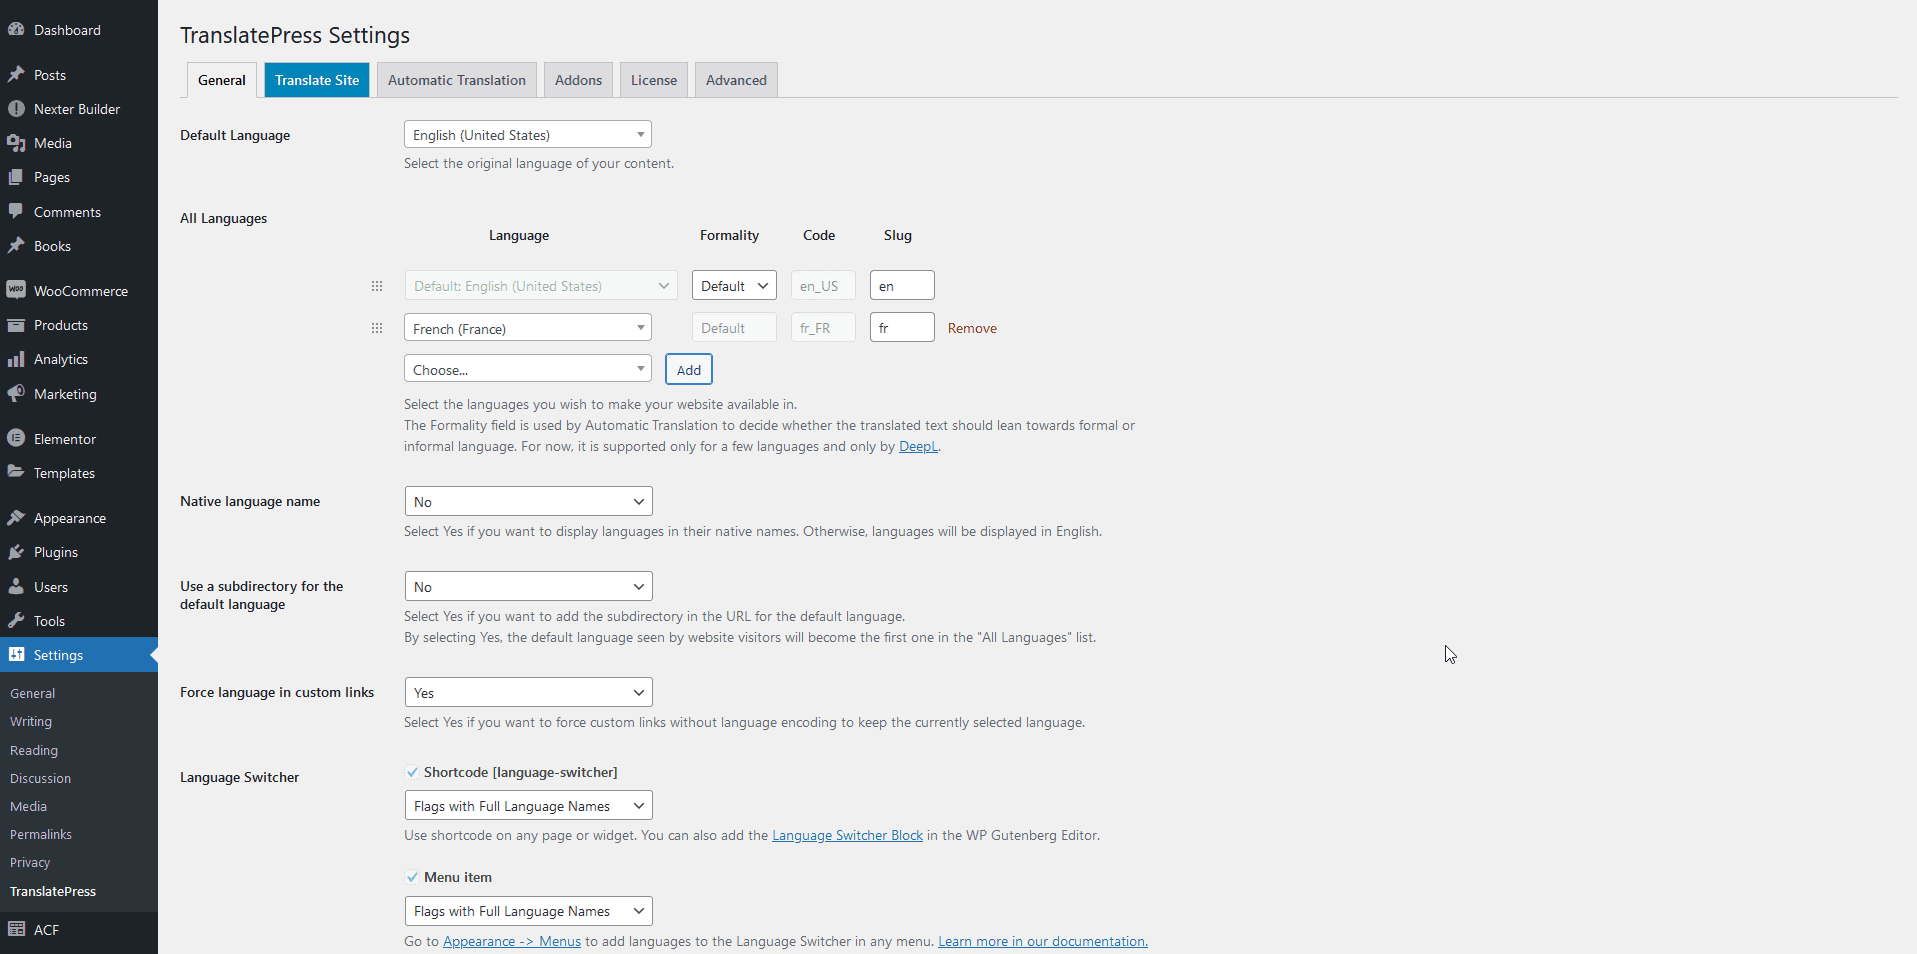
Once done then, add the Header Meta Content widget to the header template and follow the steps –
Note: To create the header template, you can use the free Nexter Builder or you can use Elementor Pro if you are already using it.
1. In the Meta Content tab, you’ll find an item click to open it, then select Language Switcher from the Select Options dropdown.

Suggested reading, best 4 Elementor translation plugins for multilingual websites.
Then, do the necessary icon spacing adjustments from the Icon Left Space and Icon Right Space sections.
From the Responsive Device section, you can manage the visibility of the item for different devices if needed.
2. Then go to the Language Switcher tab and enable the Display Language Switcher toggle and choose Translatepress from the Select dropdown.
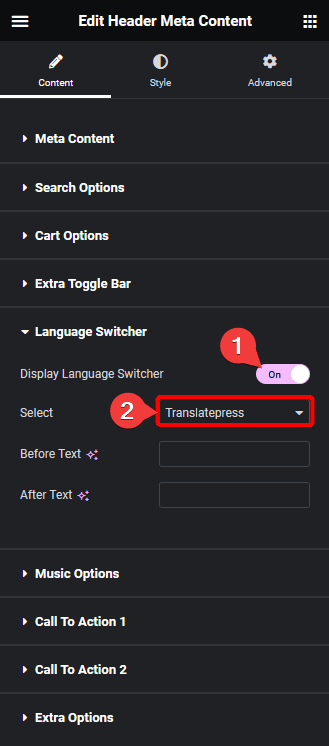
From the Before Text and After Text fields, you can add texts before and after the dropdown.
Now you’ll be able to see a language switcher in the header.

Also, read how to add search icon to Elementor navigation header menu.
