If you want to showcase your latest podcast episode or feature a music track for your visitors, having an audio player on your site can greatly enhance the overall user experience.
With the Audio Player widget from The Plus Addons for Elementor, you can easily add an audio player to your Elementor website.
Required Setup
- Elementor FREE Plugin installed & activated.
- You need to have The Plus Addons for Elementor plugin installed and activated.
- This is a Premium widget, and you need the PRO version of The Plus Addons for Elementor.
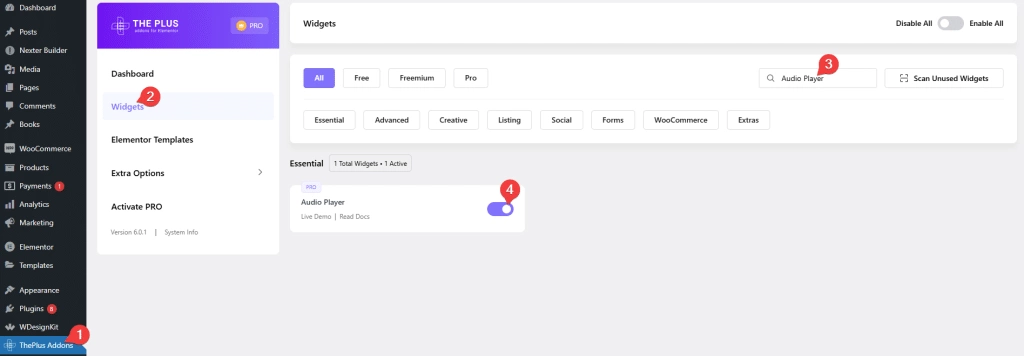
- Make sure the Audio Player widget is activated, to verify this visit The Plus Addons → Widgets → and Search for Audio Player and activate.
Learn via Video Tutorial:
How to Activate the Audio Player Widget?
Go to
- The Plus Addons → Widgets
- Search the widget name and turn on the toggle.
Key Features
- Multiple styles – You can easily choose from multiple styles.
- Add playlist – You can easily add a playlist.
- Multiple sources – You can add audio from two sources, self-hosted or external sources.
How to Add an Audio Player in Elementor?
To add an audio player in Elementor, add the Audio Player widget to the page.
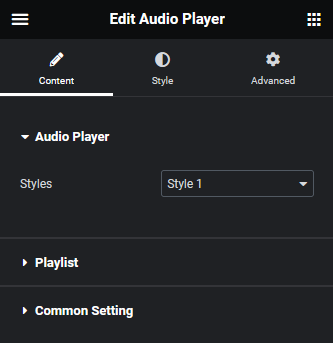
Audio Player
From the Styles dropdown, you can select a pre defined style.
Playlist
Here you can add the playlist items. By default, you’ll find one item open it –
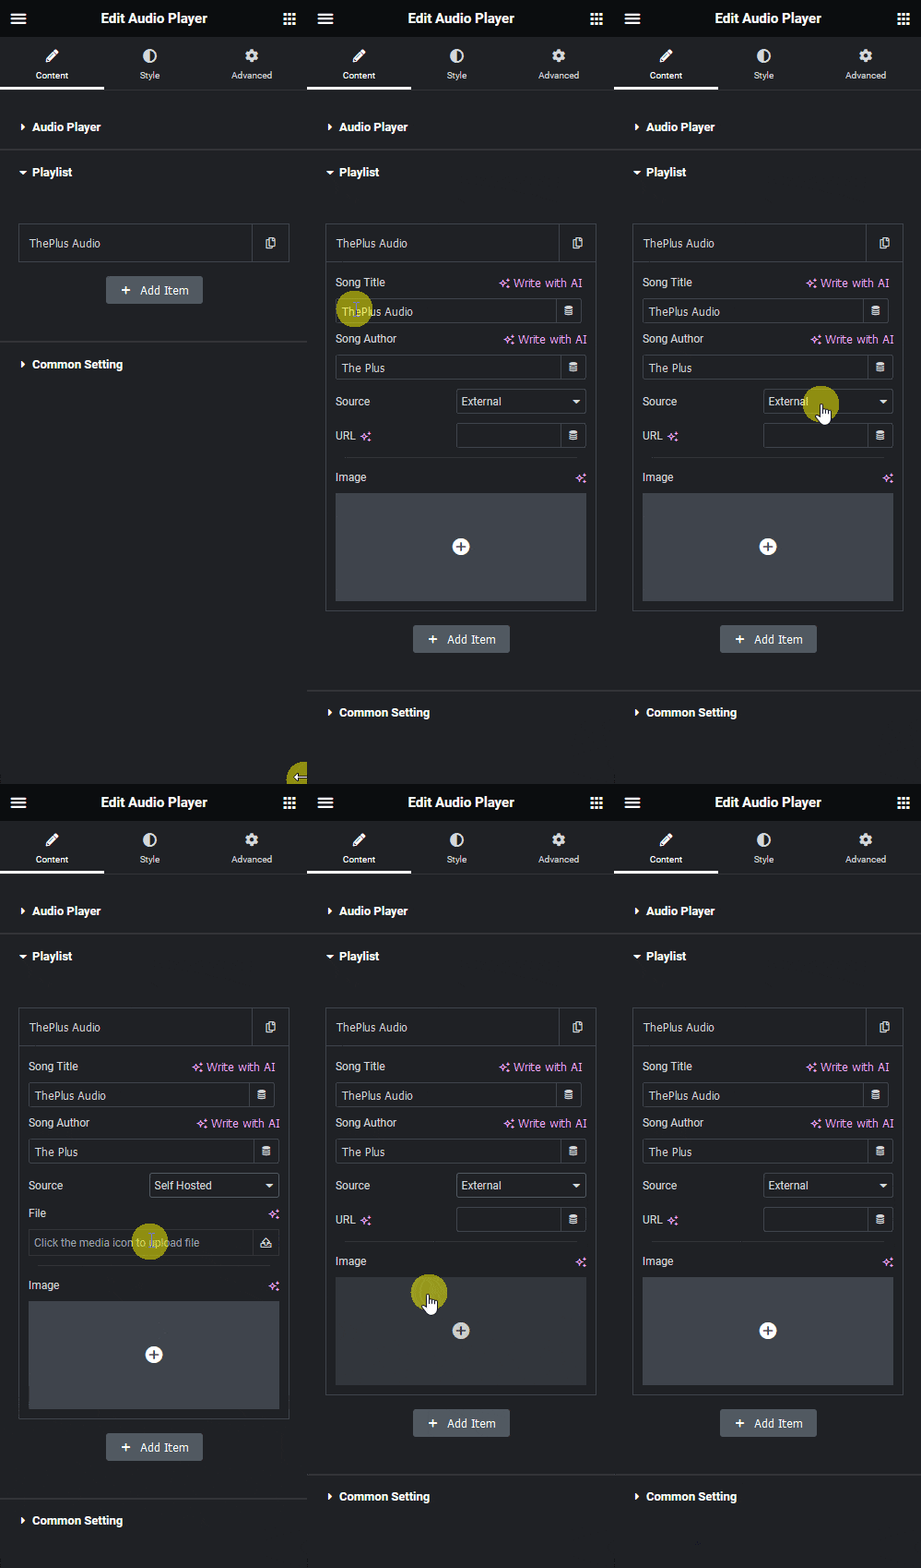
In the Song Title field, you can add the audio title.
Then in the Song Author field, you can add the author’s name of the audio.
From the Source dropdown, you have to select the source. Here you’ll find two options –
- Self Hosted – With this option you can use audio from your WordPress media library.
- External – With this option you can use audio from external sources. This option is useful when your audio files are hosted somewhere else.
Note: Supported audio file types .mp3, .wav, .ogg, .flac, .m4a.
Let’s select External here.
Then in the URL field, you have to add the audio file URL.
Note: When the Self Hosted option is selected, you have to select the audio file from the File field.
After that from the Image section, you can add an image for the audio.
You can click on the + Add Item button to add more audio, this way you can create an audio playlist.
Common Setting
From the Image Resolution dropdown, you can change the image size.
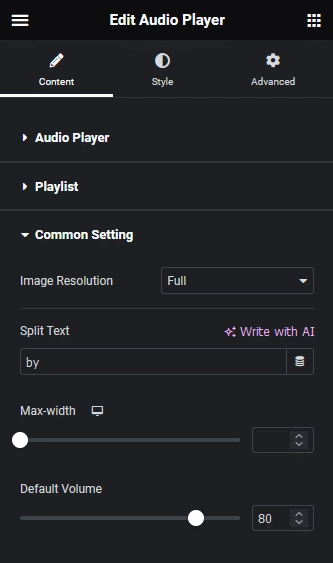
In the Split Text field, you can add a text between the audio title and author’s name.
Then from the Max-width section, you can set the audio player max width for different devices.
From the Default Volume section, you can set the audio player’s default sound level.

How to Style the Audio Player Widget in Elementor?
You can style the Audio Player from the Style tab.
Song Title – From here, you can manage the audio title typography and color.
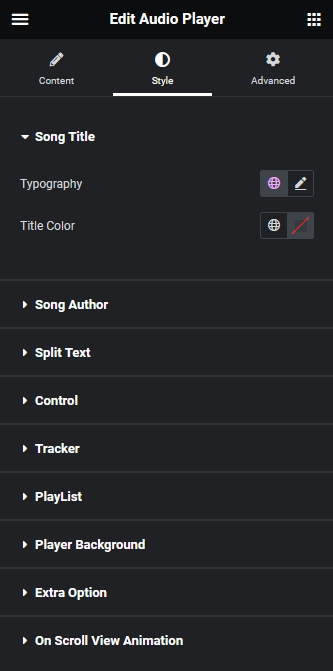
Song Author – From here, you can manage the audio author name typography and color.
Split Text – From here you can manage the Split Text style.
Control – From here, you can style the audio player controls.
Tracker – From here, you can style the audio player tracker.
PlayList – From here, you can style the audio player playlist.
Player Background – From here, you can manage the audio player background style.
Extra Option – From here, you can autoplay the audio in a loop by enabling the Autoplay Loop toggle.
On Scroll View Animation – This is our global extension available for all our widget, this adds scrolling animation as the widget comes in viewport. You can learn more about this from here.
Advanced options remain common for all our widget, you can explore all it options from here.
View Advanced tab tutorial.
Suggested Read: How to Add a Music Player Bar in Elementor Navigation Header Menu.
