The Navigation Menu widget from The Plus Addons for Elementor, allows you to easily create menus using the repeater option. With this option, you can directly create the menu in the widget making it easier to use.
To check the complete feature overview documentation of The Plus Addons for Elementor Navigation Menu widget, click here.
Requirement – This widget is a part of The Plus Addons for Elementor, make sure its installed & activated to enjoy all its powers.
To do this, add the Navigation Menu widget to the header template and follow the steps –
Note: To create the header template, you can use the free Nexter Builder or you can use Elementor Pro if you are already using it.
Add Top Level Menu
1. Select Repeater from the Menu Type dropdown.
2. Then select an appropriate option from the Menu Direction dropdown.
3. Now, you’ll see an item under the Navigation Menu section. Open the item
4. From the Menu Level dropdown, you have to select the menu level. Here, you’ll find 0 Level to 6 Level, 0 Level being the top level menu subsequently followed by other levels.
Also read, 5 Best Elementor mega menu plugins.
So to create the top level menu, you have to set the Menu Level to 0 Level.
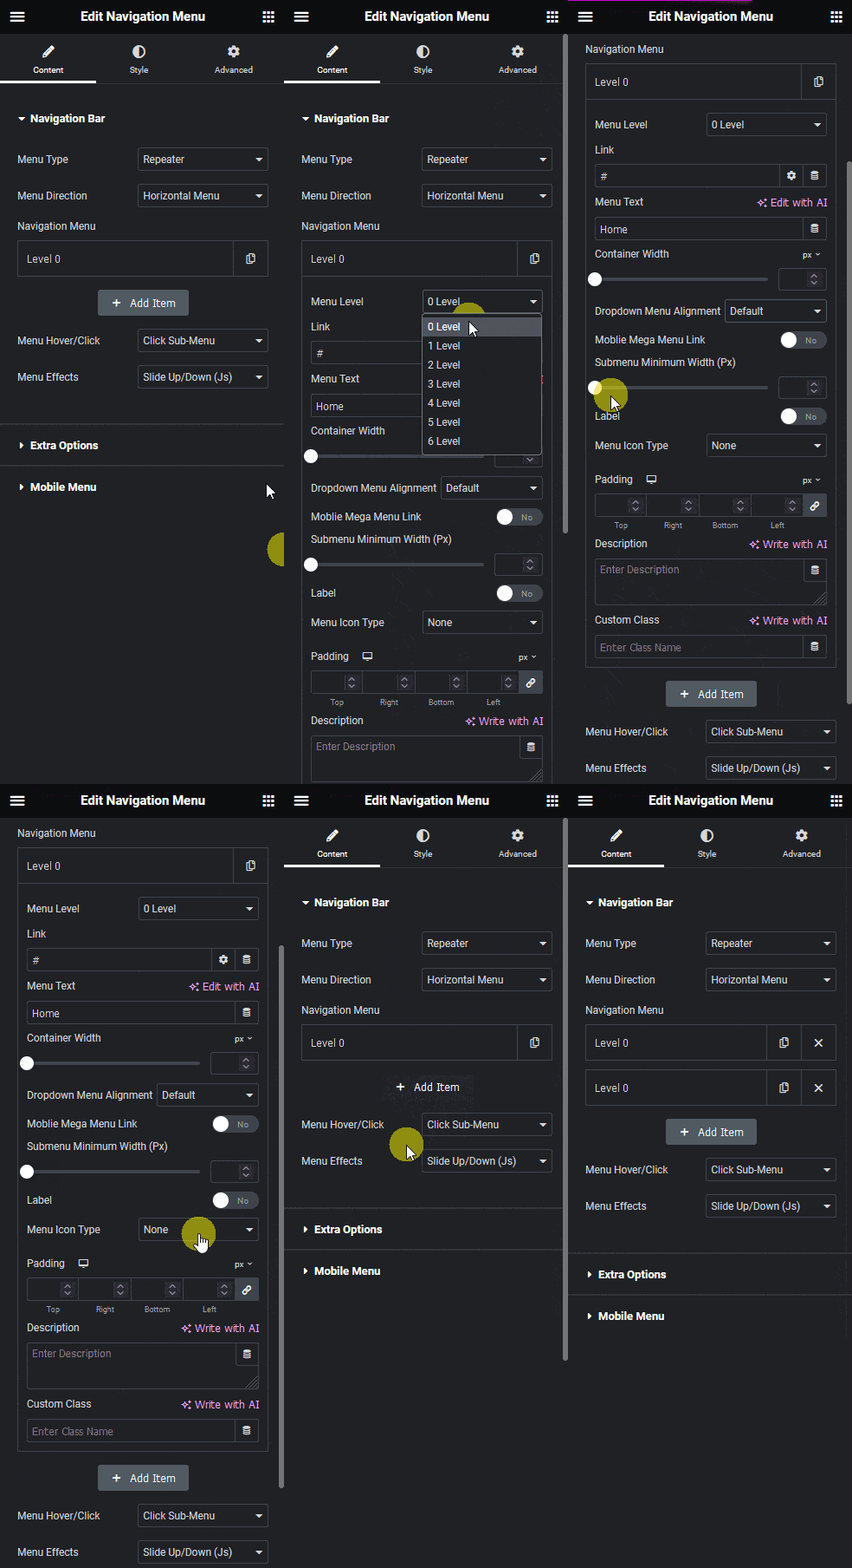
5. In the Link field, you have to add the URL of the item.
6. In the Menu Text field, you have to add the label name of the menu item.
From the Dropdown Menu Alignment dropdown, you can set the dropdown content alignment.
Note: The Container Width, Moblie Mega Menu Link and Submenu Minimum Width (Px) options are not applicable for 0 Level they only work for sub menu.
From the Label toggle, you can add an additional label to the menu item. You can also manage the label’s color and background from here.
You can add an icon or image to the menu item from the Menu Icon Type dropdown.
From the Padding section, you can add padding to the menu item.
You can also add some additional text as a description in the Description field.
In the Custom Class field, you can add a class name to target the menu item with custom CSS or js.
Did you know? You can create a side menu in Elementor.
7. Then click on the + Add Item button to add more items.
Note: To make top level menu items, make sure you have set 0 Level in the Menu Level in each item.
Add Sub Menu
1. To add a submenu, click on the + Add Item button to add an item.
2. Open the new item, and select 1 Level from the Menu Level.
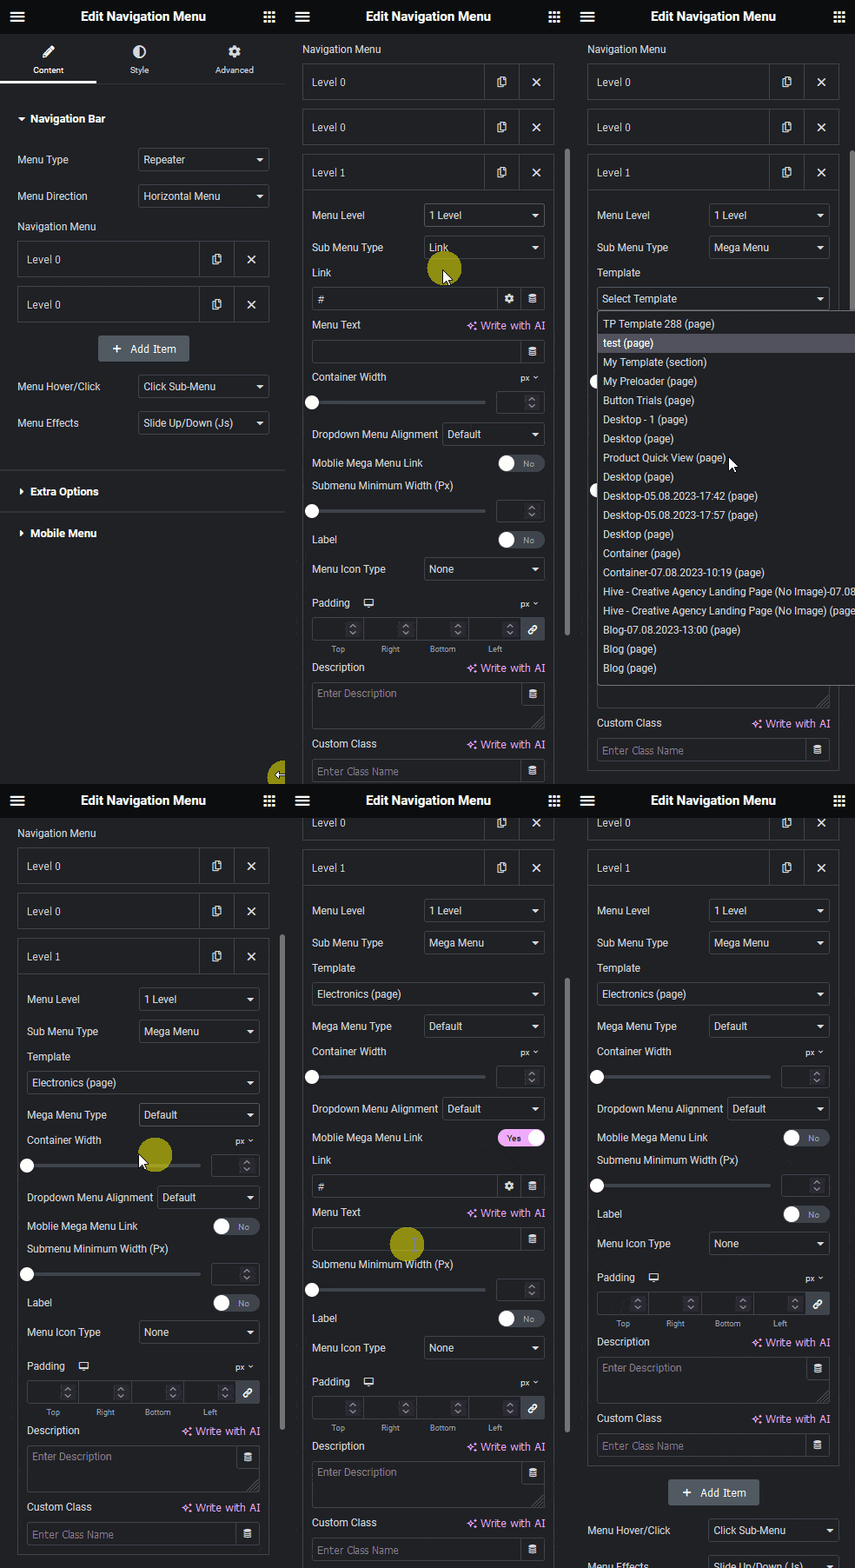
Note: For sub menu, you have to put the sub menu items below its top level menu item to show them in the dropdown.
Note: In a similar way, you can create a multi level dropdown menu by selecting subsequent levels and placement.
3. From the Sub Menu Type, you have to select the sub menu type. Here, you’ll find two options –
Link – For creating a normal dropdown menu.
Mega Menu – For creating a mega menu.
For the Link option, you’ll get the same options as in the top level menu.
For the Mega Menu option, you have to create an Elementor template and select from the Template dropdown.
From the Mega menu Type dropdown, you can set the mega menu container width. You can set the width to default, container or full width.
When you select the default width, you get options to set a custom width for the mega menu and content alignment.
When you enable the Moblie Mega Menu Link toggle you can add a link and text for the sub menu item.
From the Submenu Minimum Width (Px), you can set the width of sub menu when Sub Menu Type is set to Link.
The rest of the options are the same as you’ll find in the top level menu.
In a similar way, you can add more sub menu items by clicking on the + Add Item button.
This is how simply you can create a menu using the repeater option.
Also, read how to create a mega menu in Elementor.


