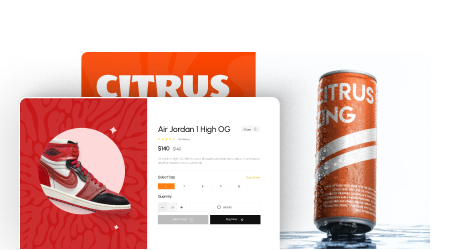
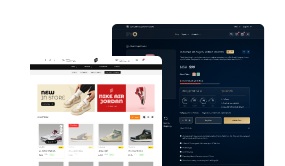
Do you want to show your WooCommerce product in a custom layout? The default WooCommerce product layout is not very customizable, so your online store may look similar to others that use WooCommerce. Creating a custom product loop allows you to stand out from the rest with your custom design.
With the Product Listing widget from The Plus Addons for Elementor, you can easily design a custom loop for your WooCommerce product in Elementor.
To check the complete feature overview documentation of The Plus Addons for Elementor Product Listing widget, click here.
Requirement – This widget is a part of The Plus Addons for Elementor, make sure its installed & activated to enjoy all its powers.
To do this, make sure you’ve added some products to your WooCommerce store, then follow the steps –
First, you have to create a custom product template using Elementor. For instance, we will be creating this custom product layout design.
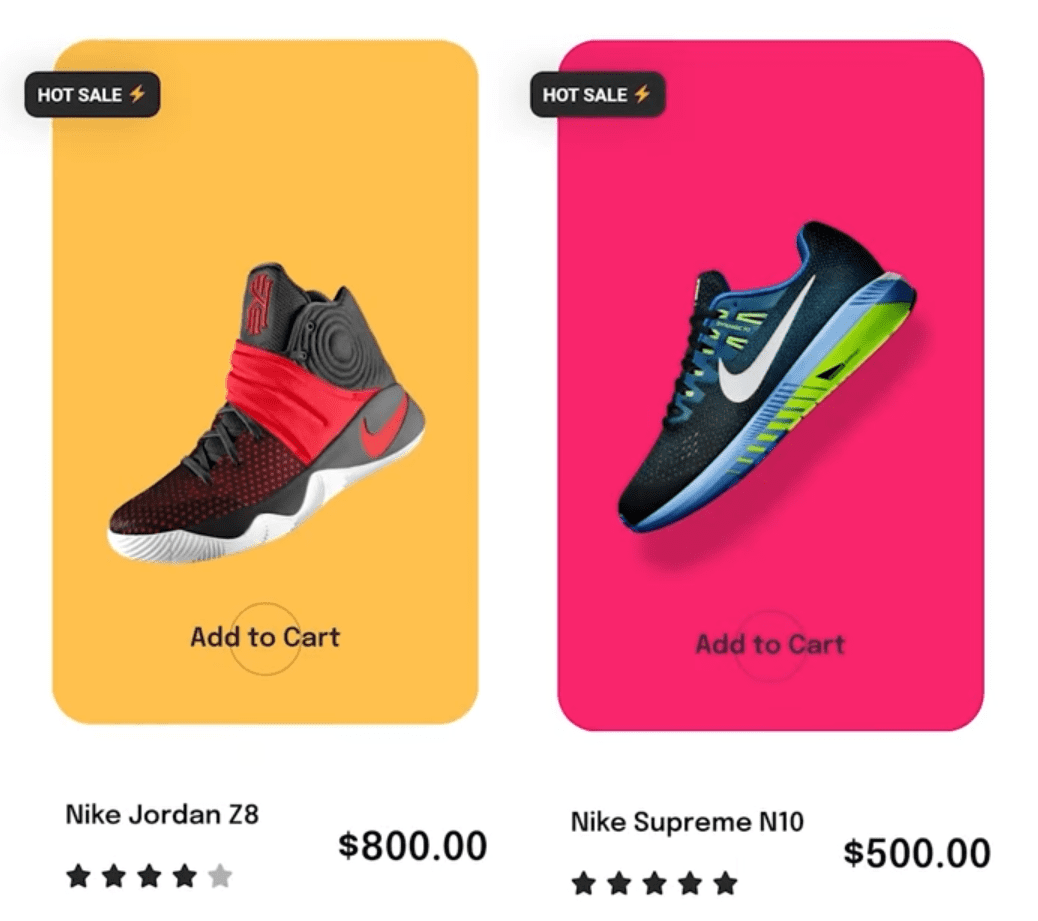
For this design, we will need the Advanced Custom Fields (ACF) plugin for adding some custom fields and Elementor Pro plugin for fetching dynamic data.
Note: The Advanced Custom Fields (ACF) plugin is only required if you want to add additional fields but it is not mandatory to use. You can also create a custom product loop using other widgets.
Add Custom Fields to WooCommerce Product Listing
We’ll create a couple of custom fields for background color and rating.
1. To do this from the Dashboard, go to ACF > Field Groups and click on Add New button.
2. Add a name to the field group.
3. Then click on the +Add Field button to add a field for the product background color. Add a field label, field name and select color picker as the field type.
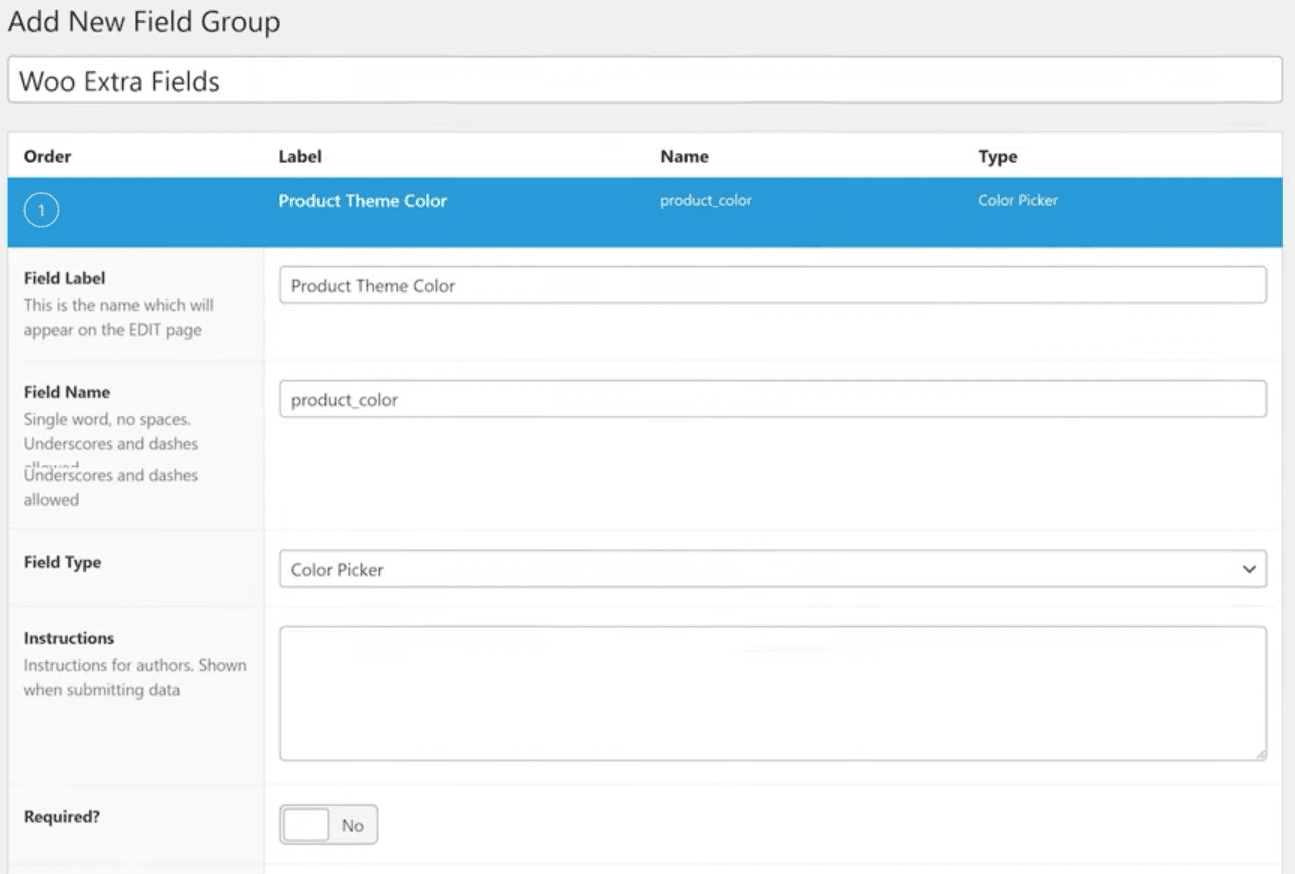
4. Again, click on the +Add Field button to add a rating field. Add a field label, field name and select number as the field type.
5. Once done, from the Location section, we’ll set the location to Product under Rules.
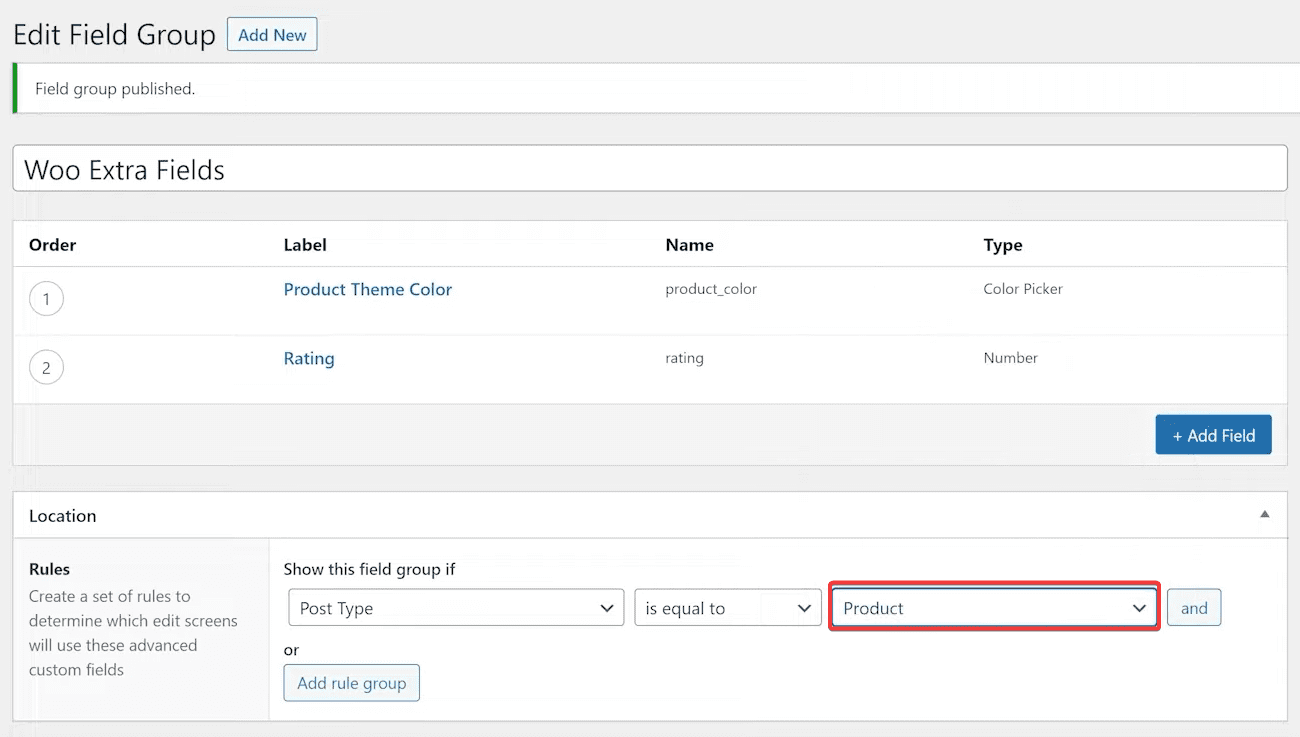
6. Once done, click on the Update button.
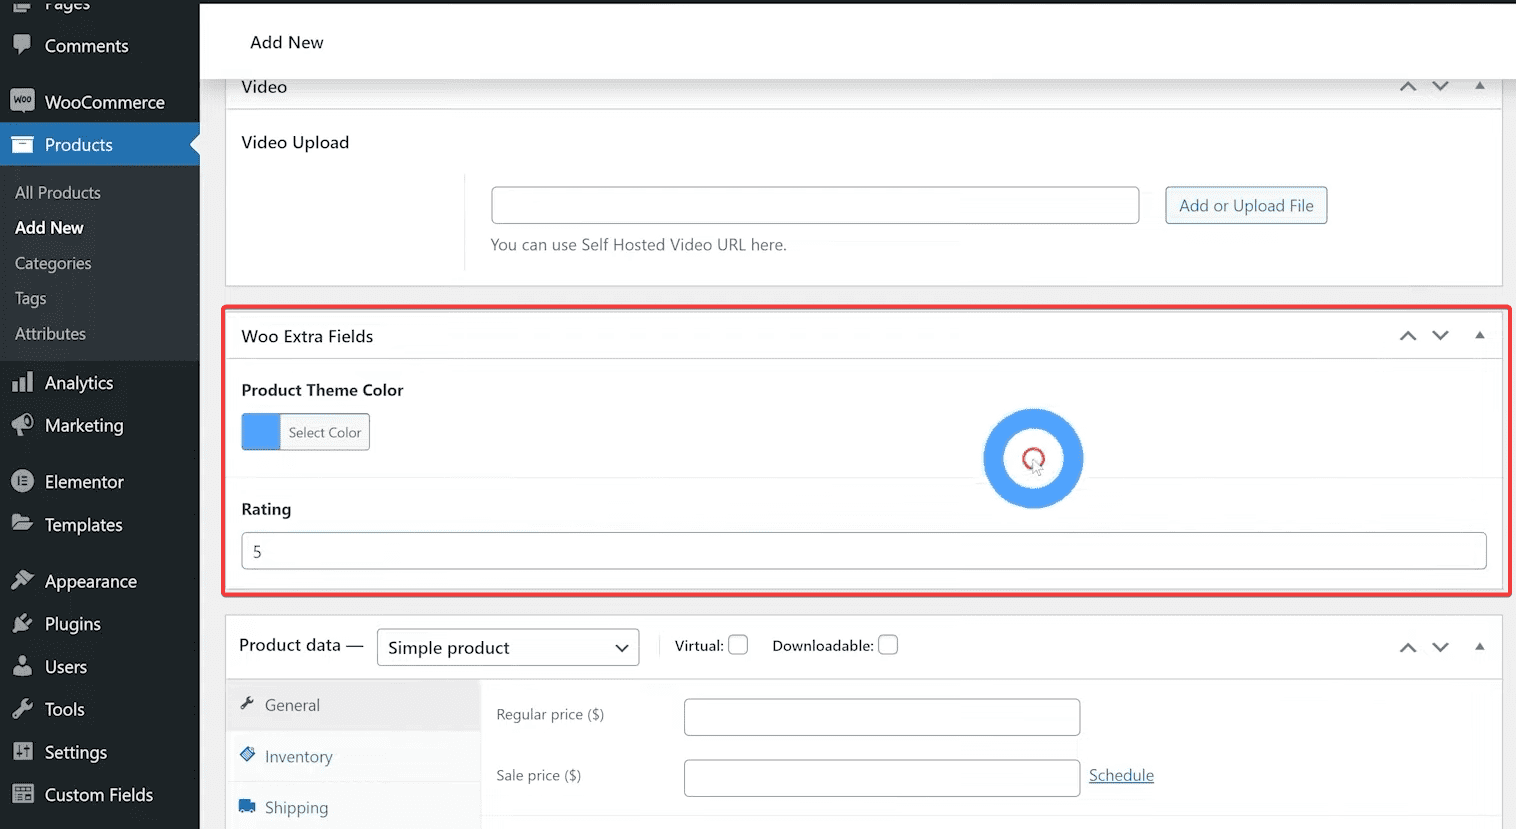
7. Then you have to add value in the custom fields on each product.
Create a Custom Product Template for WooCommerce
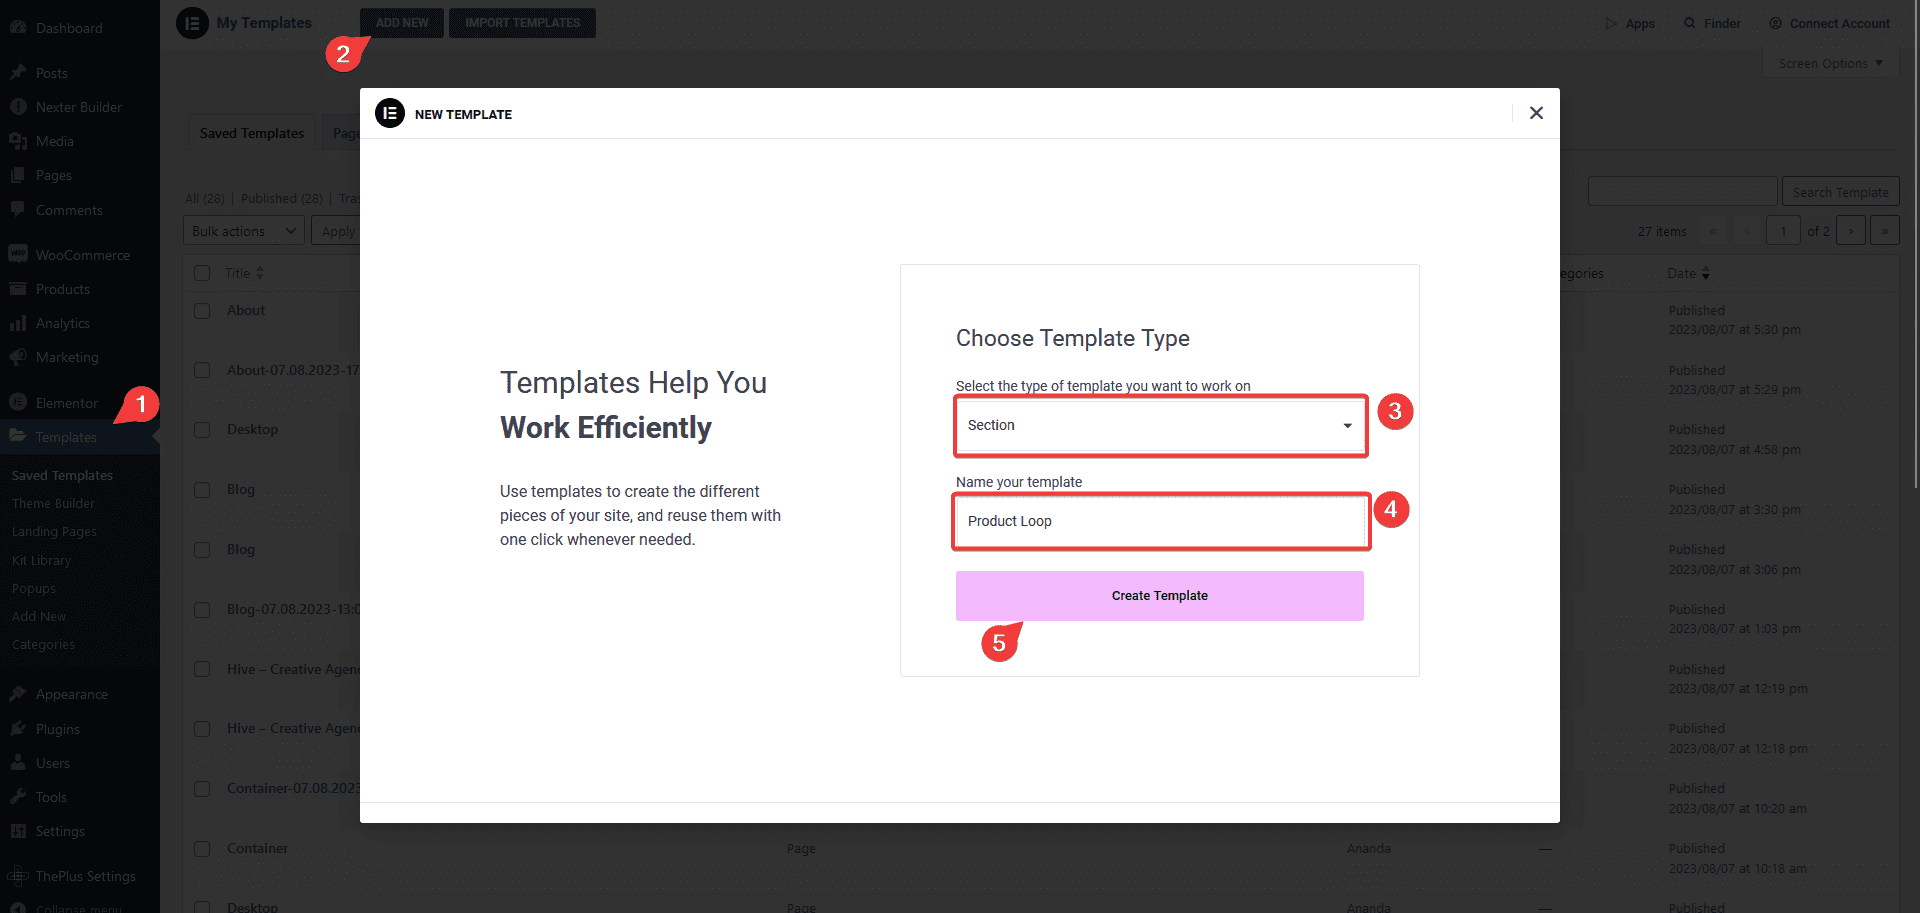
1. To do this from the Dashboard, go to Templates and click on Add New, then select Section as the template type, give a name to the template, then click on Create Template button.
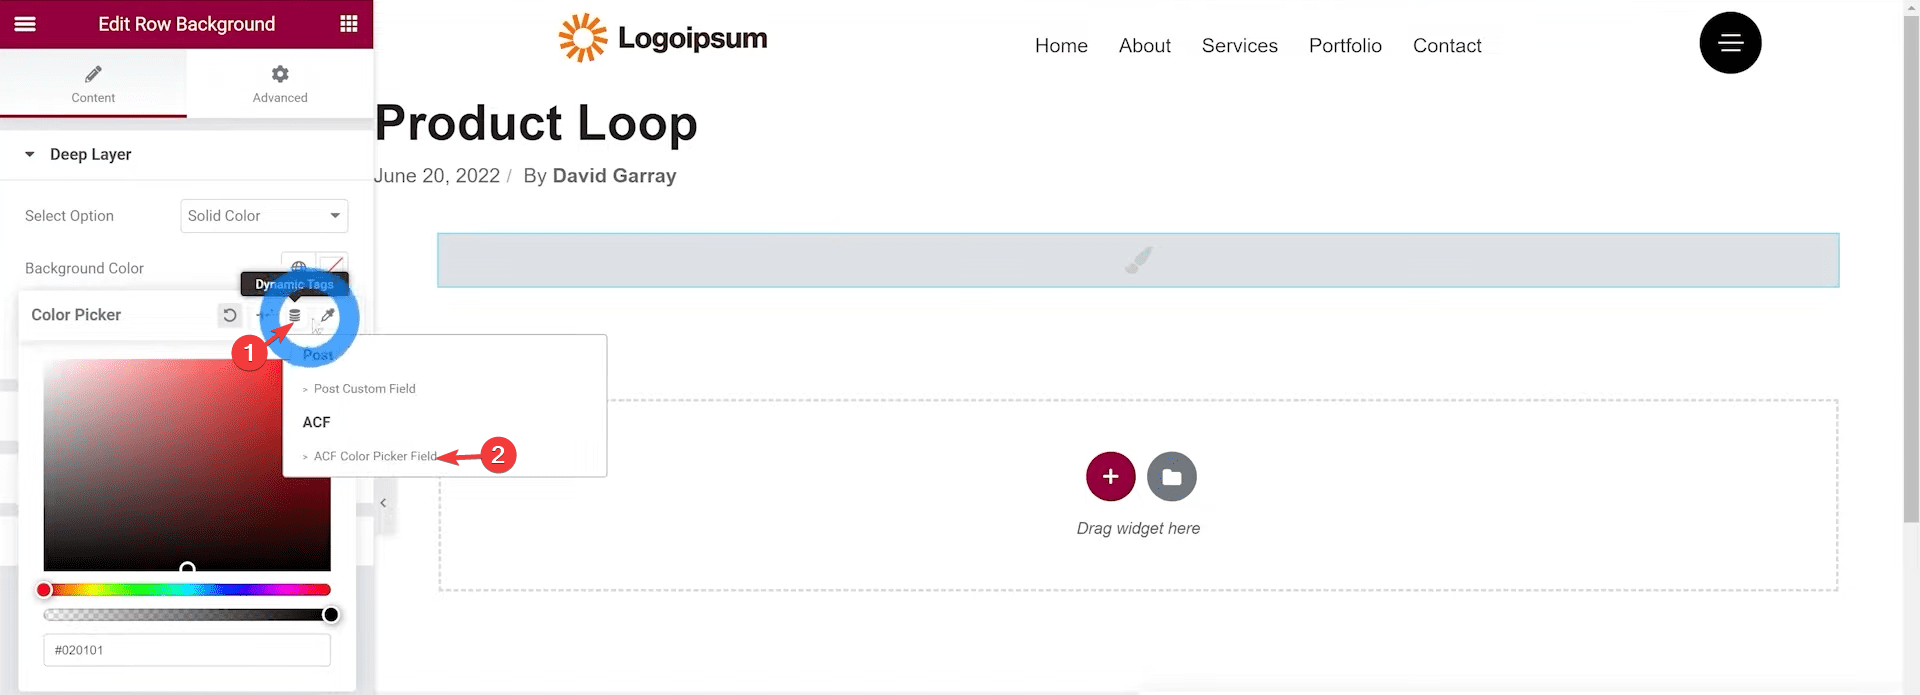
2. We’ll add a Container and then add the TPAE Row Background widget to add the product background color. Select Solid Color from the Select Option dropdown.
Then click on the background color field and click on the Dynamic Tags, then select the custom field under ACF.
3. Add a heading widget to add the product tag and style it accordingly.
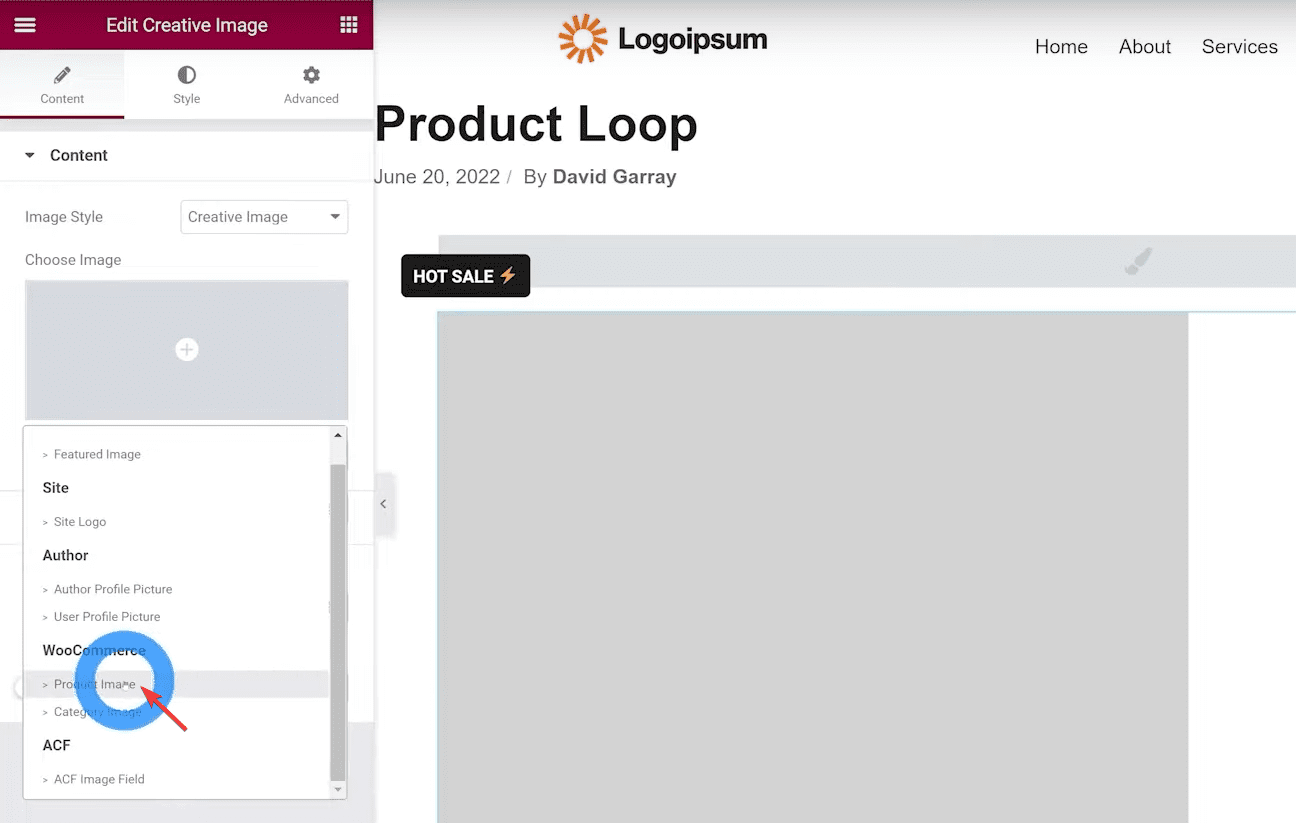
4. To add the product image, we’ll use the TPAE Creative Image widget, in the Choose Image field, click on the Dynamic Tags and select Product Image under WooCommerce.
Style it according to your requirement.
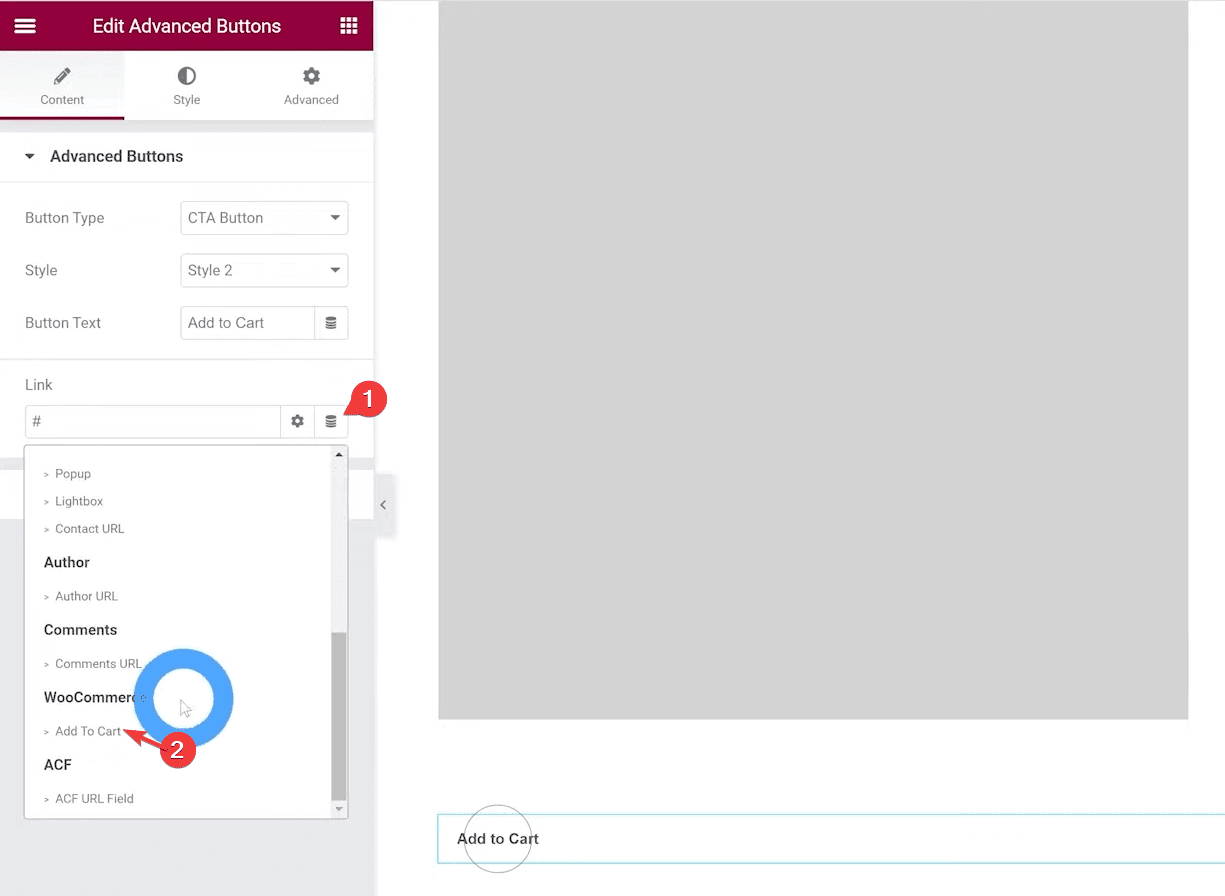
5. To add the add to cart button, we’ll use the TPAE Advanced Buttons widget. Select Button Type as CTA Button, then select the appropriate style and add button text.
Now to make the button link dynamic, click on the Dynamic Tags in the Link field and select Add To Cart under WooCommerce.
Style it further according to your requirement.
6. To add the product title, we’ll use the Elementor Heading widget and to make it dynamic, click on the Dynamic Tags in the Title field and select Product Title under WooCommerce.
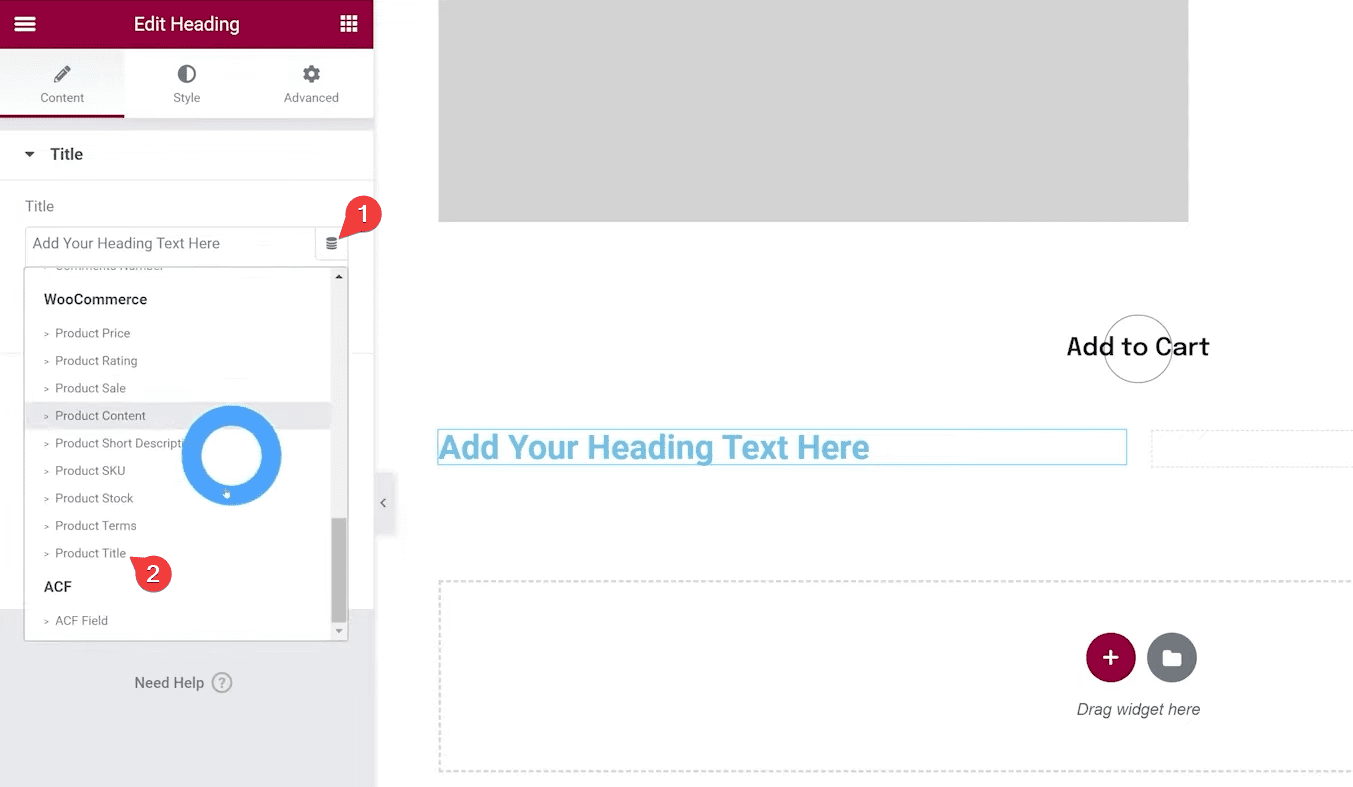
Style it further according to your requirement.
7. Now, to add the product rating we’ll use the Elementor Star Rating widget, to make it dynamic click on the Dynamic Tags in the Rating field and select the custom field under ACF.
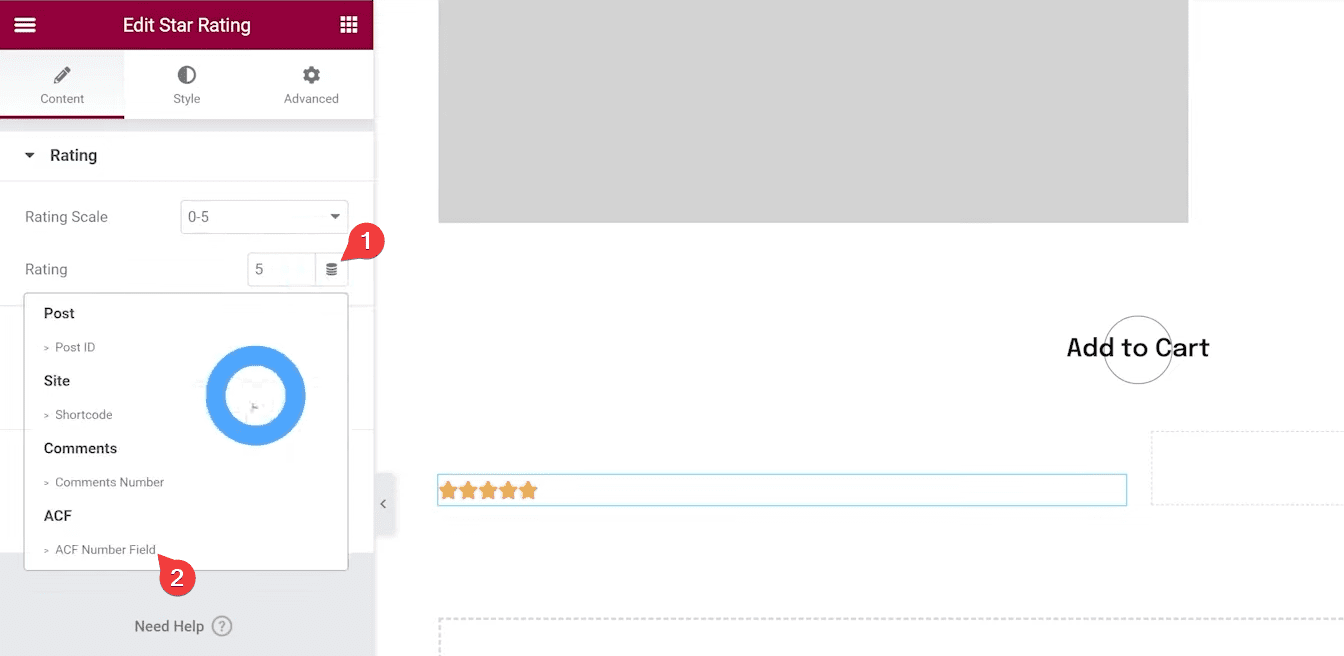
Style it further according to your requirement.
8. Then, to add the product price, we’ll use the Elementor Heading widget, and to make it dynamic, click on the Dynamic Tags in the Title field and select Product Price under WooCommerce.
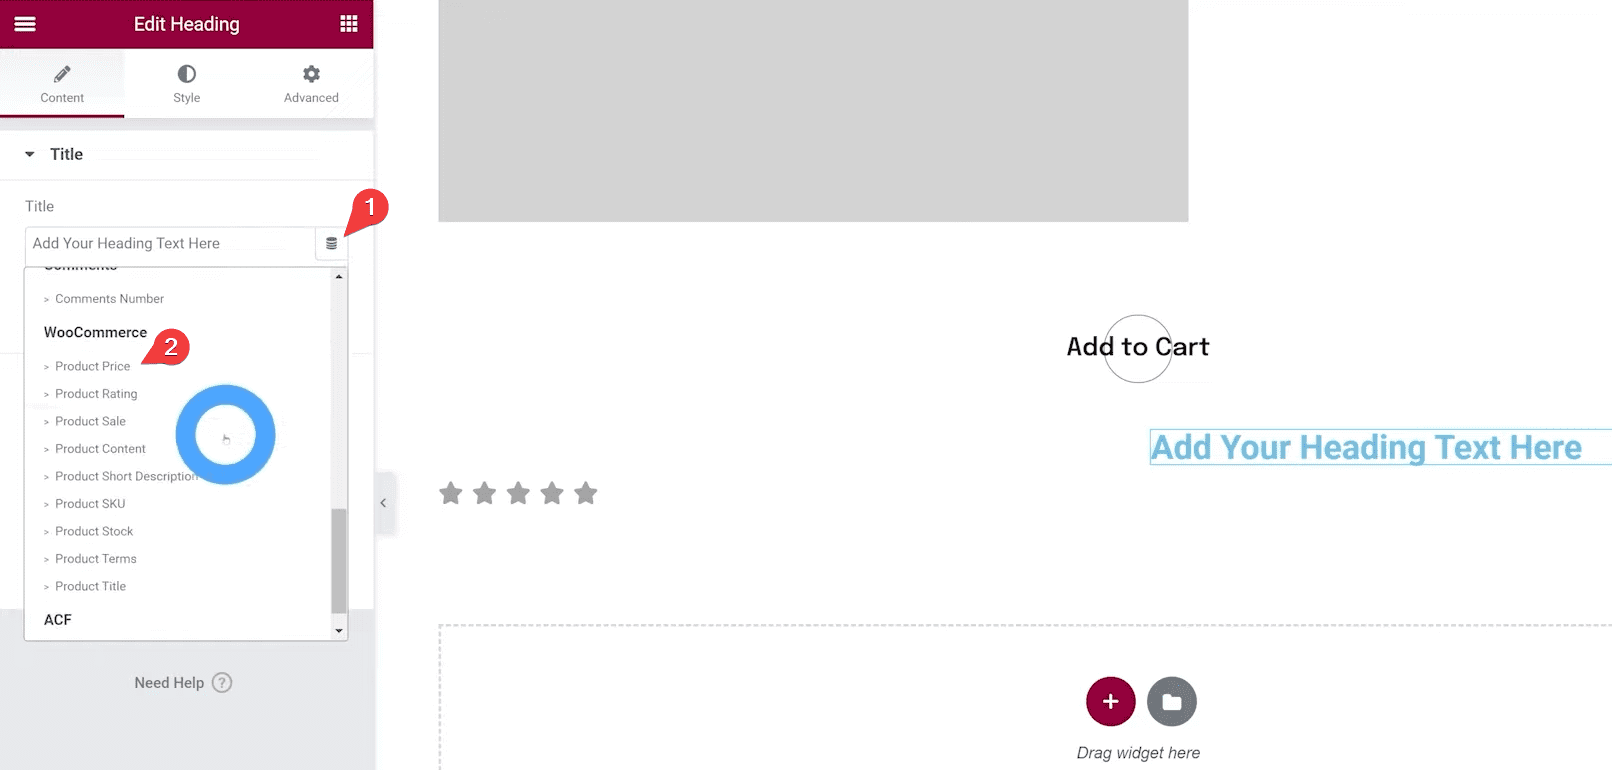
Style it further according to your requirements.
9. Once done, publish the template.
Note: Following this process, you can use different widgets to create the layout as well and make them dynamic using the Dynamic Tags of Elementor Pro.
Use the Template With the Product Listing Widget
Once you have created your custom product layout, use it with the Product Listing widget.
1. Add the Product Listing widget on a page or template, and select the appropriate listing type.
2. Then select Custom Skin from the Style dropdown.
3. Now, you have to select your template from the Select a template dropdown.
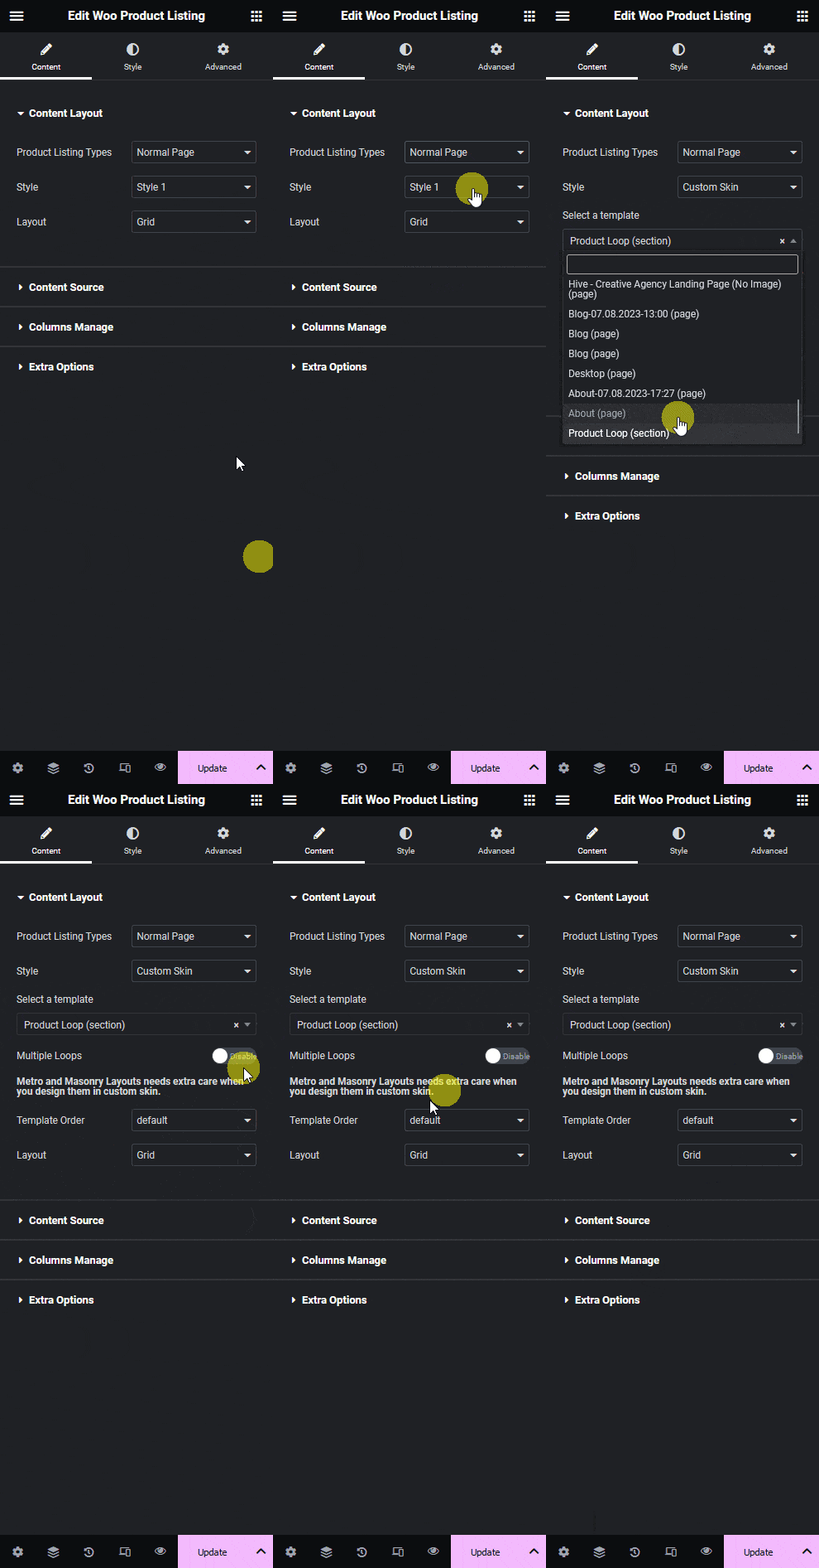
You can turn on the Multiple Loops toggle to use multiple layout designs together for your listing. You can use up to 5 templates together.
Note: In order to use Multiple Loops, you have to create separate custom templates for each loop template.
If you are using multiple loops, you can arrange the templates in reverse or random order from the Template Order dropdown.
4. Then, you have to select the appropriate layout type from the Layout dropdown.
Note: For using Masonry and Metro layout, you have to design your templates accordingly.
Now your products will show in your custom layout.
Also, read How to Create a WooCommerce Product Archive Page in Elementor.
