When building a dynamic website in Elementor, display conditions can play an important role. Display conditions allow you to control how, when and where your content is displayed. They give you the flexibility to show different pieces of content to different audiences or even hide content from specific users. Knowing which display conditions to use and how to apply them can make all the difference in your website’s overall design and usability.
But Elementor has a very limited option for setting up good display conditions on your Elementor website. For this you can use powerful Display Condition extension from The Plus Addons for Elementor. It offers a whole list of options to set up complex display conditions on your website.
Required Setup
- Elementor FREE Plugin installed & activated.
- You need to have The Plus Addons for Elementor plugin installed and activated.
- This is a Premium feature, and you need the PRO version of The Plus Addons for Elementor.
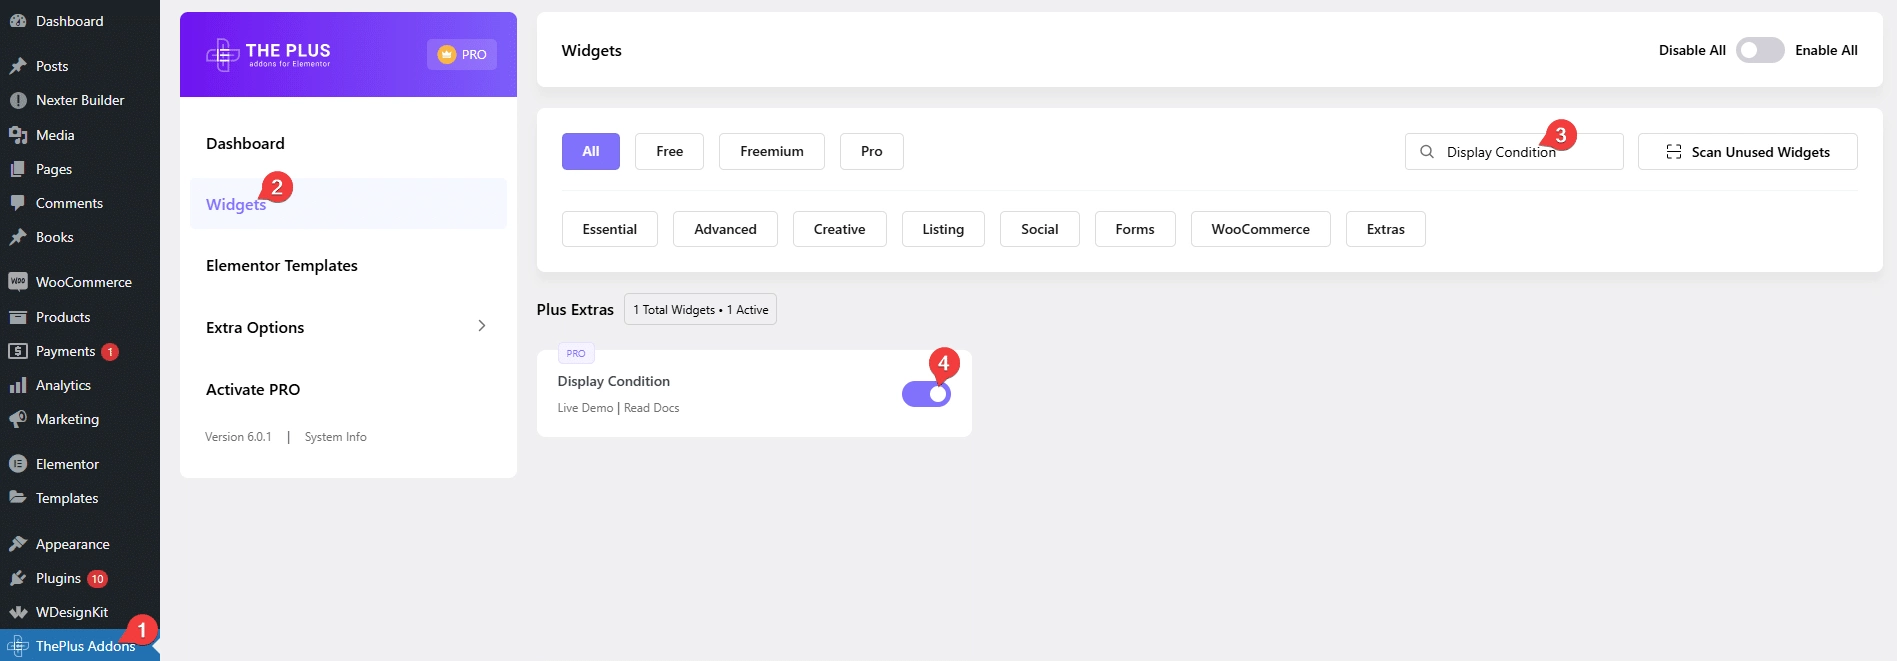
- Make sure the Display Condition extension is activated, to verify this, visit The Plus Addons → Widgets → and Search for Display Condition and activate.
Learn via Video Tutorial:
How to Activate the Display Condition Extension?
Go to
- The Plus Addons → Widgets
- Search the widget name and turn on the toggle.
Key Features
- Multiple display conditions – You can set multiple display conditions together on a widget eg. combining login status rules with date and time conditon.
- User based condition – You can easily set different display conditions based on the user status like login, browser, location and more.
- Date and Time based – You can set display conditions based on different dates and times.
- Single page based – You can target different single page templates to set visibility conditions on different widgets.
- Archive page based – You can target different archive page templates to set display conditions for your content.
- Language based – Set visibility condition based on the site or browser language.
- Shortcode based – You can show or hide content using the shortcode value.
- URL based – You can easily set display conditions based on where the user comes from.
- Display condition for Woocommerce – You can specifically set different display conditions for Woocommerce.
- Display condition for Custom fields – You can target different custom fields from plugins like ACF, JetEngine, Meta box etc. to set different display conditions.
How to Use the Elementor Display Conditions?
Once the Display Condition extension is activated, you can use it with all Elementor widgets. So add any Elementor widget on the page –
1. Go to Advanced > Plus Extras : Display Condition.
2. Turn on the Display Condition toggle.

Now you’ll see an option called Keep HTML. Enabling this will hide the content in the frontend if the condition is false, but it will remain in the HTML (DOM).
Then from the Display When dropdown, you have to choose when the display conditions are applied. Here you’ll find two options –
All Rules are True – In this option, whichever rules you’ve set in the Rules section all has to be true for the display condition to work.
Any one Rule is True – In this option, anyone rule has to be true for the display condition to work.
Then in the Rules section, you have to set the actual display condition. You can have one or multiple conditions/rules.
To set the rule click on the Rule tab. You’ll find different options to set your display condition in the Rule dropdown.
Visitor: This sets display rules based on the different statuses of a visitor.
- Login Status – Based on the user’s login status. Like Logged In or Logged Out.
- User Role – Based on different WordPress user roles. Like Administrator, Editor etc.
- Operating System – Based on the user’s operating system. Like Windows, Mac OS, Linux etc.
- Browser – Based on the user’s browsers. Like Google Chrome, Mozilla Firefox etc.
- Location – Based on the user’s location. Like United States, United Kingdom etc.
Date & Time: This sets display rules based on date and time.
- Current Date – For targeting a specific date range. Like 25th Dec to 1st Jan.
- Time of Day – For targeting a particular time of the day. Like 11:59pm.
- Day of Week – For targeting a specific day of the week. Like Monday, Friday etc.
- Time Range – For targeting a specific time range. Like 10pm to 12pm.
Single: This sets display rules on single page templates.
- Page – For different pages of the site. Like About Us, Contact Us etc.
- Post – For different posts on the site. Like different blog posts.
- Static Page – For different static pages. Like Home Page, Blog Page, 404 Page etc.
- Post Type – For different post types like Pages, Posts etc.
- Term – For different terms like Categories, Tags etc. Like Clothing, Fashion etc. for a Clothing website.
Archive: This sets display rules on archive templates. Like Search Page, post category listing page and so on.
- Taxonomy – For different taxonomies like Category, Tags etc. of an archive template.
- Term – For different terms of Categories, Tags etc. of an archive template.
- Post Type– For different post types like Pages, Posts etc. of an archive template.
- Date– For different date archive templates.
- Author– For the author archive templates.
- Search – For the search archive template.
Language: This sets display rules based on different languages.
- Site – For the language of the website. Like Spanish, Italian etc. set in General Settings of WordPress
- Browser – For the language of the user’s browser. Like Spanish, Italian etc.
URL: This sets display rules based on the URL users are coming from.
- String – For specific URL string. Like https://domain.com/product
- Parameter – For UTM-based URL. Like https://domain.com/?utm_source=email
Shortcode:
- Shortcode – This sets display conditions based on a shortcode. If you’ve created your own shortcode to show content, you can manage the visibility using this option. This is for advanced users only. Like [my_shortcode]
If you are using Woocommerce, then you’ll find some dedicated display conditions for it.
Woocommerce: This sets display rules specifically for Woocommerce.
- Woo : In Cart Product Category – Based on the category of the product added to the cart.
- Woo : In Cart Product Tag – Based on the tag of the product added to the cart.
- Woo : Cart Subtotal – Based on the cart subtotal (before discount, tax and shipping etc.).
- Woo : Cart Total – Based on the cart total (after discount, tax and shipping etc.).
- Woo : Items in Cart – Based on the number of items added to the cart.
- Woo : Purchase Order Total – Based on the total order value of a customer.
- Woo : Purchase Date – Based on a buyer’s purchase date.
- Woo : First Purchase Date – Based on a buyer’s first purchase date.
- Woo : Last Purchase Date – Based on a buyer’s last purchase date.
- Woo : In Purchase Product Category – Based on the category of a product bought previously.
- Woo : In Purchase Product – Based on a product bought previously.
- Woo : Order(s) Placed – Based on the number orders placed previously.
- Woo : Current Product Category – For product page based on the product category.
- Woo : Current Product Price – For product page based on the price of a product.
- Woo : Current Product Stock – For product page based on the stock of a product.
- Woo : Cart Product – Based on a product added to the cart.
- Woo : Last Order Billing City – Based on the buyer’s billing city in the last order.
- Woo : Last Order Billing State – Based on the buyer’s billing state in the last order.
- Woo : Last Order Billing Country – Based on the buyer’s billing country in the last order.
- Woo : Last Order Billing Postcode – Based on the buyer’s billing postcode in the last order.
- Woo : Last Order Shipping City – Based on the buyer’s shipping city in the last order.
- Woo : Last Order Shipping State – Based on the buyer’s shipping state in the last order.
- Woo : Last Order Shipping Country – Based on the buyer’s shipping country in the last order.
- Woo : Last Order Shipping Postcode – Based on the buyer’s shipping postcode in the last order.
If you are using Advanced Custom Fields (ACF), you’ll find additional display condition options for its fields.
AFC: This sets display rules for the Advanced Custom Fields.
- ACF : Text Fields – For different ACF text fields (includes text, number, range, email, url, password and text area).
- ACF : Selection – For different ACF select elements like select, radio button and checkbox.
- ACF : Button Group – For ACF buttons.
- ACF : Boolean – For ACF boolean value (True or False).
- ACF : Date / Time – For ACF date and time.
- ACF : Post – For ACF Post.
- ACF : Taxonomy – For ACF taxonomy.
Note: If you are using some other dynamic custom fields plugins like JetEngine, Metabox or Toolset, you’ll get relevant display condition options.
Then you can make the status true or false by choosing Is or Not from the dropdown below.
You’ll get relevant dropdown options based on the selected option in the Rule dropdown. Select the appropriate option to set the condition.
You can add multiple rules by clicking on the +Add Items button.
What is Keep HTML?
If a display condition is false, the targeted element will be removed from the page. But with the Keep HTML option, you can keep the targeted element’s HTML in the webpage HTML code (DOM).
This will allow the web crawlers like Googlebot to crawl the content from HTML even if it is not visible.
But if you want to remove the content altogether, then you can turn off the option.
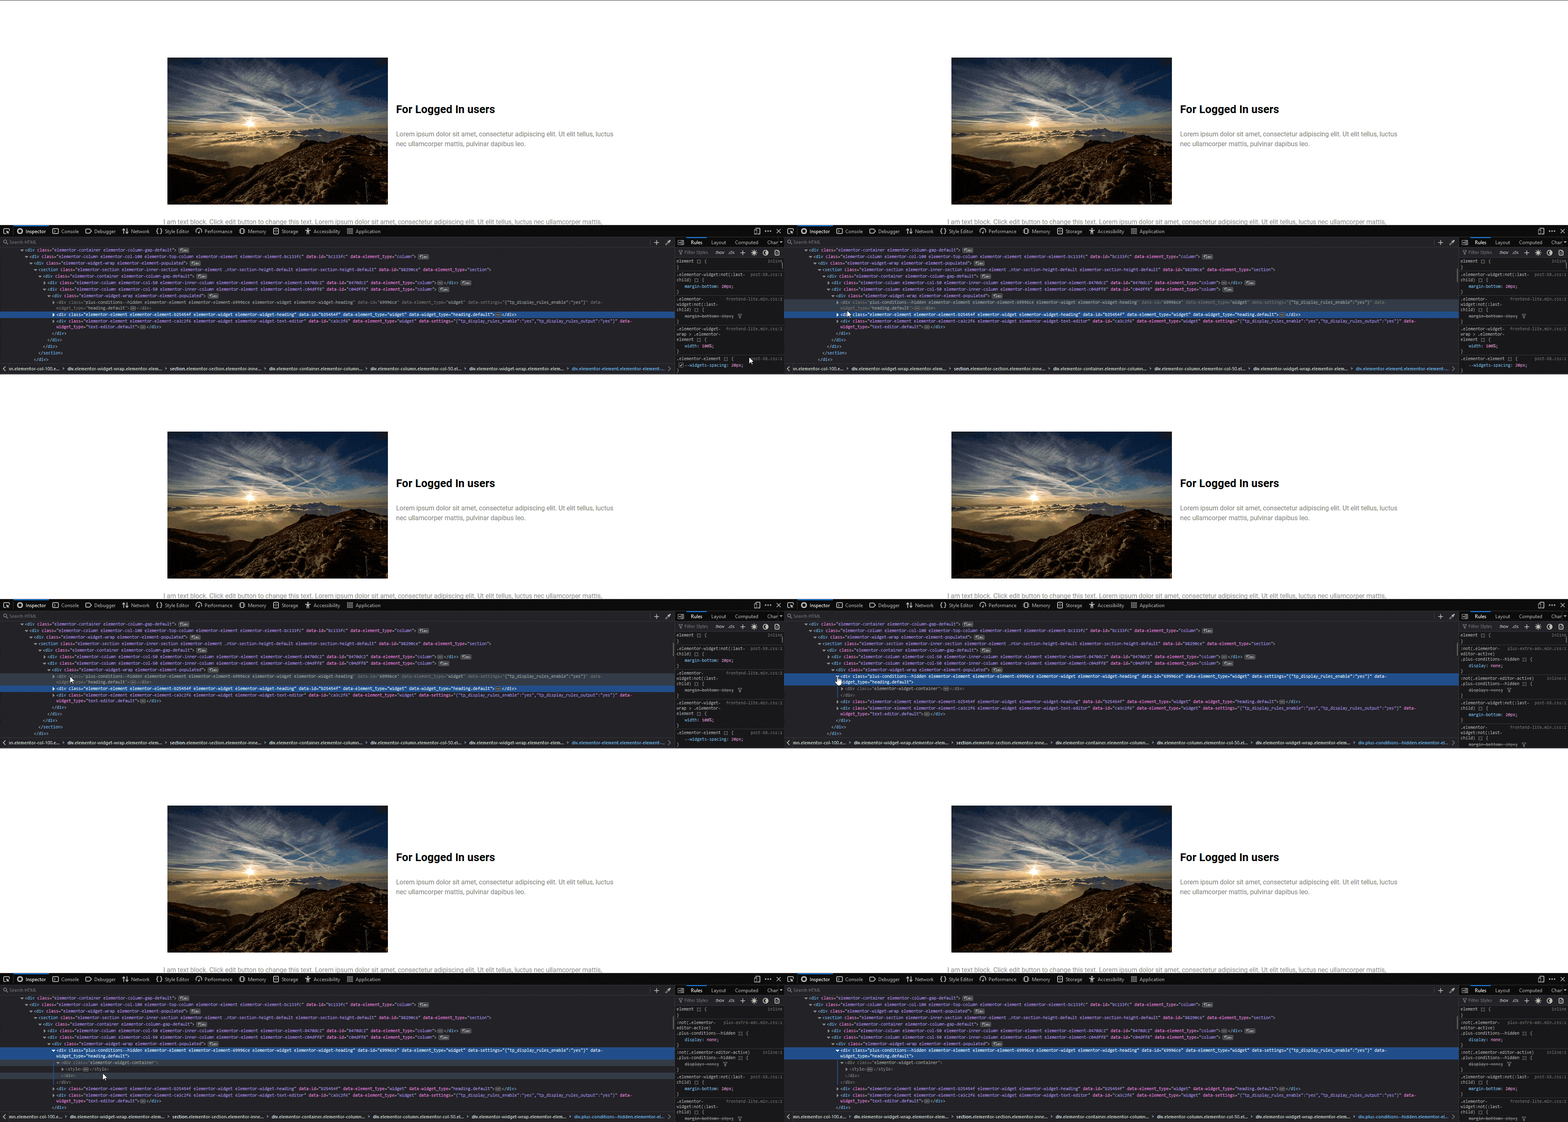
For example, we have a title widget with the Keep HTML option enabled and the display condition is false.

If we check the HTML code in the inspect element, we can see the title in the HTML.
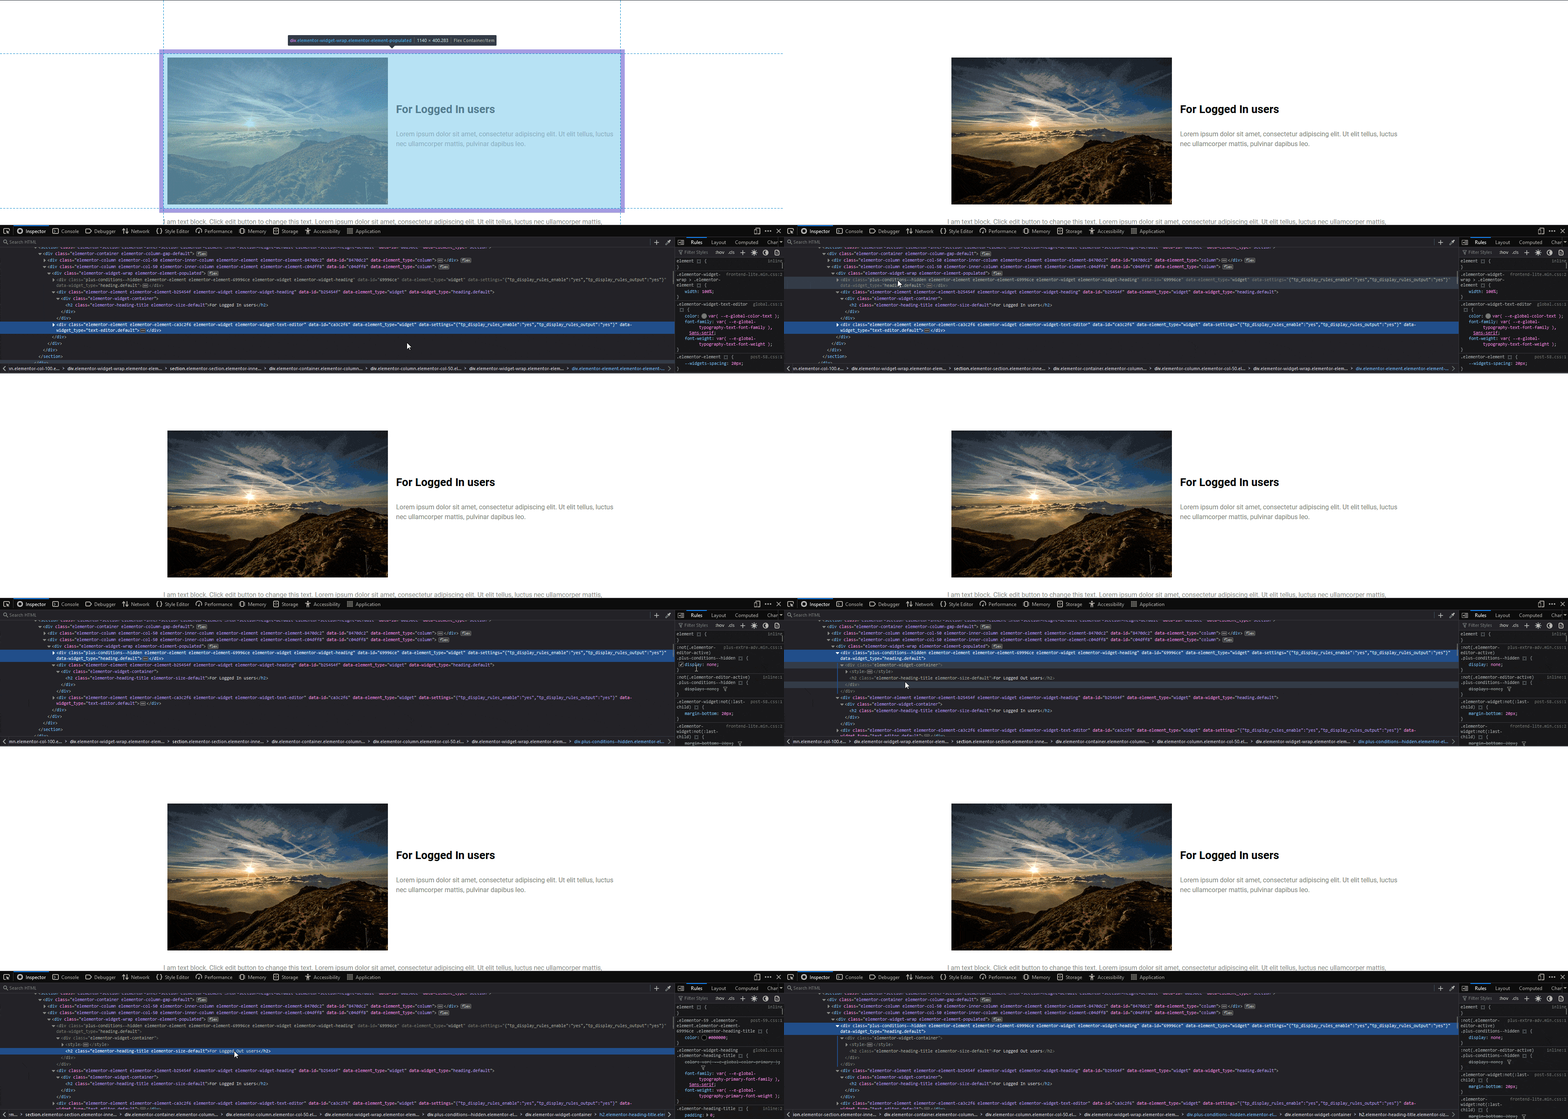
Now if we turn off Keep HTML option and then check the HTML code, it will not be there in the code.
