Are you looking to edit the WooCommerce checkout page in Elementor to match your brand and style? However, customizing the default WooCommerce checkout page will require coding knowledge.
But with the Woo Checkout widget from The Plus Addons for Elementor you can easily customize the WooCommerce checkout page without any coding.
To check the complete feature overview documentation of The Plus Addons for Elementor Woo Builder, click here.
Required Setup
- Elementor FREE Plugin installed & activated.
- You need to have The Plus Addons for Elementor plugin installed and activated.
- This is a Premium widget, and you need the PRO version of The Plus Addons for Elementor.
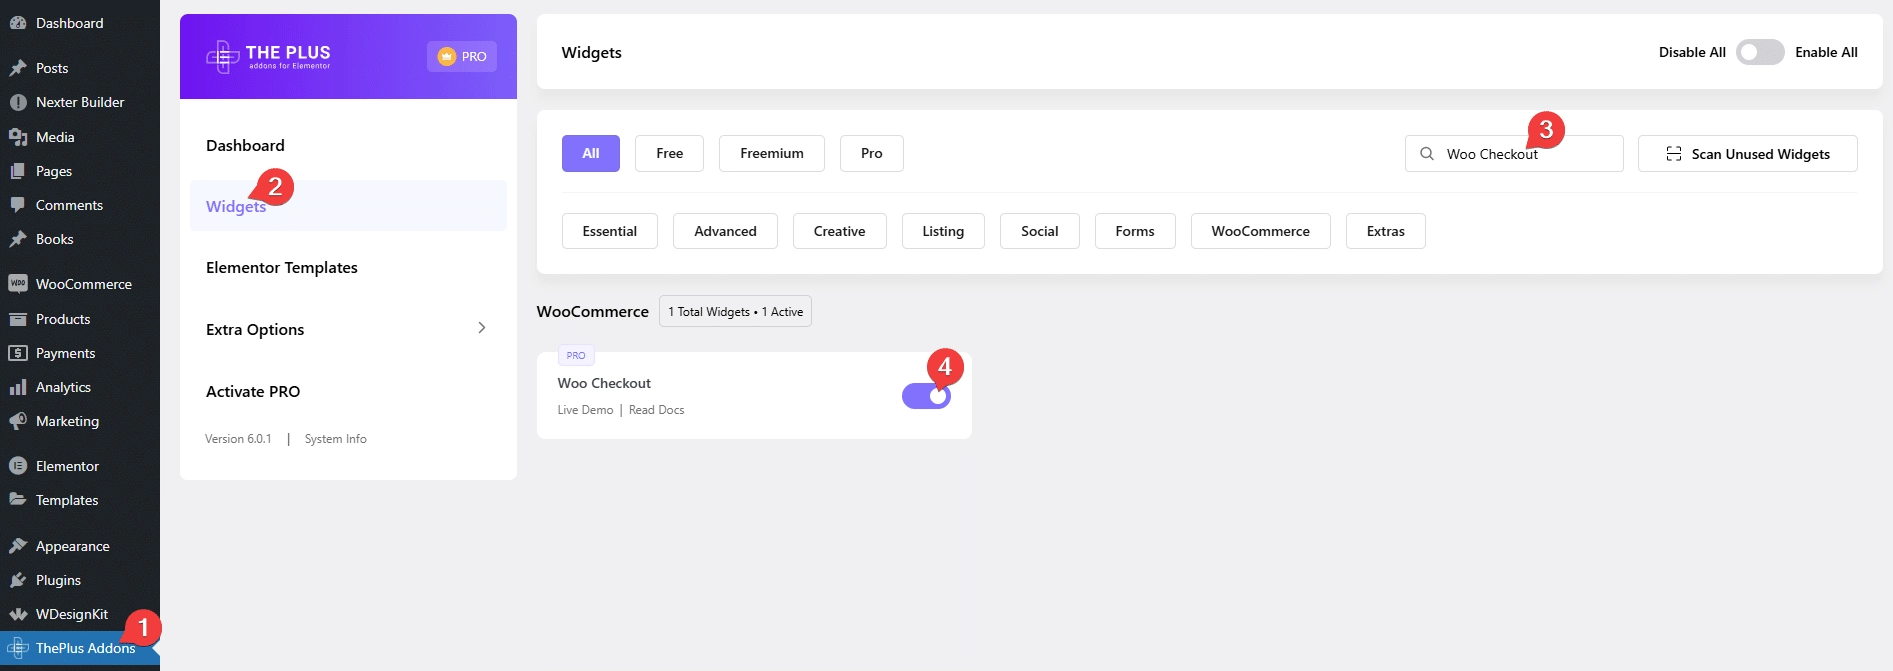
- Make sure the Woo Checkout widget is activated, to verify this visit The Plus Addons → Widgets → and Search for Woo Checkout and activate.
How to Activate the Woo Checkout Widget?
Go to
- The Plus Addons → Widgets
- Search the widget name and turn on the toggle.
Add Woo Checkout
To edit the checkout page, open the checkout page with Elementor and add the Woo Checkout widget.
Note: Make sure all the default WooCommerce pages are created.
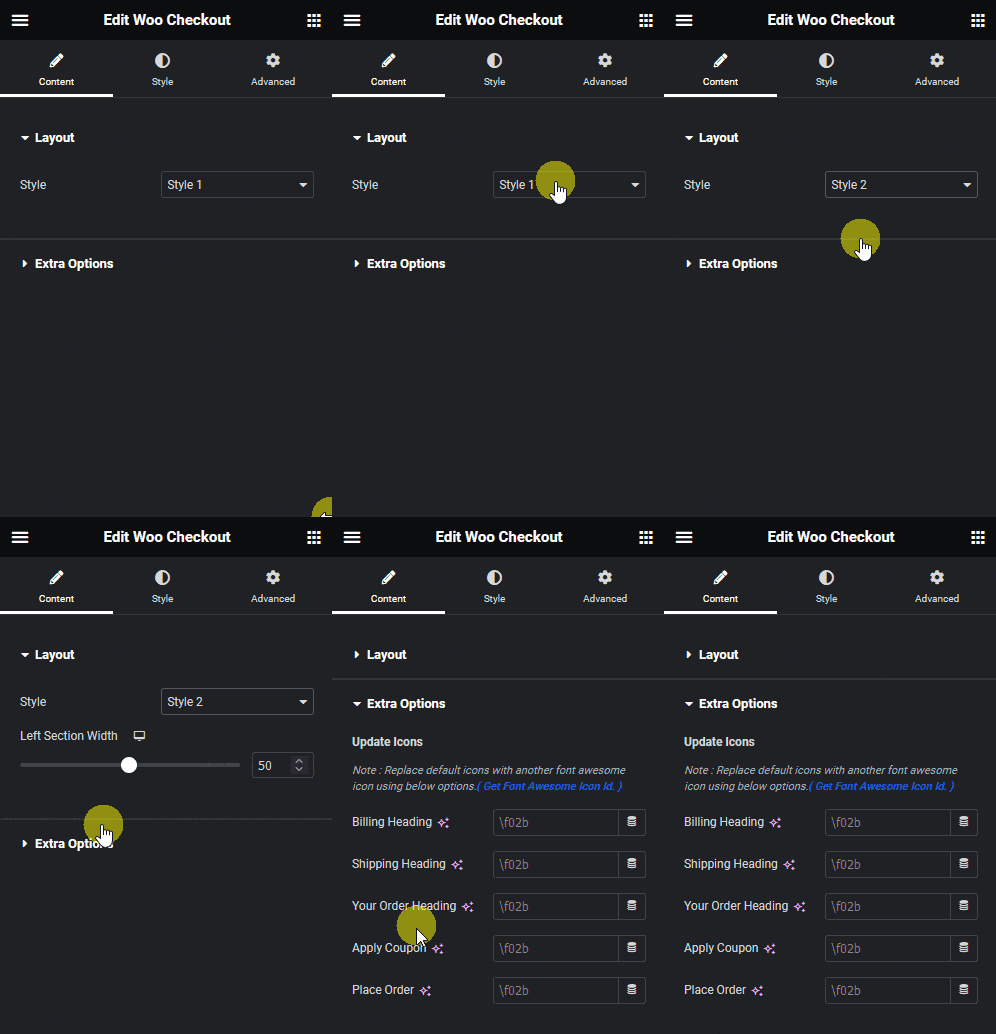
From the Style dropdown, under the Layout tab, you can select from two predefined styles.
Suggested reading, 5 best WooCommerce Elementor themes with detailed comparison
Then, from the Extra Options tab, you can add icons to each heading of the checkout form by adding the Font Awesome icon Unicode.
From the Style tab, you can customize the form style further.
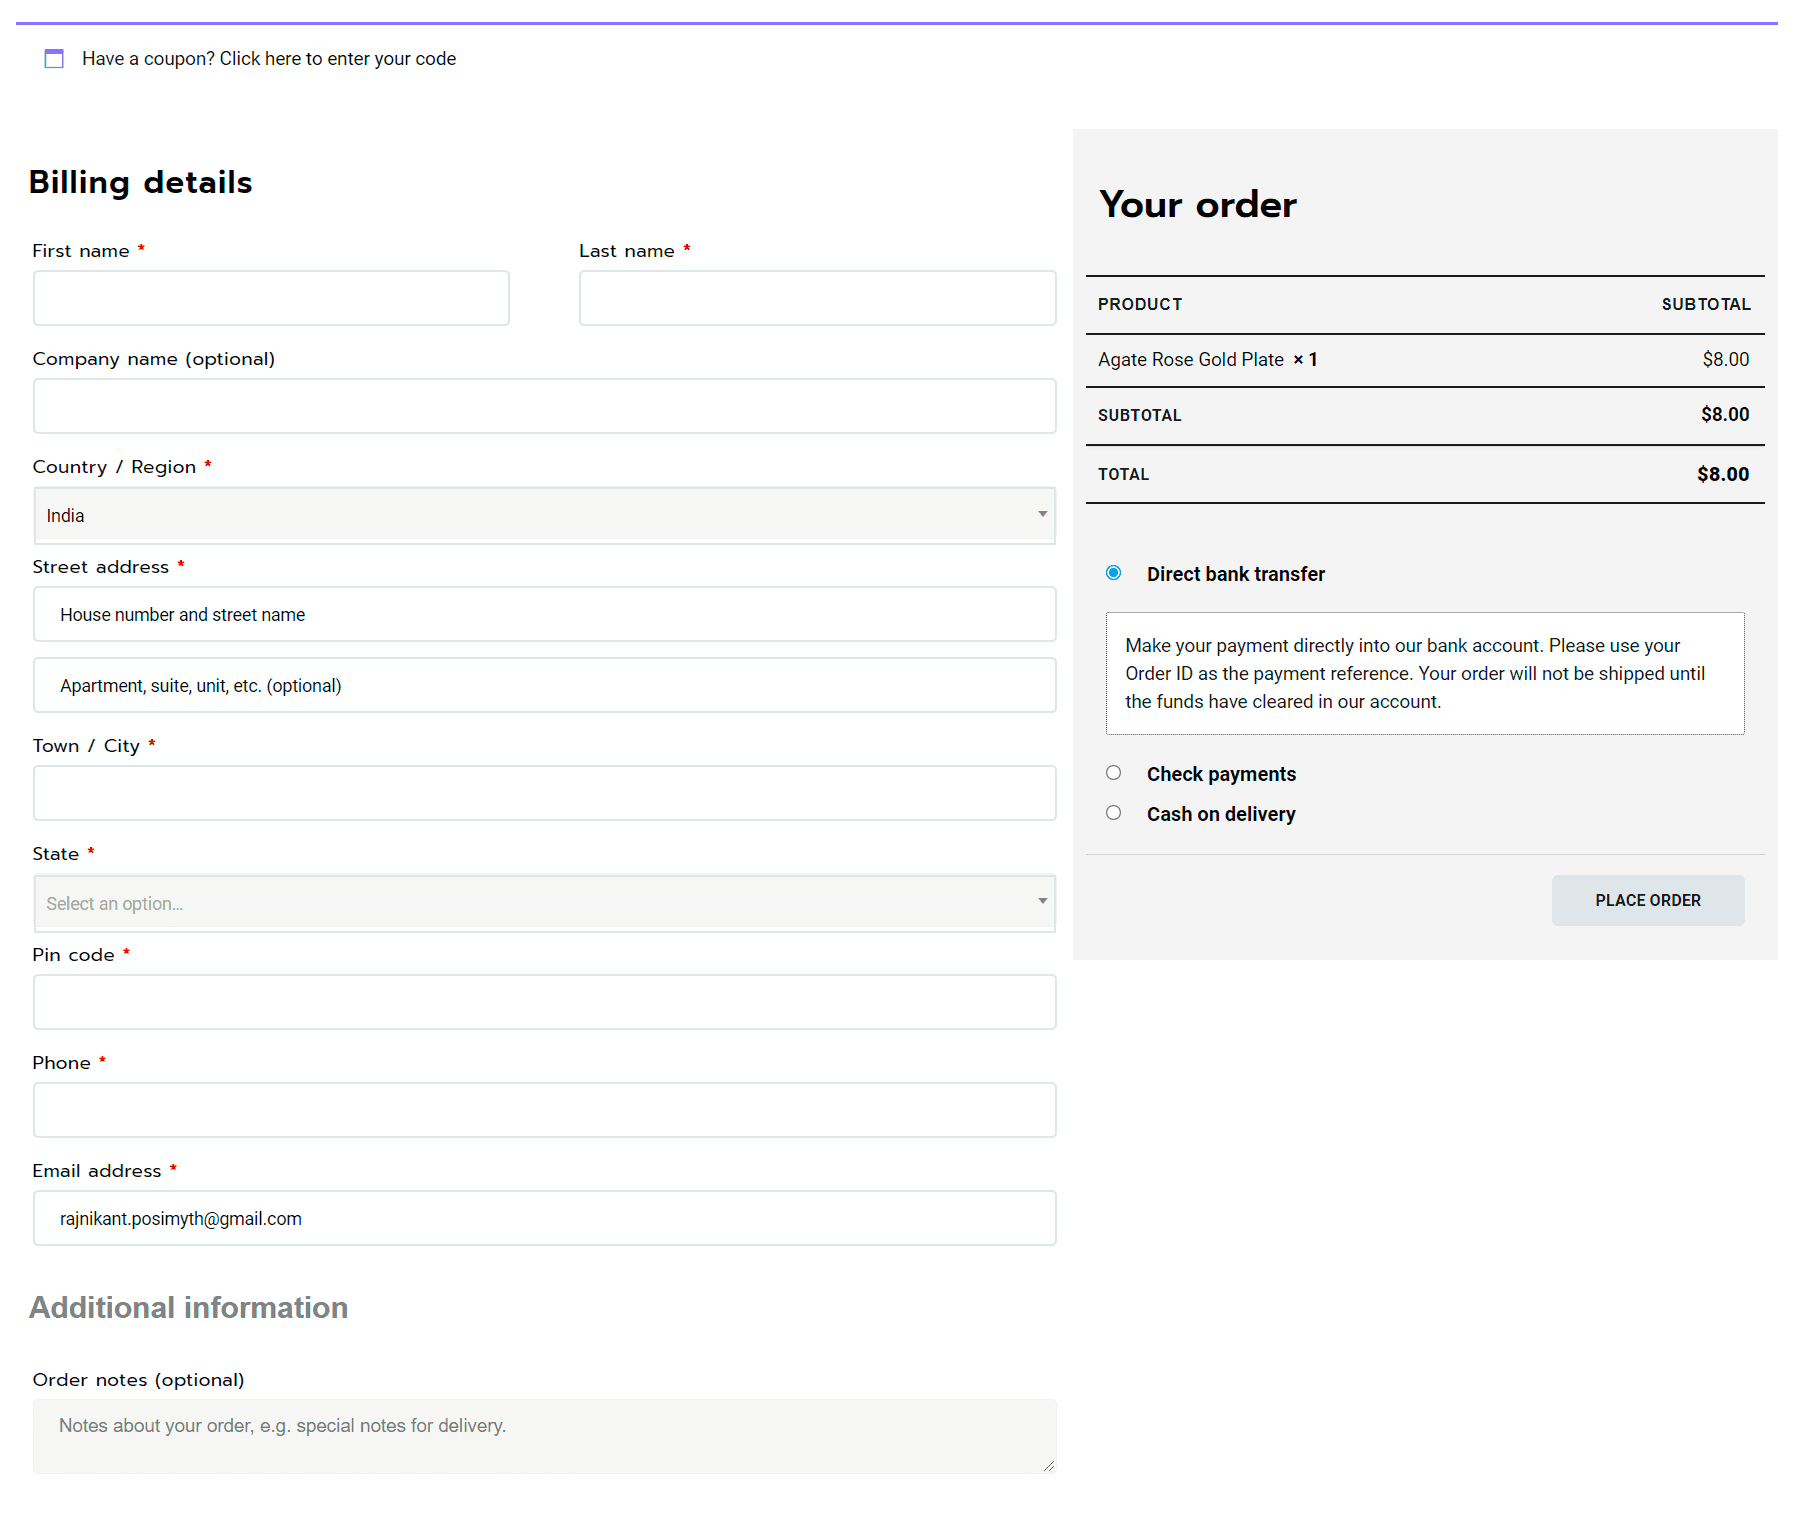
Now, you’ll see a beautiful checkout form.
Also, check how to edit WooCommerce cart page in Elementor.
