When it comes to creating stunning websites with Elementor, The Plus Addons for Elementor is a powerful tool that offers a wide range of features and functionalities. However, it’s important to ensure that your website’s performance remains top-notch even with the use of these add-ons.
Here, we will explore various techniques and tips to get best performance when using The Plus Addons for Elementor. By following these steps, you can maintain a fast-loading website, enhance user experience, and improve overall site performance.
Video Tutorial
Check System/Hosting Requirement
Make sure your hosting requirement meets the minimum system requirements of The Plus Addons for Elementor so you can get a smooth user experience.
Following are the System Requirements for The Plus Addons for Elementor
PHP Version: 7.4 or Higher
max_execution_time: 300
memory_limit: 512M or Higher (In most cases, this is enough if you’re using few widgets from The Plus Addons for Elementor, but if you have a dynamic WooCommerce website with multiple add-ons, we suggest keeping it to 1024M).
max_input_vars: 300
WordPress: 5.3 & above
MySQL: 5.6 or Greater OR MariaDB version 10.0 or Greater.
You can check your system information from Elementor > System Info.
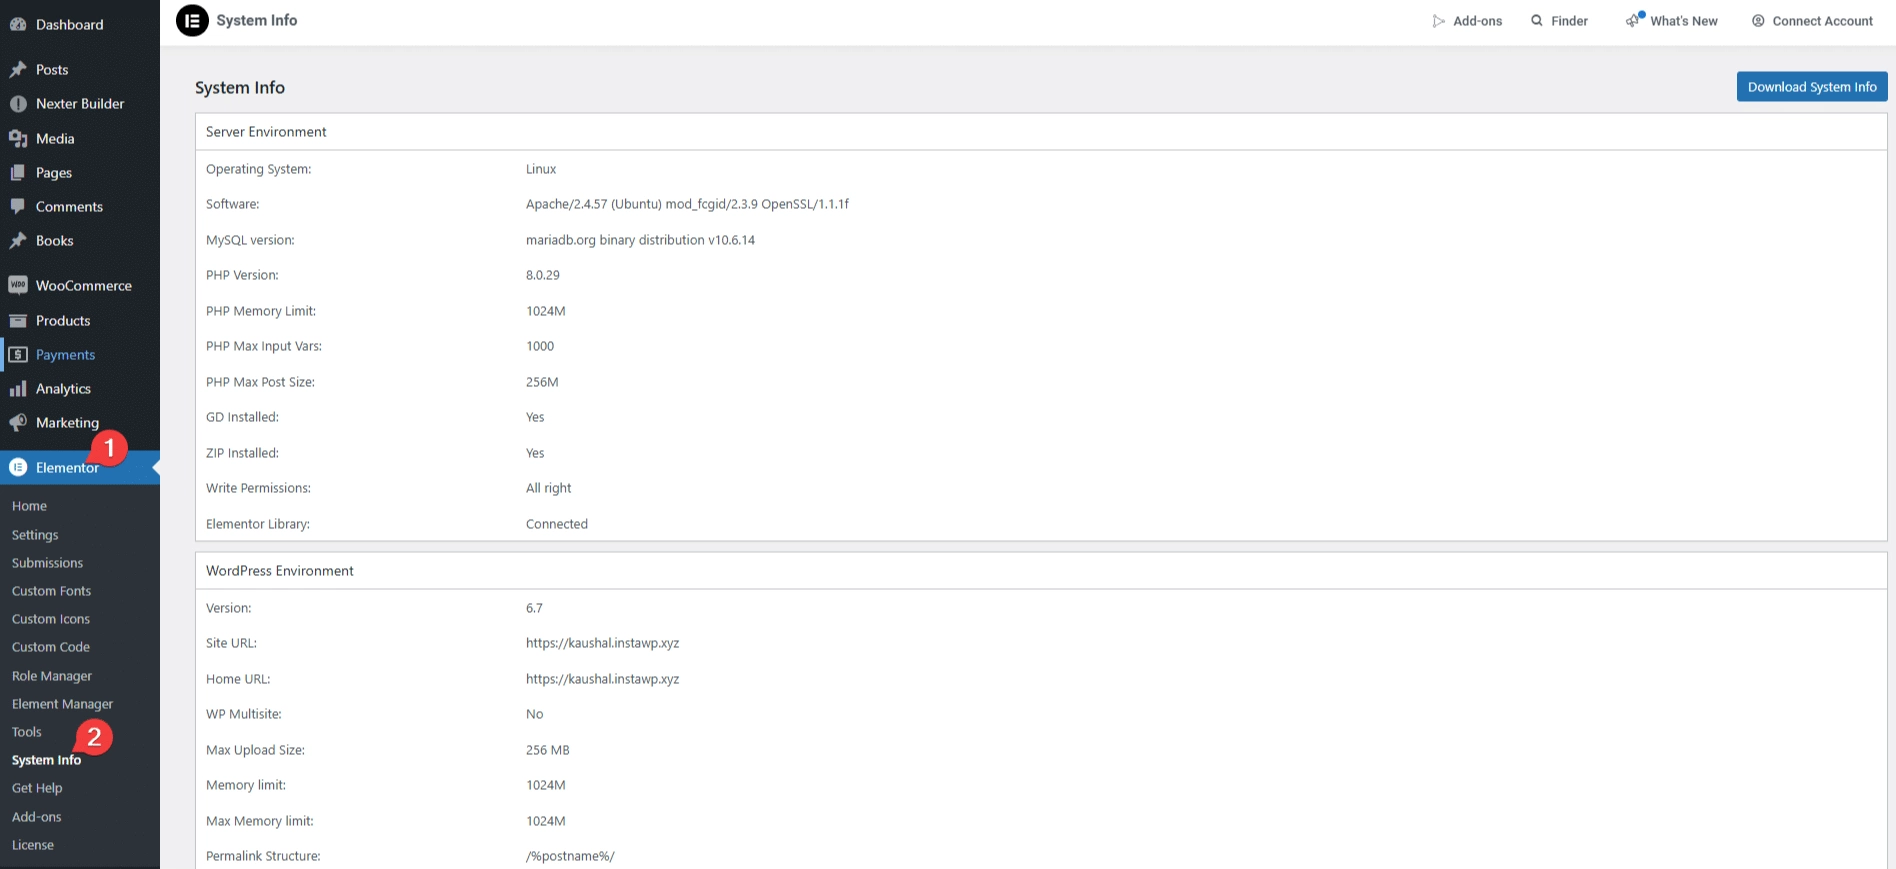
If your system settings are low, you should contact your hosting provider to upgrade.
Turn on Required Elementor Widgets Only
The Plus Addons for Elementor has 120+ widgets, but in most cases, you won’t be using all of them on a single website. Loading so many widgets at once can affect the Elementor editor panel load time.
So the best way would be to plan beforehand which widgets you want to use and only turn them on, so it doesn’t load up the Elementor editor panel.
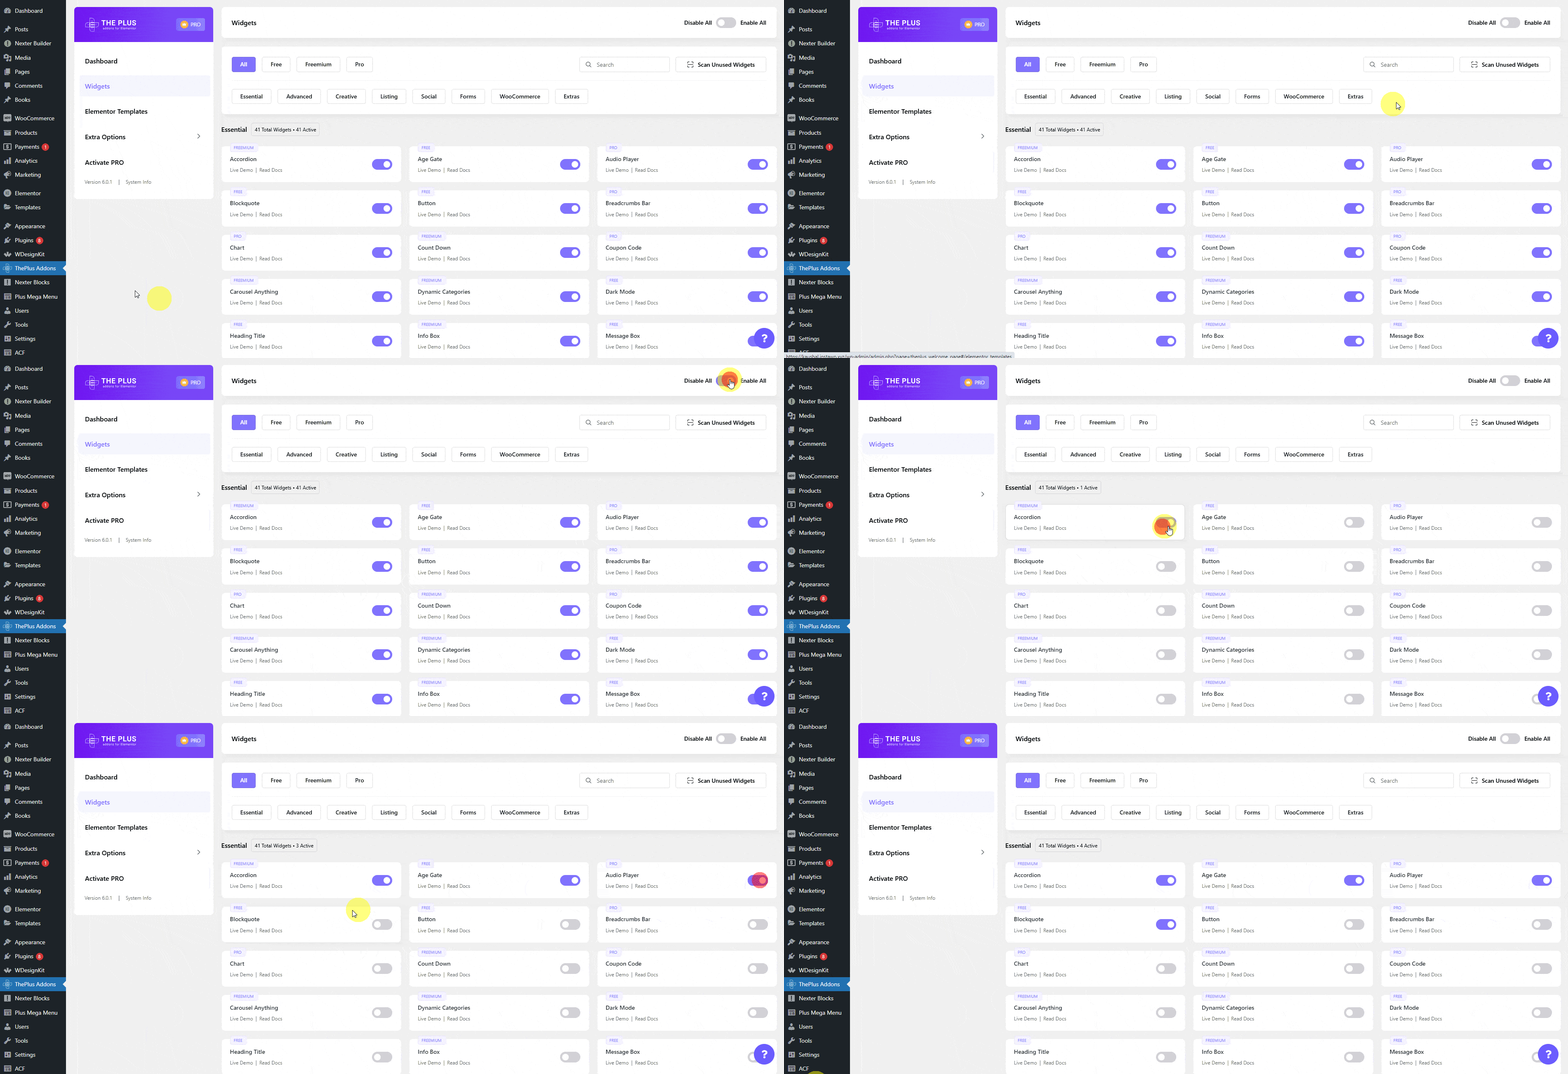
To do so from the Dashboard, go to ThePlus Addons > Widgets.
You have to disable all the widgets for this first, turn on the Enable All toggle, and then turn off it to Disable all the widgets.
Then manually turn on only the widgets you want to use.
Disable Non Required Extra Options
The Plus Addons for Elementor provide many integrations to 3rd party solutions such as Google Maps, MailChimp, LottieFiles and more.
While these integrations are a great way to make your website dynamic but you might not be using all of them together on your website.
Simply disable the integrations you don’t wish to use, this will reduce the number of requests on your server and improve the load time.
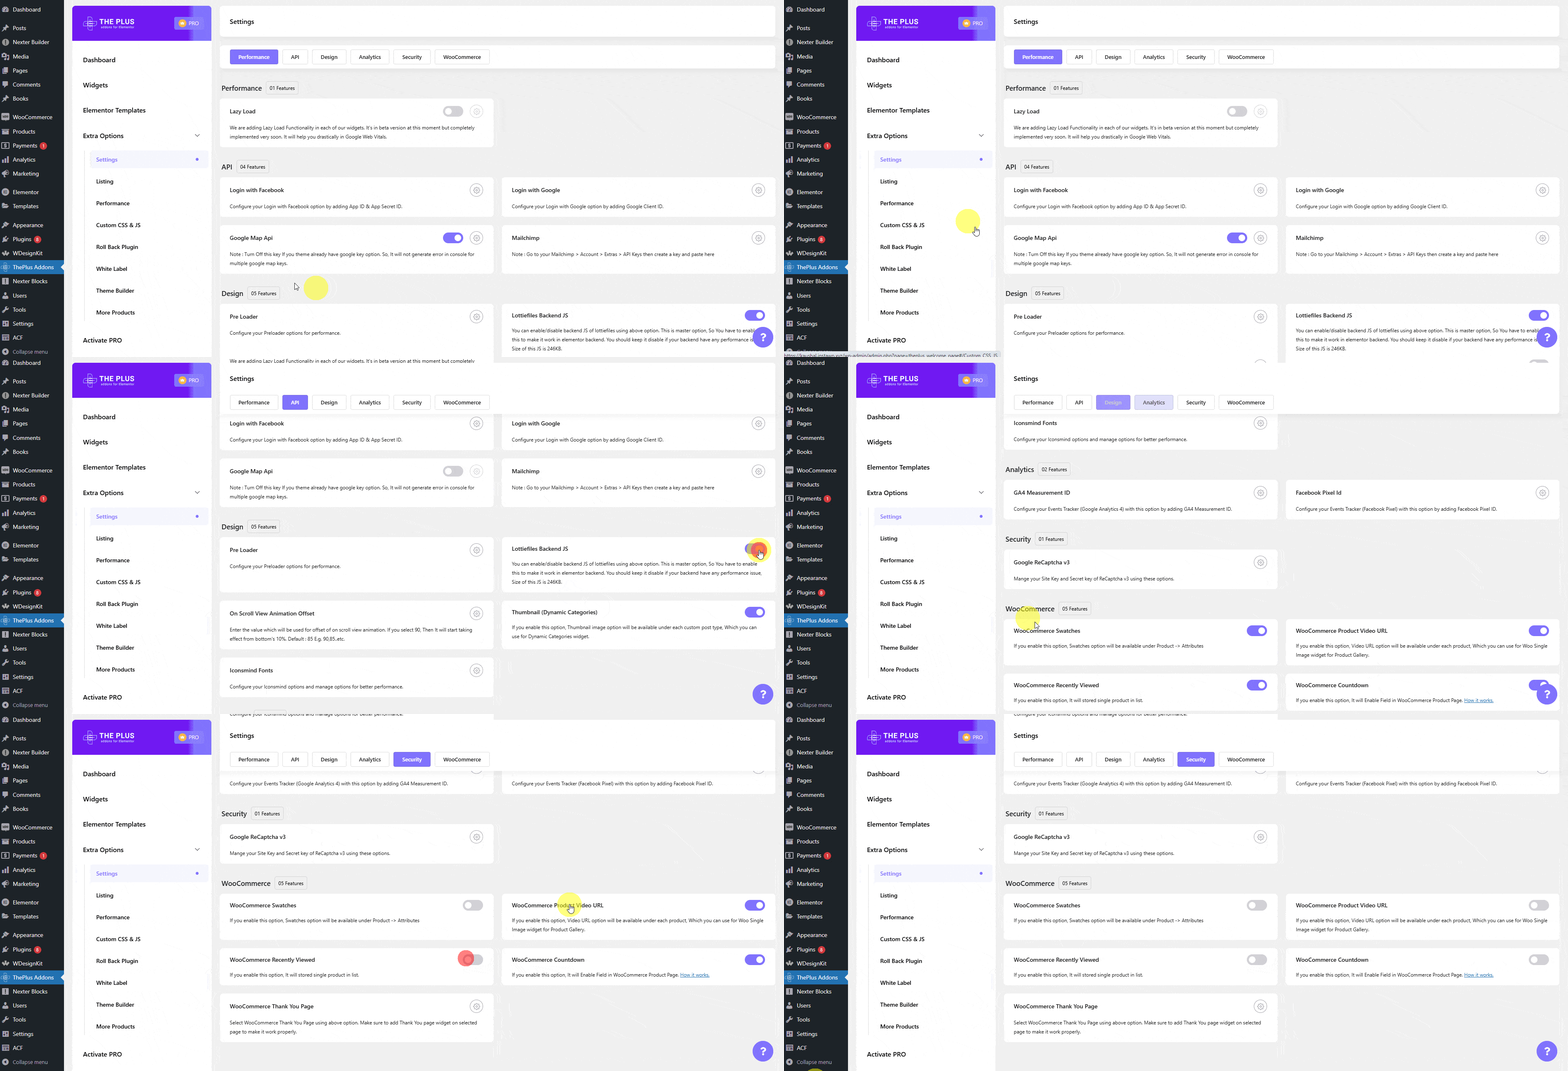
To do this from the Dashboard, go to ThePlus Addons > Extra Options > Settings and manually turn off the options you don’t want to use.
Common Suggestions
- If you’re not using the Icon Minds library and prefer to stick with the default Font Awesome 4 or 5, please disable it.
- If you’re not utilizing the Google Map Widget from The Plus Addons, kindly set the Google Map API Key to None.
- In case you’re not using any of our Lottie widgets, please turn off all the Lottie options.
- Similarly, remember to toggle the switcher off to ensure that only the content you’re using is loaded.
Adjust Plus Performance Cache
You can further optimise the performance of The Plus Addons for Elementor using it’s exclusive cache feature.
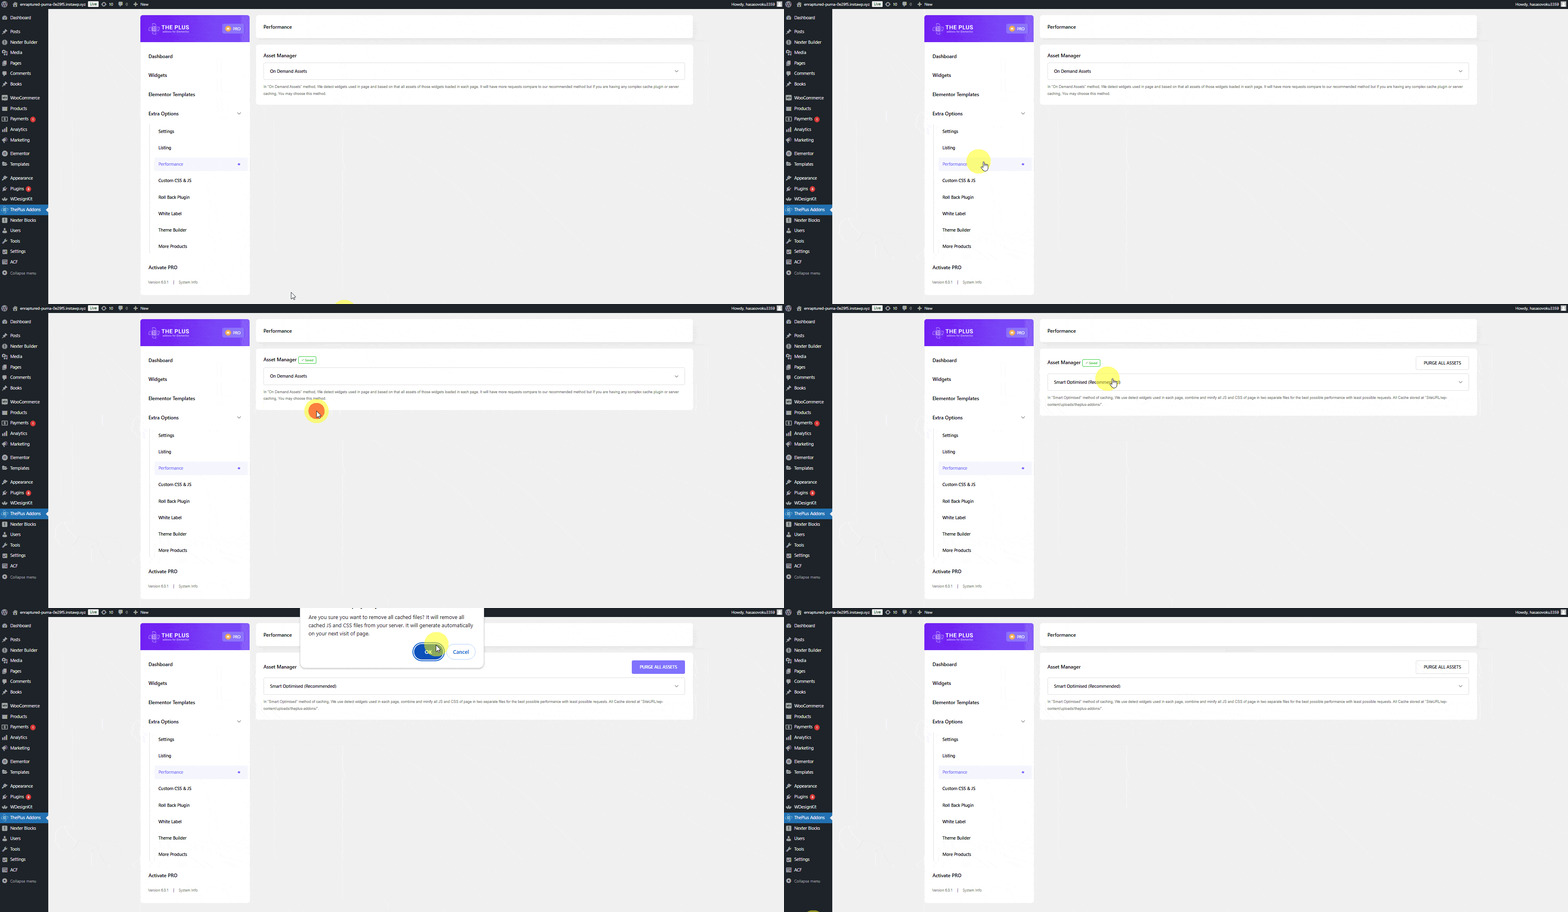
To access the cache feature from the Dashboard, go to ThePlus Addons > Extra Options > Performance.
Under the Asset Manager section, you’ll find two cache methods –
Smart Optimised (Recommended): In this method, when you use multiple widgets, their individual CSS files will be loaded separately when you load the page for the first time, but from the second load onwards, all those CSS files will be combined in a single CSS file.
For example, if you use 3 widgets on a page, then 3 CSS packets will be loaded. On the second load, these CSS packets are combined, further reduced, and minified into a single CSS file.
As for JS, only 1 JS file will be loaded dynamically for each page, regardless of how many widgets you use.
So you’ll have just 1 CSS and 1 JS file.
If you encounter any design issues, you can simply click on Purge All Assets from the backend to clear the cache.
Then, open the alert dialog box. To clear all CSS and JavaScript files, click the OK button.
This optimisation is recommended for most website users.
On Demand Assets: This method is recommended if you are using a CDN cache, where files can be pulled from multiple pull zones.
In this method, each widget will load its own dedicated CSS and JS, and for each Template used on a page, it will have its own dedicated CSS and JS.
But if one widget is used multiple times, it won’t load the related CSS and JS files multiple times. For example, if you use the Accordion widget 3 times on a page, only one 1 CSS and JS file will be loaded for the Accordion widget.
Disable Unused The Plus Addons Widget & Elementor Widgets (Exclusive)
The Plus Addons for Elementor has a unique option to disable unused widgets in one click. So once your project is done, you can easily disable all the widgets which were enabled but not used.
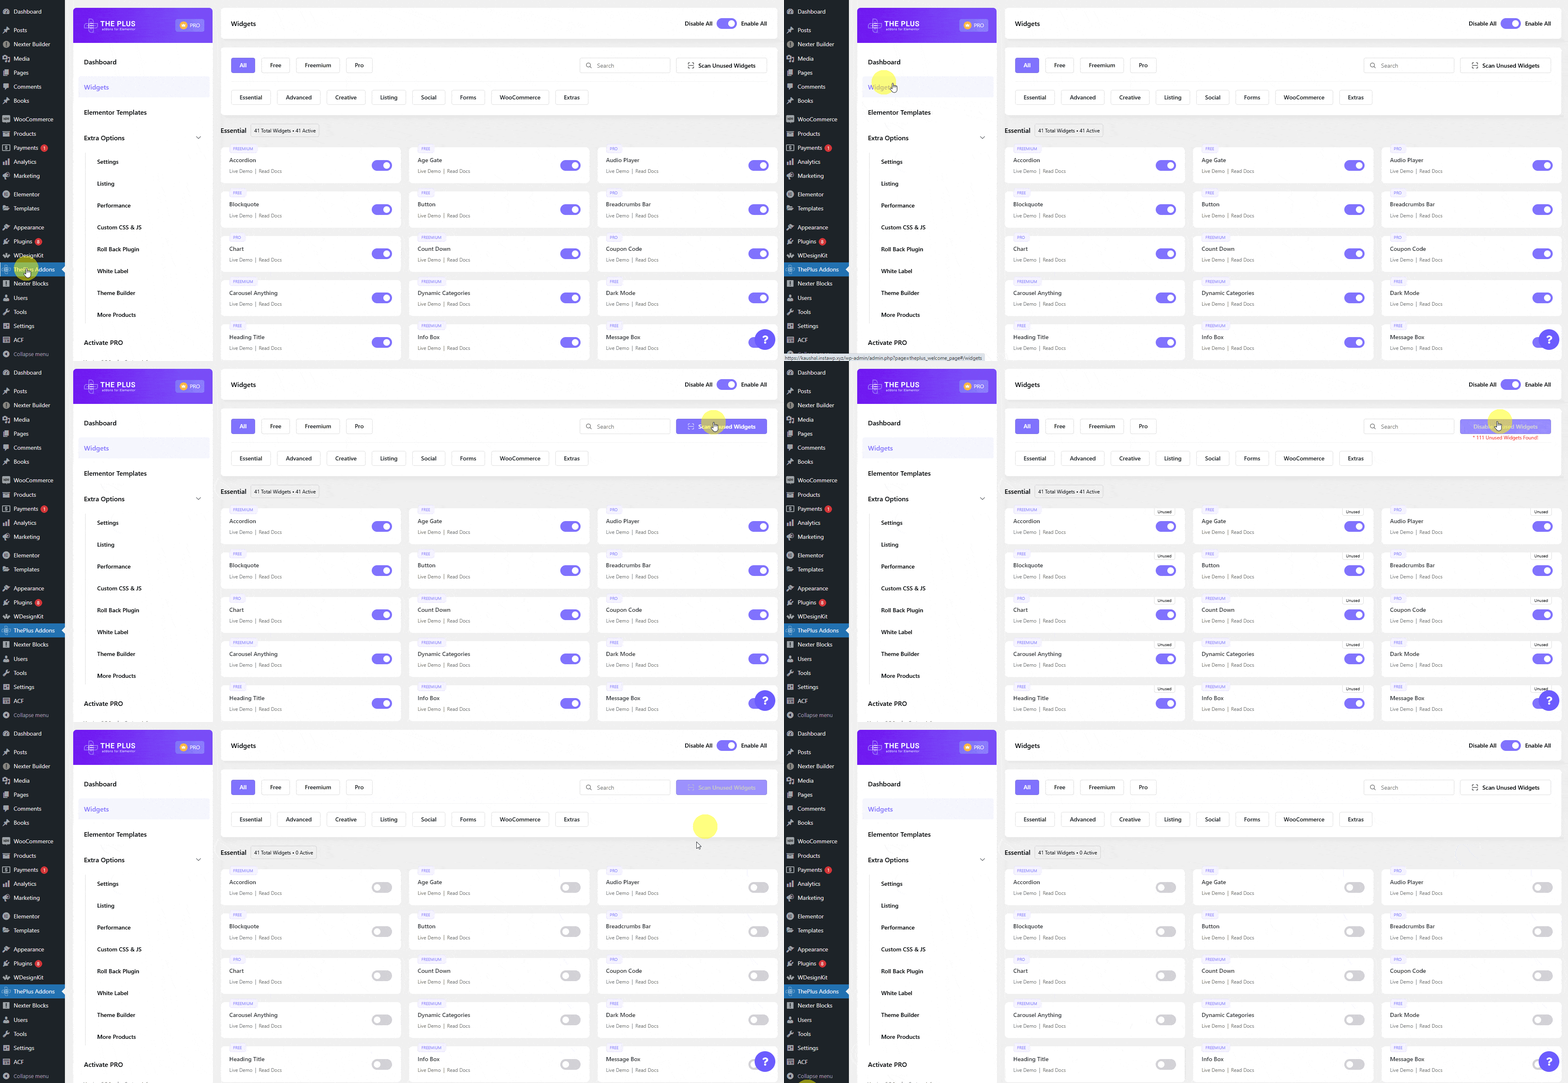
To do this, go to The Plus Addons > Widgets.
Click on the Scan Unused Widgets button.
Watch this in action:
It will show all the unused widgets, just click on the Disable Unused Widgets button to disable all unused widgets.
Note: Plus Extra options won’t be disabled with this you have to manually disable the options which are not used.
Elementor Loading Panel, Freeze
If you are facing the Elementor loading panel freezing problem, i.e. when you open the Elementor editor the widget panel keeps on loading and not letting you edit the page.
We have created a dedicated document addressing how to fix Elementor editor stuck on loading screen [20+ Ways].
Using Performance Booster from our NexterWP Theme
If you are using our Nexter theme, you’ll get some additional performance optimisation options that can improve your site’s performance.
If you go to Appearance > Nexter Settings > Performance.
In the Advance Performance click on the Settings button.
Here you’ll see multiple optimisation options such as Disable Emojis Script, Remove RSD Link, Remove wlwmanifest Link and more.
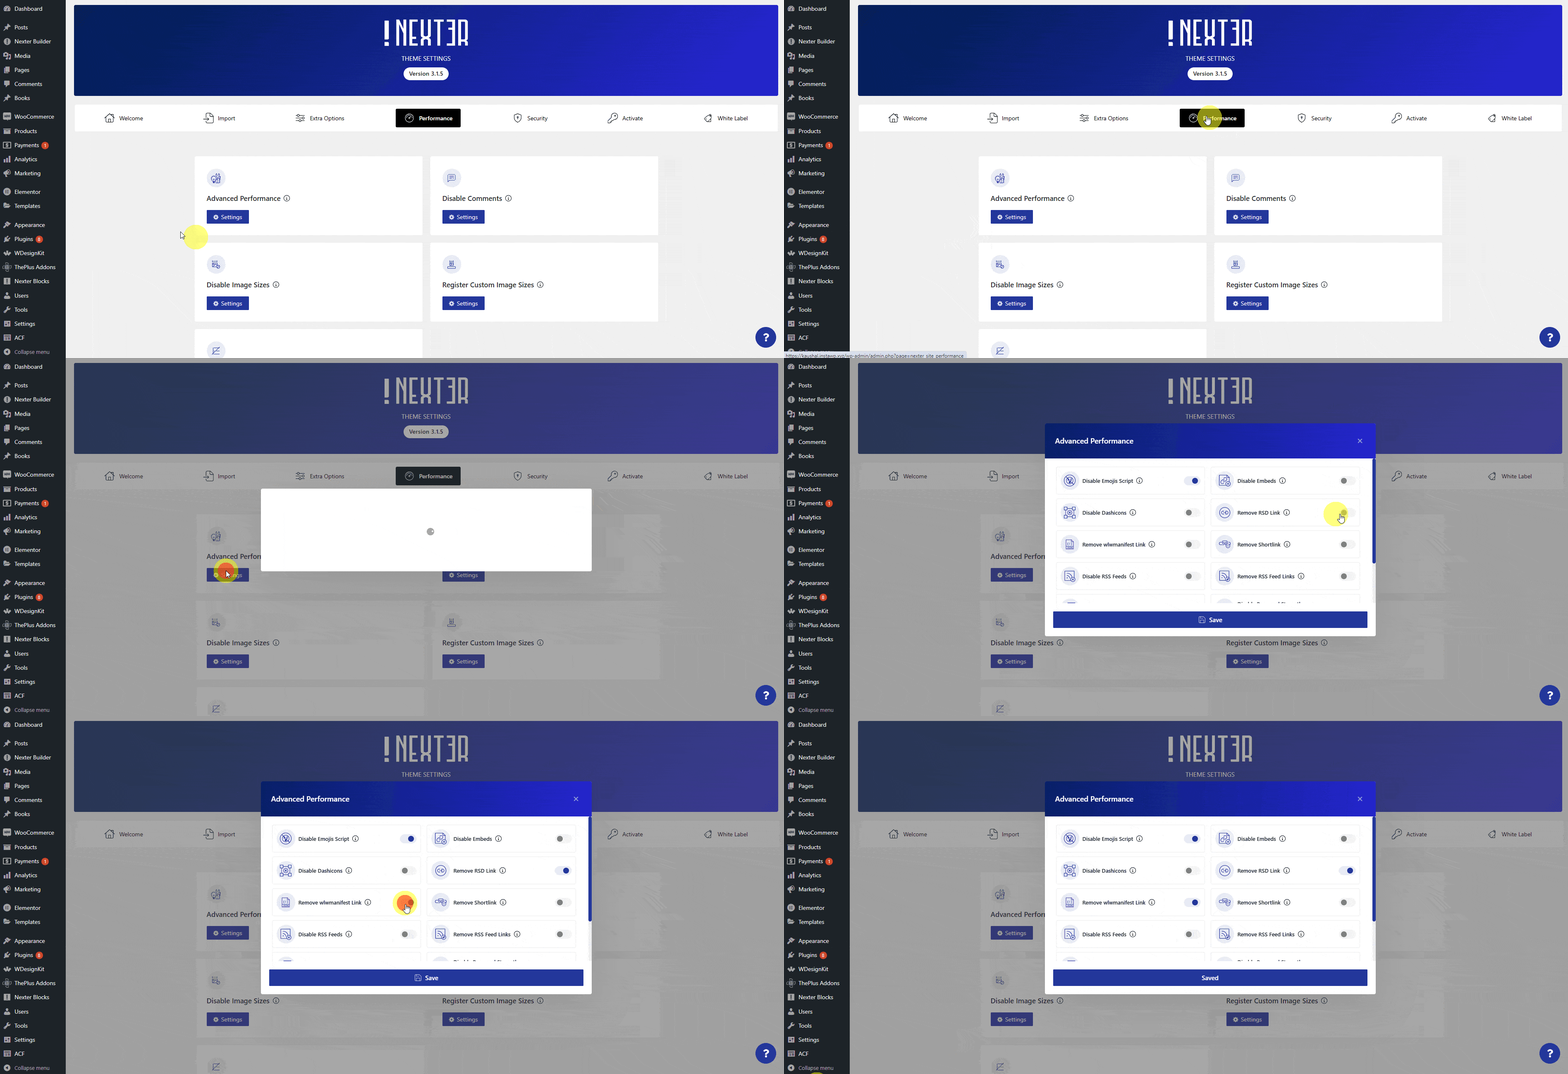
These will remove excess code from your website, which will reduce the number of requests from your site and improve your website’s load time.
You can look into this playlist to further optimise your Elementor website.
