Do you want to add a scarcity countdown timer on different WooCommerce pages in Elementor? Adding a scarcity countdown timer creates a sense of scarcity and urgency, prompting customers to make a purchase decision quickly. As a result, it can significantly increase your conversion rates and improve overall sales.
With the Countdown widget from The Plus Addons for Elementor, you can easily add a scarcity countdown timer on different WooCommerce pages in Elementor.
To check the complete feature overview documentation of The Plus Addons for Elementor Countdown widget, click here.
Requirement – This widget is a part of The Plus Addons for Elementor, make sure its installed & activated to enjoy all its powers.
To do this, add the Countdown widget to the specific WooCommerce template or page and follow the steps –
Note: To create the single product template, you can use the free Nexter Builder or you can use Elementor Pro if you are already using it. You can customize the WooCommerce cart and checkout page using different widgets from The Plus Addons for Elementor.
1. Select Scarcity Countdown (Evergreen) from the Countdown Setup dropdown.
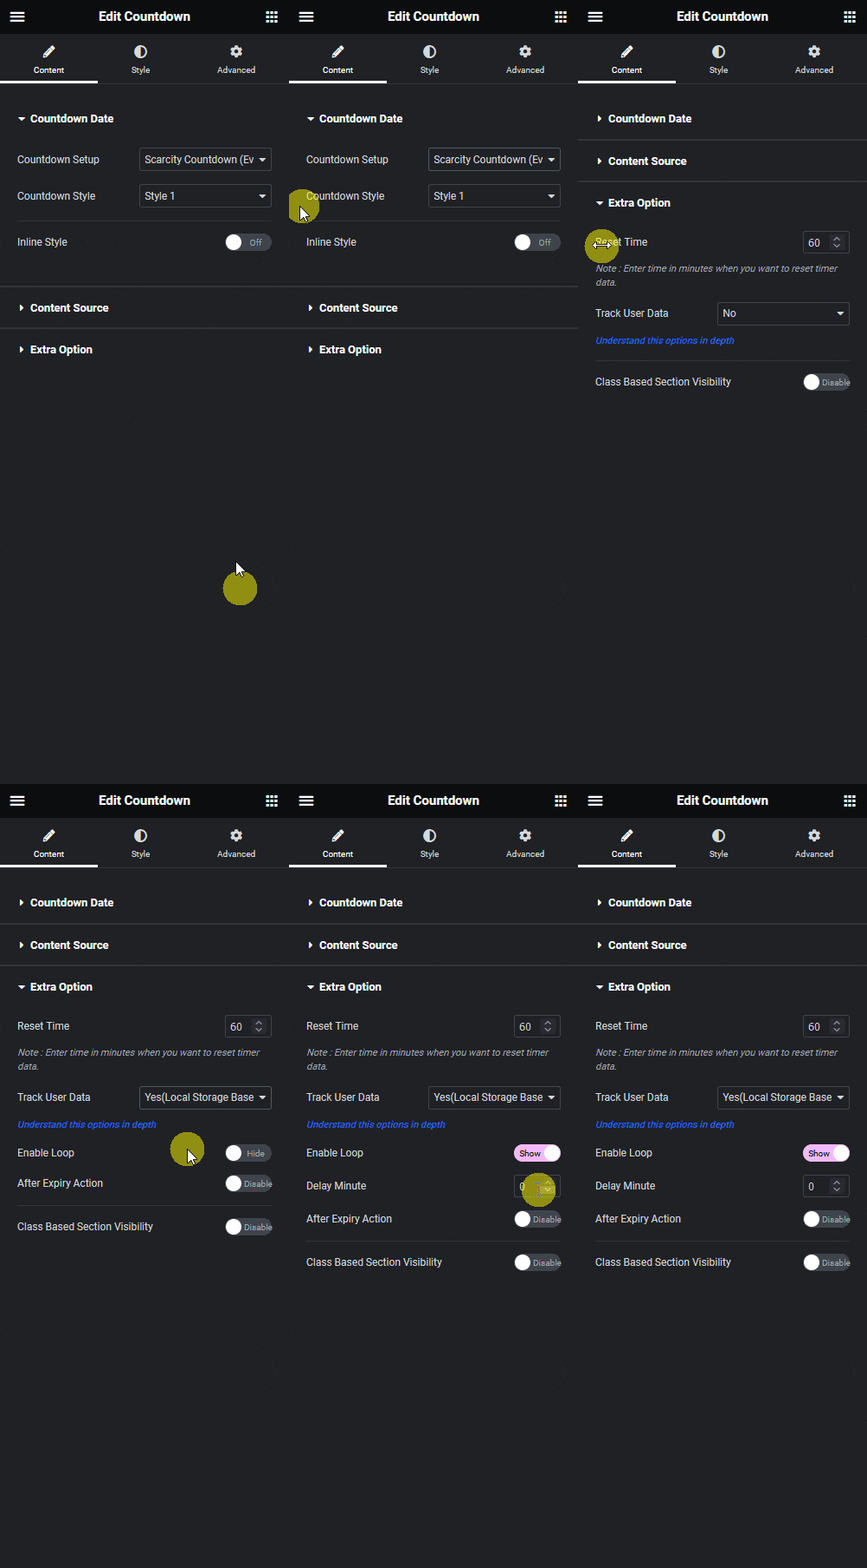
2. Select the appropriate style from the Countdown Style dropdown and make necessary adjustments in the Content Source tab.
3. Then go to the Extra Option tab and add the timer reset time in the Reset Time field.
Note: The number will be set in minutes.
4. From the Track User Data dropdown select the Yes(Local Storage Based) option.
This will save the timer cookie in the user’s browser making the countdown timer specific to the user. If the user visits the page again the countdown will not reset instead it will continue to complete the remaining time.
5. Then enable the Enable Loop toggle, this will make the countdown loop forever.
From the Delay Minute field, you can set a delay (in minutes) before starting the countdown timer after the timer ends. This way the countdown timer will not restart immediately making it look more natural.
From the After Expiry Action toggle, you can set different actions after the countdown ends.
Then from the Class Based Section Visibility toggle, you can change content after the countdown ends based on CSS class names.
Detailed guide on how to add a countdown timer to a WooCommerce product page in Elementor.
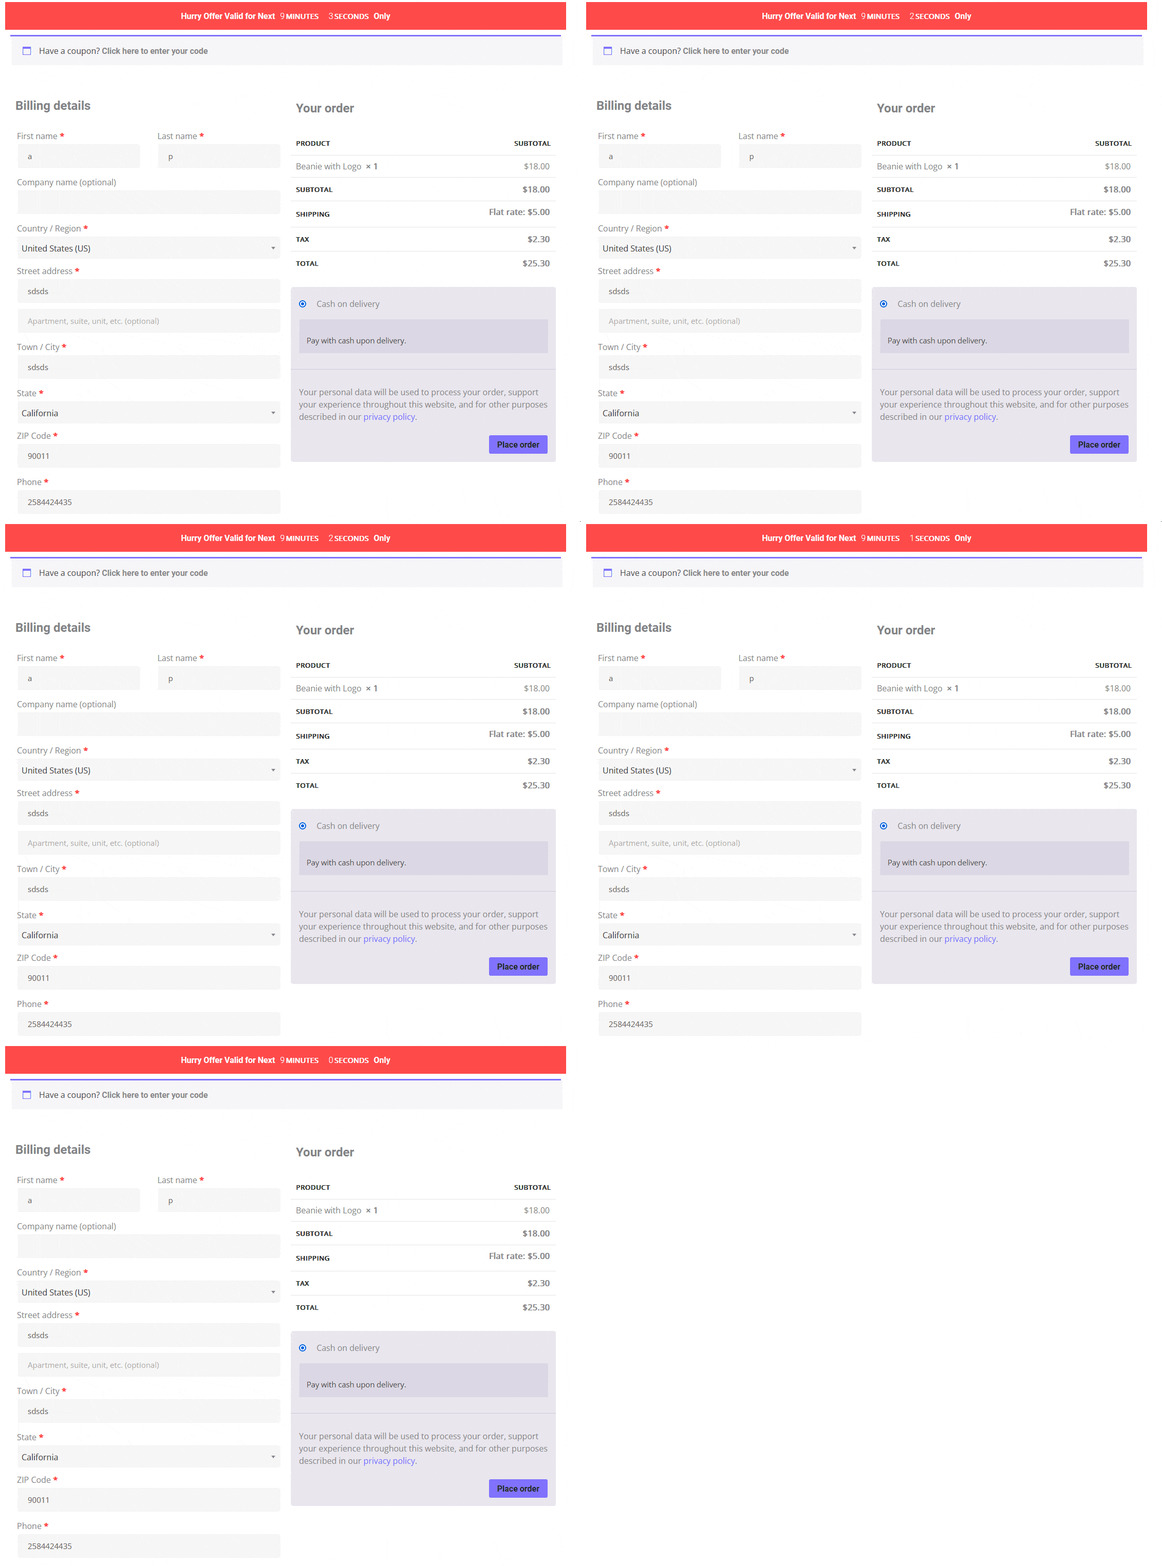
This is how easily you can add a scarcity countdown timer on different WooCommerce pages.
Also read, how to create a countdown timer for coming soon page in Elementor.
