Are you looking to track Google Analytics 4 events on your Elementor website? Google Analytics 4 (GA4) provides enhanced tracking capabilities and valuable insights into user behaviour on your website. By tracking specific events, such as button clicks, form submissions, video plays, and more, you can understand how users interact with your site and make data-driven decisions to improve your online presence.
With the Event Tracker extension of The Plus Addons for Elementor, you can easily track Google events on your Elementor website.
To check the complete feature overview documentation of The Plus Addons for Elementor Event Tracker extension, click here.
Requirement – This extension is a part of The Plus Addons for Elementor, make sure it’s installed & activated to enjoy all its powers.
To track Google events on your Elementor website, you need to have Google Analytics or Google Measurement ID installed on your website.
How to Find Google Measurement ID
Log in to your Google Analytics account and follow the steps –
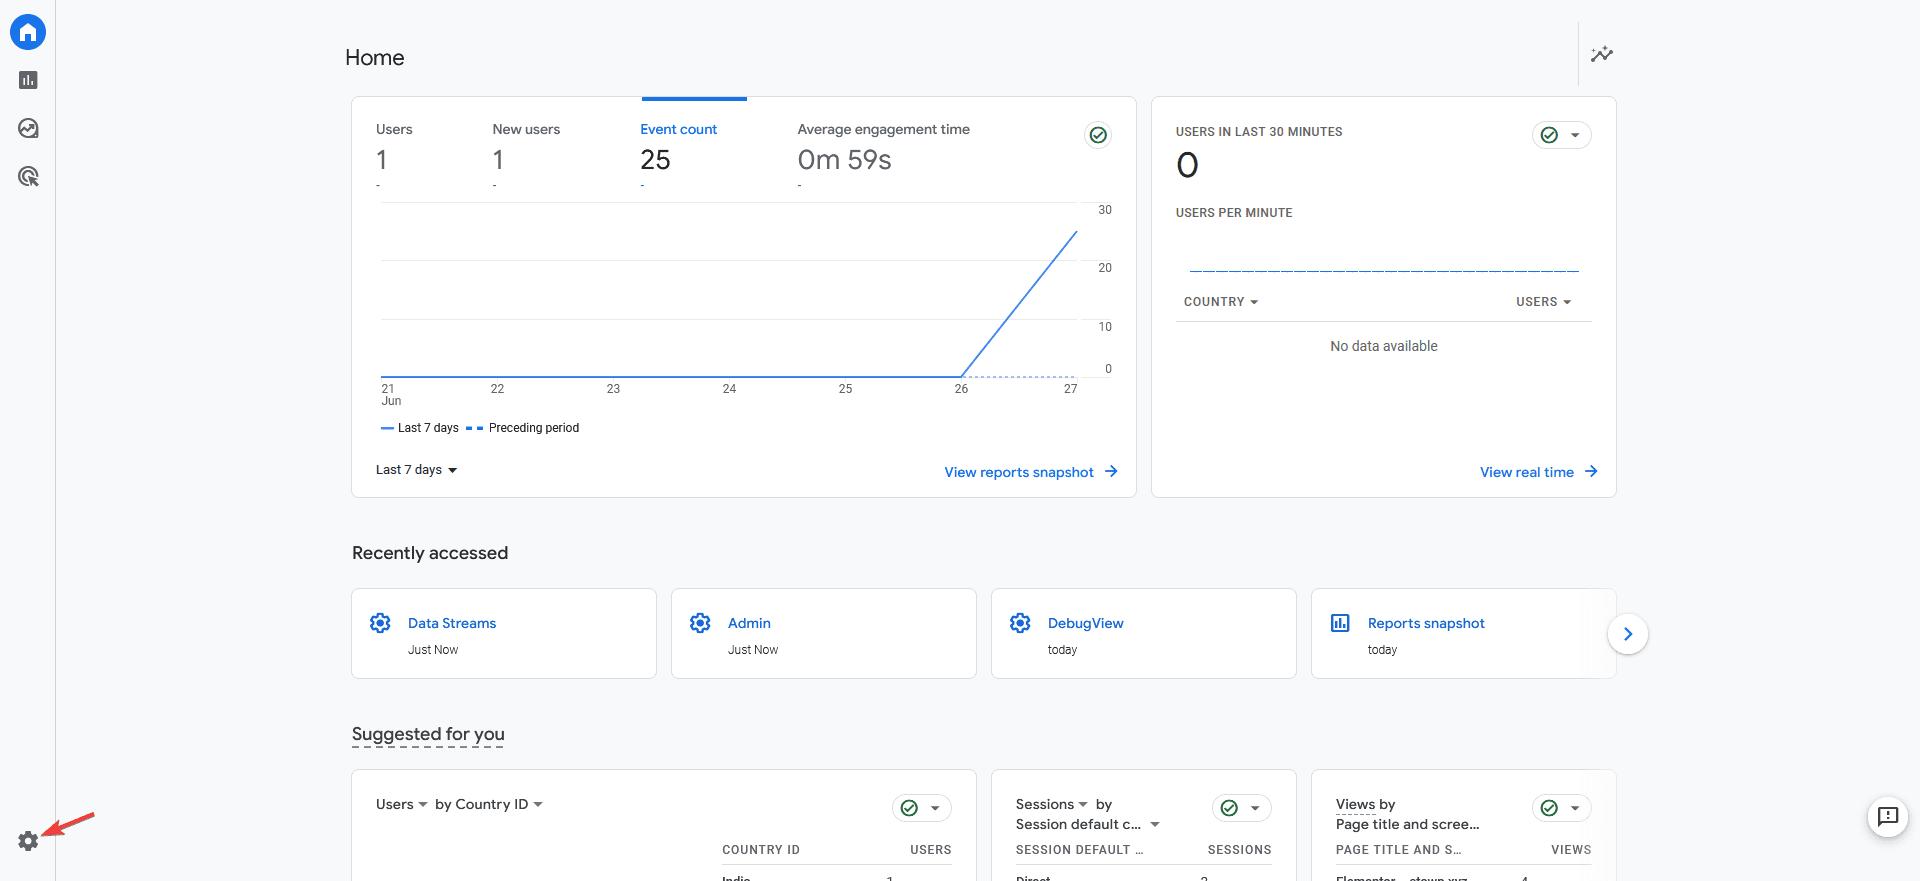
1. Click on Admin.
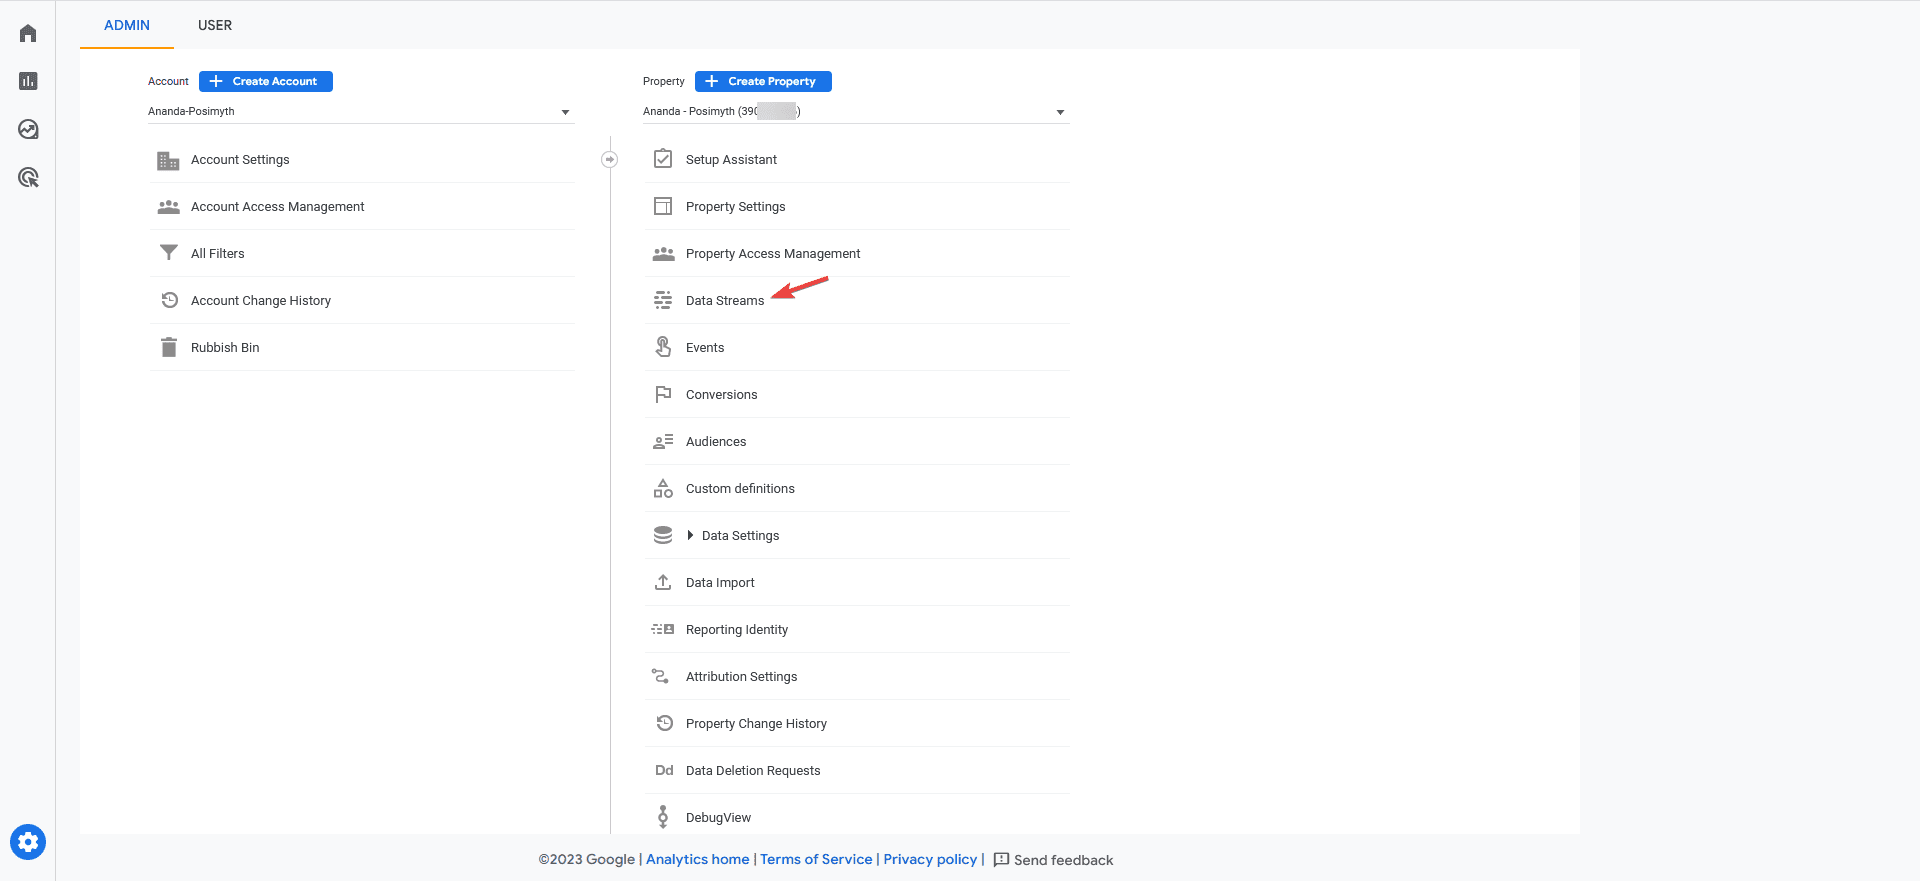
2. Click on Data Streams.
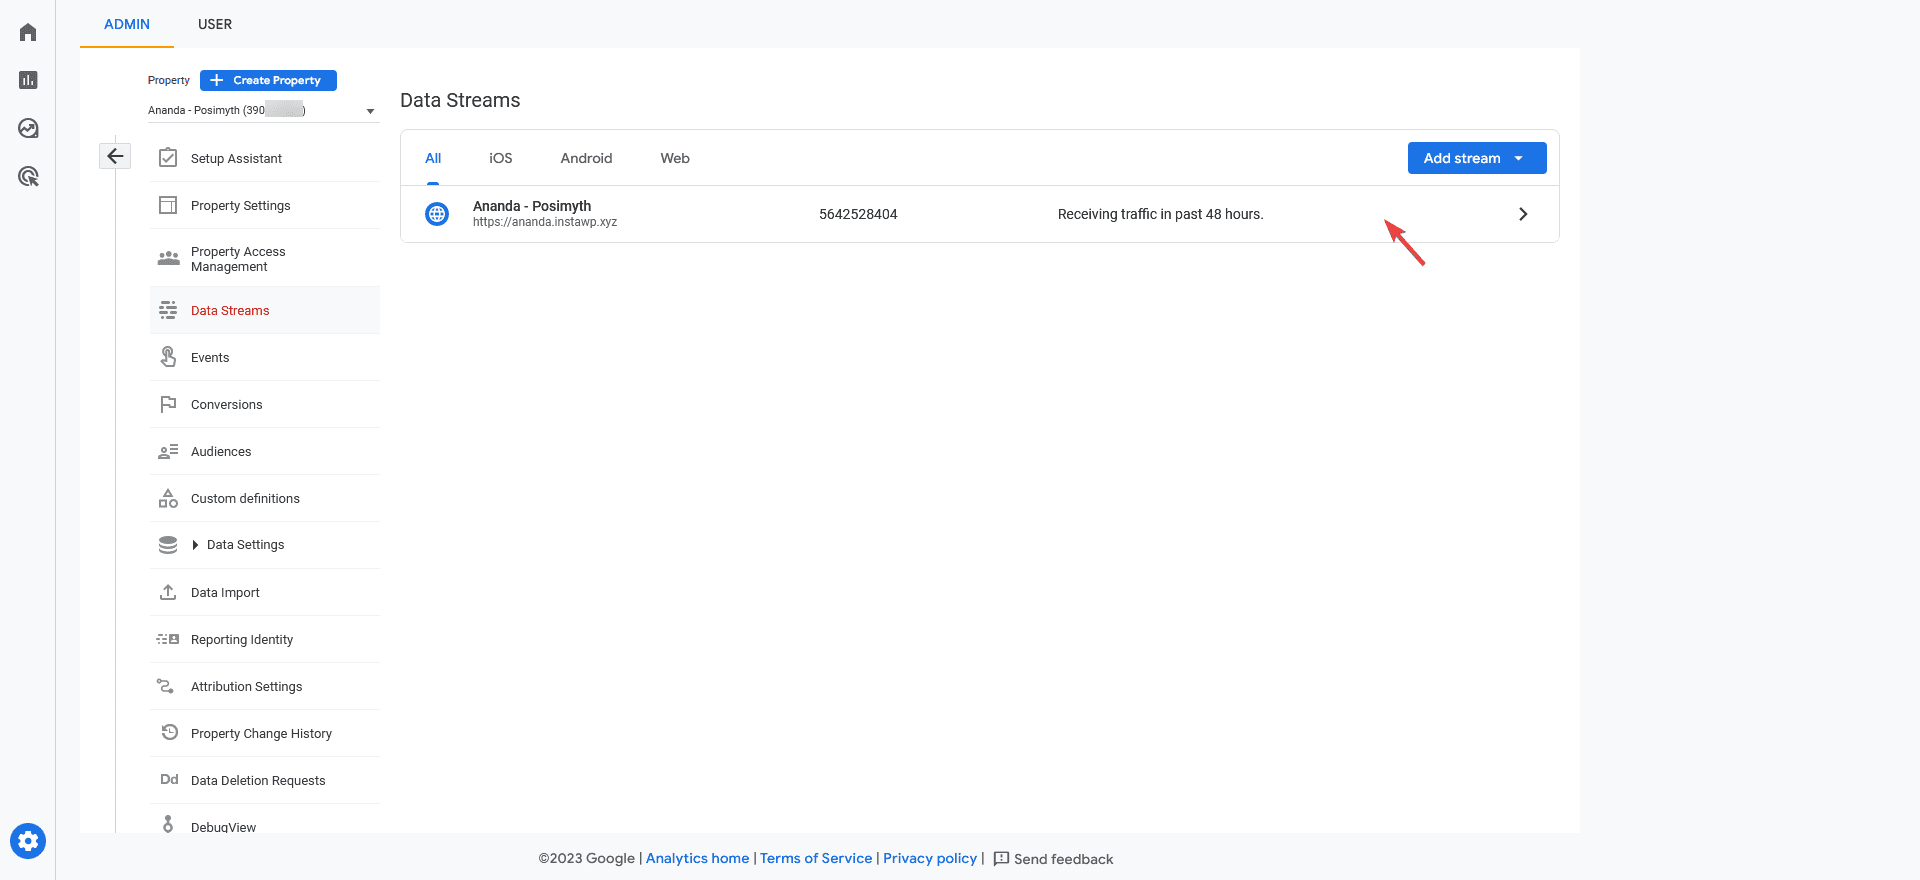
3. Then, click on the property you want to get the measurement ID.
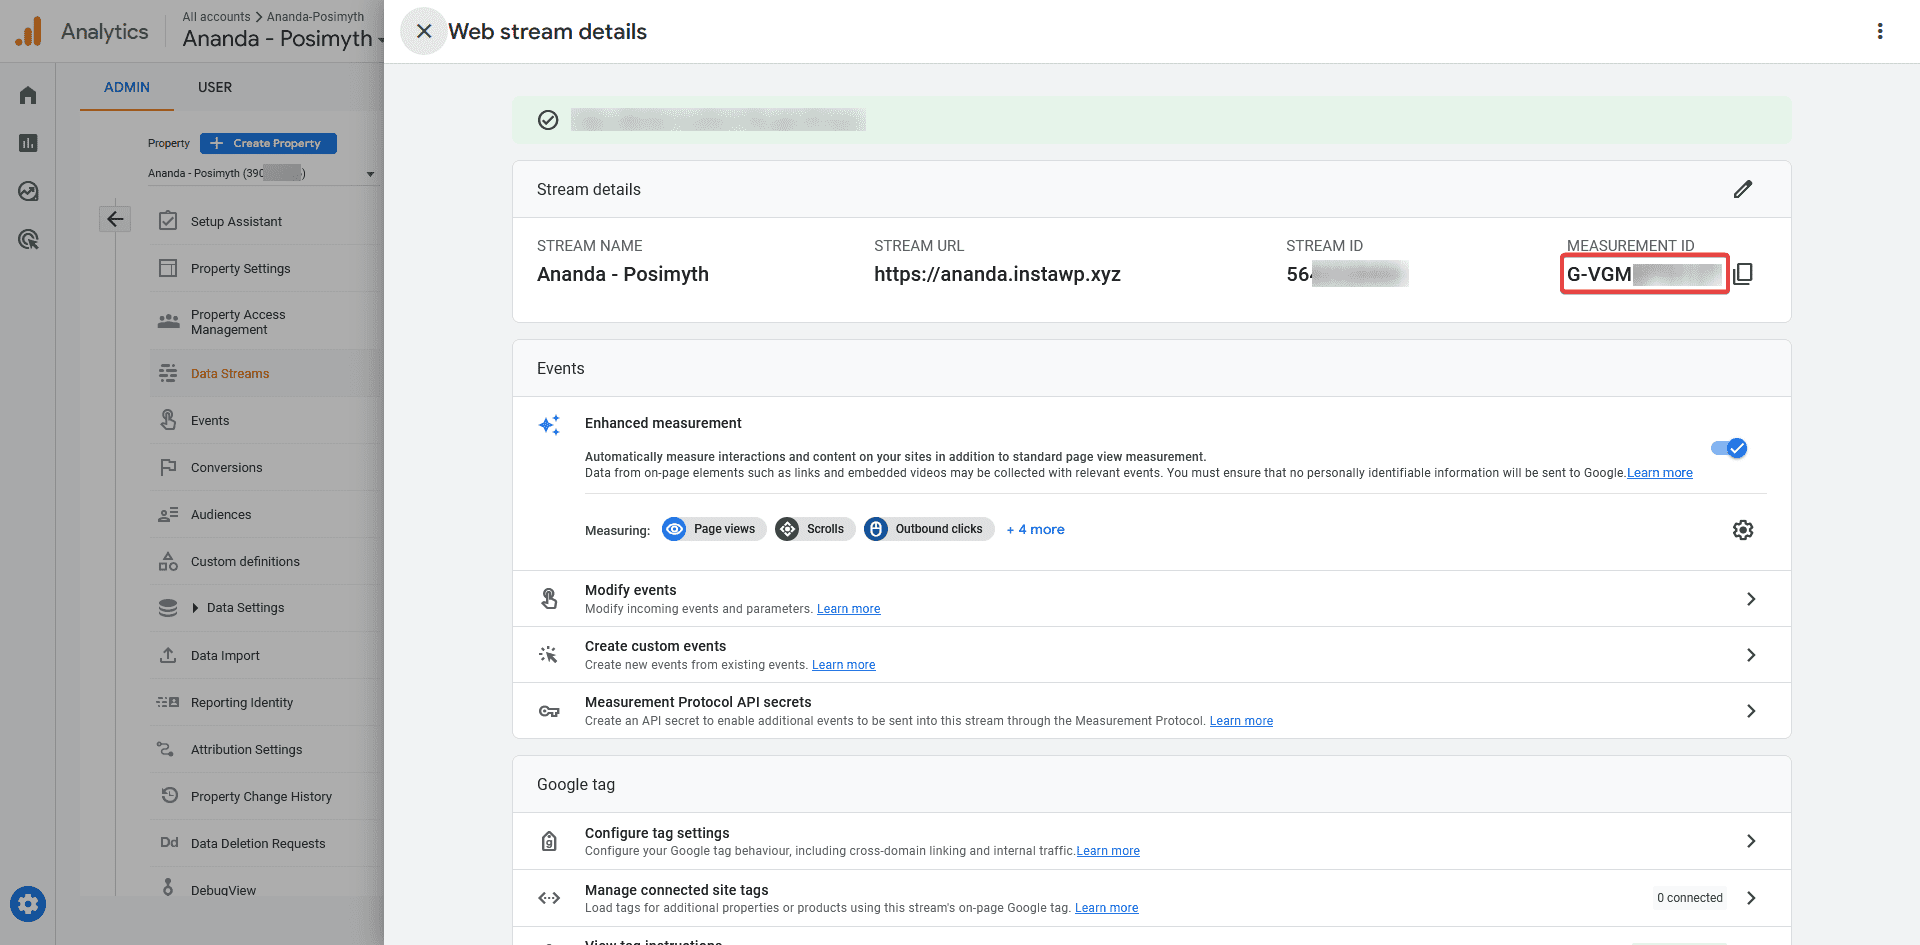
4. Then, you’ll find the Measurement ID. Copy the ID and save it in a notepad.
Add Google Measurement ID using The Plus Addons for Elementor
To add the Google Measurement ID using The Plus Addons for Elementor follow the steps –
Note: If you’ve added Google Analytics or Google Measurement id on your website using any other method or plugin then you don’t need to follow this step.
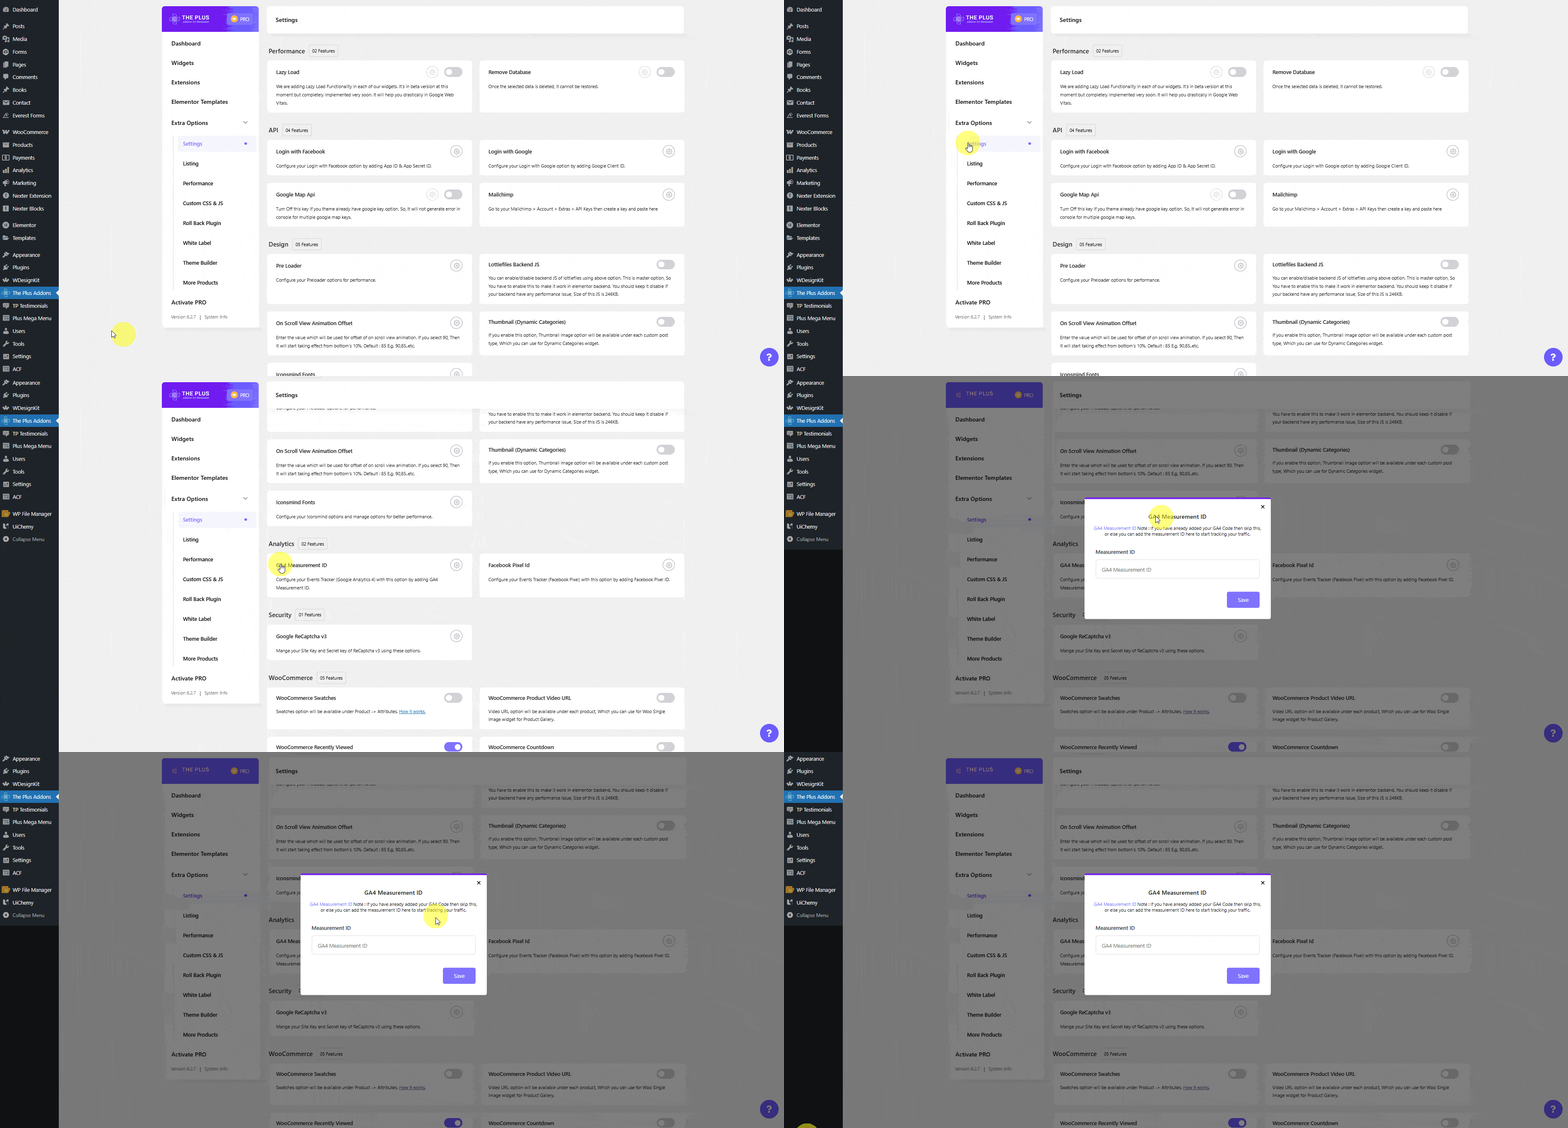
1. Go to The Plus Addons > Extra Options > Settings.
2. Scroll down to the GA4 Measurement ID section, then click on the Settings Icon button.
3. Now, you’ll see the GA4 Measurement ID pop-up menu.
Note: You can generate an ID by clicking on the GA4 Measurement ID text.
4. Now, enter the GA4 Measurement ID, then click the Save button.
Once you’ve added the Google Measurement ID, you can use buttons, forms, or any custom links to track the events. So, for instance, add a button widget on the page.
1. Go to Advanced > Plus Extras: Events Tracker.
2. Turn on the Google Analytics 4 toggle.
3. In the Event Type dropdown, you’ll find two options –
- Recommended – For tracking the GA4 Recommended events.
- Custom – For tracking custom events.
Here we’ll select Recommended.
4. In the Select Event dropdown, you’ll find all the GA4 Recommended events.

Select the event you want to track. Let’s suppose we want to track purchase events, so select Purchase from the dropdown.
5. Then, from the Event Properties section, you can add custom properties to the event.
Open the item here, you’ll find two fields –
Name – For adding a custom label to the event.
Value – For adding a custom value to the event.
You can click the + ADD ITEM button to add multiple custom properties.
Let’s suppose we are selling multiple e-books, so we can add the book name and value in the Name and Value fields, respectively.
6. In Google Analytics 4, it can take up to 24 hrs to show the events in the analytics. So,o to check the event instantly to know if it is working or not, install the Google Analytics Debugger Chrome extension.
7. Open the page in Chrome and turn on the Google Analytics Debugger extension. Reload the page and click on the button.
Note: Make sure your ad blockers are disabled, and you’re not using brave browser. You can also read steps to do if your debug view isnt working. all
8. Now go to your Google Analytics, then go to Admin > DebugView, where you’ll see the events live. You’ll also see your event’s custom properties.
Also, read How to Track Facebook Pixel Events With Elementor.
